The Ordinary Cook loves to cook. If I am not cooking or baking then the chances are I am thinking about cooking and baking. I love sharing recipes and ideas and my website is my space to do this.
These little bars of deliciousness are, like the Norfolk Scone, inspired by Jennie Reekie’s Cakes, Pastries and Bread book. I have altered her recipe though replacing half the flour with ground almonds to make them more almondy, taken out Jennie’s cinnamon addition and changing the method, so they really are only a doff of the hat to Jennie. Mine are more macaroon to Jennie’s shortbread. In fact, if you pinned me down to describing them I would say that they are a hybrid macaroon/shortbread. A bit like the Norfolk Scone being a hybrid scone/eccles cake. There seems to be a pattern forming here…
Line a 20cm square tin with baking paper and preheat the oven to 180°c, gas mark 4 or use the middle shelf of the Aga baking oven.
I use a food processor and whizz the butter, caster sugar, flour and almonds until the mixture begins to form a ball.
If you don’t have a processor then rub the butter into the flour, almonds and sugar. You will start with a breadcrumb texture and then it should start to bind together to form a ball.
Press the mixture into a 20cm square tin using the palm of your hand to level the surface. Using a pastry brush, brush all over with the beaten egg. Prick all over with the tines of a fork and sprinkle over the almonds and granulated sugar.
Place in the preheated oven and bake for 15-20 minutes until golden brown. Cut into fingers whilst still warm, lift the baking paper out of the tin and place onto a cooling tray.
I was recently approached to review items for Hotel Chocolat. There were some lovely Christmas chocolates that I could have quite happily chomped on, but what really caught my eye was their cocoa pasta and pesto. I was intrigued. They arrived beautifully presented and the girls were immediately interested. Well, of course they were, the bag had the word chocolat on it. I had planned roast chicken for tea and the girls were eager to try the cocoa pasta. The pesto is what it says on the bottle – a basil pesto with added cocoa nibs. So I boiled the pasta and stirred in the pesto. A simple, quick solution for an unusual dinner. I have to admit the first taste was unusual. The pesto is quite bitter. But, a few bites in and I was more convinced and Mr OC agreed saying that he thought I had gone mad at first but that the pasta/pesto combo was really quite delicious. I think the slight bitterness of the cocoa nibs in the pesto was a step too far for the girls though with their less adventurous palates.
I made a dip to go with the chicken too, by mixing an equal amount of mayonnaise and natural yoghurt together and adding pesto to taste. This edged out the bitterness of the cocoa nibs and made a very good dip indeed. I will be having this a lot.
The next day, the family were coming for fireworks in the garden and so I cooked the remaining pasta and made a chocolate custard, mixed the two together and served cold with brandied cherries that I had frozen after making cherry brandy. This was a great success, the pasta adding a bit of bite to the dessert. The cherries made a lovely addition but the dessert would stand well enough on its own.
125g cocoa pasta
100g 70% chocolate
300ml double or single cream
4 egg yolks
1 tsp cornflour
1 tablespoon caster sugar
Method
Boil the pasta in a large pan of boiling water until al dente (it must have a slight bite to it). Drain and set aside.
Melt the chocolate in a bowl suspended over a pan of simmering water or in the microwave.
Pour the cream into a heavy based saucepan and bring just to the boil. In the meantime combine the egg yolks, cornflour and caster sugar in another bowl. Add the hot cream in a steady stream to the eggs and whisk all the time to prevent the eggs from scrambling. Wash out the saucepan and then add the cream and egg mixture to the pan and whisk over a gentle to medium heat until the custard thickens. Whisk in the slightly cooled melted chocolate. Add the pasta to the custard and place into a serving dish. Grate chocolate over the top. Place in the fridge until you are ready to serve.
I really enjoyed trying these items, so thank you to Hotel Chocolat for the opportunity.
I received the items in the top photograph for free from Hotel Chocolat for the purposes of review. I was not paid for this review. All opinions are my own and are honest.
One of my favourite things to do is to look through the cookbook section of our local charity shop. I don’t know why, but this particular shop seems to receive some very good cookbook donations. I always come out with one or two new books for my ever-growing collection. One of my most recent acquisitions was Cakes, Pastries and Bread by Jennie Reekie, first published in 1977. It’s a wonderful book full of the staples that you want to cook again and again. The recipe that really caught my eye was the Norfolk Scone. This filled scone is a cross between a scone and an eccles cake, and, quite frankly, that appeals to me on so many levels. My mother-in-law had come for lunch and I offered to make her some scones to take home with her. I remembered the Norfolk Scone and thought I would give it a whirl. It was a great success. The crumbly scone contrasts beautifully with the rich, sweet, sticky filling. Next time, I am going to make it with mincemeat as the filling, because, well you know, it’s that time of year and I want to try it.
For the scone:
400g self-raising flour
1 scant tsp salt
100g unsalted butter
1 egg, beaten lightly
200ml milk
For the filling and topping:
25g softened butter
100g currants
100g demerara sugar
½ tsp grated nutmeg or mixed spice
Milk for brushing the top of the scone
Method
Preheat the oven to 200°c, 400°f, Gas Mark 6 or use the Aga roasting oven with the grid shelf on the floor of the oven. Grease and flour a baking sheet that will fit a 20cm circle easily.
I used my food processor to whizz together the flour, salt and butter until it resembled fine breadcrumbs. Then added the egg and milk and whizzed again briefly until the dough just begins to come together. Empty the dough onto a lightly floured worktop and knead briefly to a soft dough.
If you don’t have a food processor you can rub the butter into the flour and salt mixture using your fingertips. Then add the egg and milk and using your hand like a claw mix to a soft dough.
The key to a light scone is minimal handling. Split the dough in half and roll out one half quickly to a circle of about 20cm. Spread the softened butter over the circle. Mix together the currants, all but 1 tbsp of sugar and spice and sprinkle over the scone. Roll out the other half to the same size and place on top of the currant mixture. Brush with milk and sprinkle with the remaining sugar. Place in the oven and bake for 35-40 minutes until golden on top and well risen. Leave to cool for ten minutes then serve warm with a cup of tea.
Do you remember I mentioned I was ready for a new venture? Well here it is – cookery courses at my sister’s house in South Shropshire.
I originally planned to set up as a home bakery. There is still a possibility of this happening in the future but for now I am going to concentrate on the cookery courses. The idea for the tutoring came about after a discussion with my sister. She lives in a beautiful 17th century farmhouse in South Shropshire, with a large farmhouse kitchen with an electric range and a wood fired Esse. The kitchen is perfect for teaching people how to cook in a domestic setting. So we thought why not? Let’s do it! So we are.
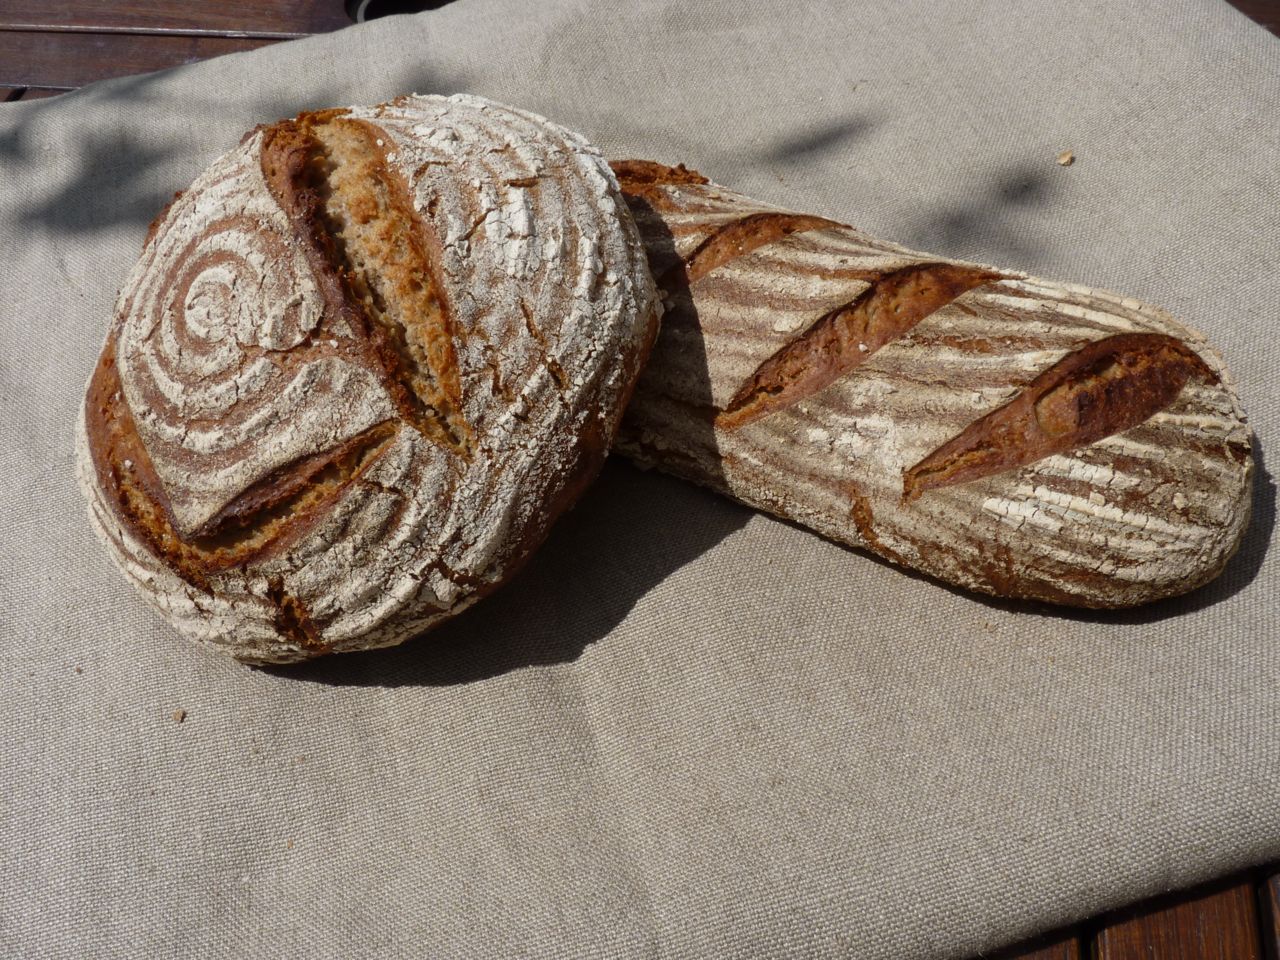
Have a look at our new webpage at VegPatchKitchen to see more about us. Initially we are focusing on teaching the basics of bread making. We had a trial run in October which went really well, inspiring some of the participants to bake bread at home for their families for the first time. I was so pleased that the day had made a difference to their cooking habits. You can take a look at the breads they made on the day here.
Gift vouchers are available if you want to treat someone to a Christmas present that they can use in the New Year. I can’t think of a better present myself.
I am really looking forward to the new venture, meeting new people and teaching them new skills.
There will still be adventures to be had here at The Ordinary Cook. I have been doing a fair bit of baking lately. I just need some time to write the posts.
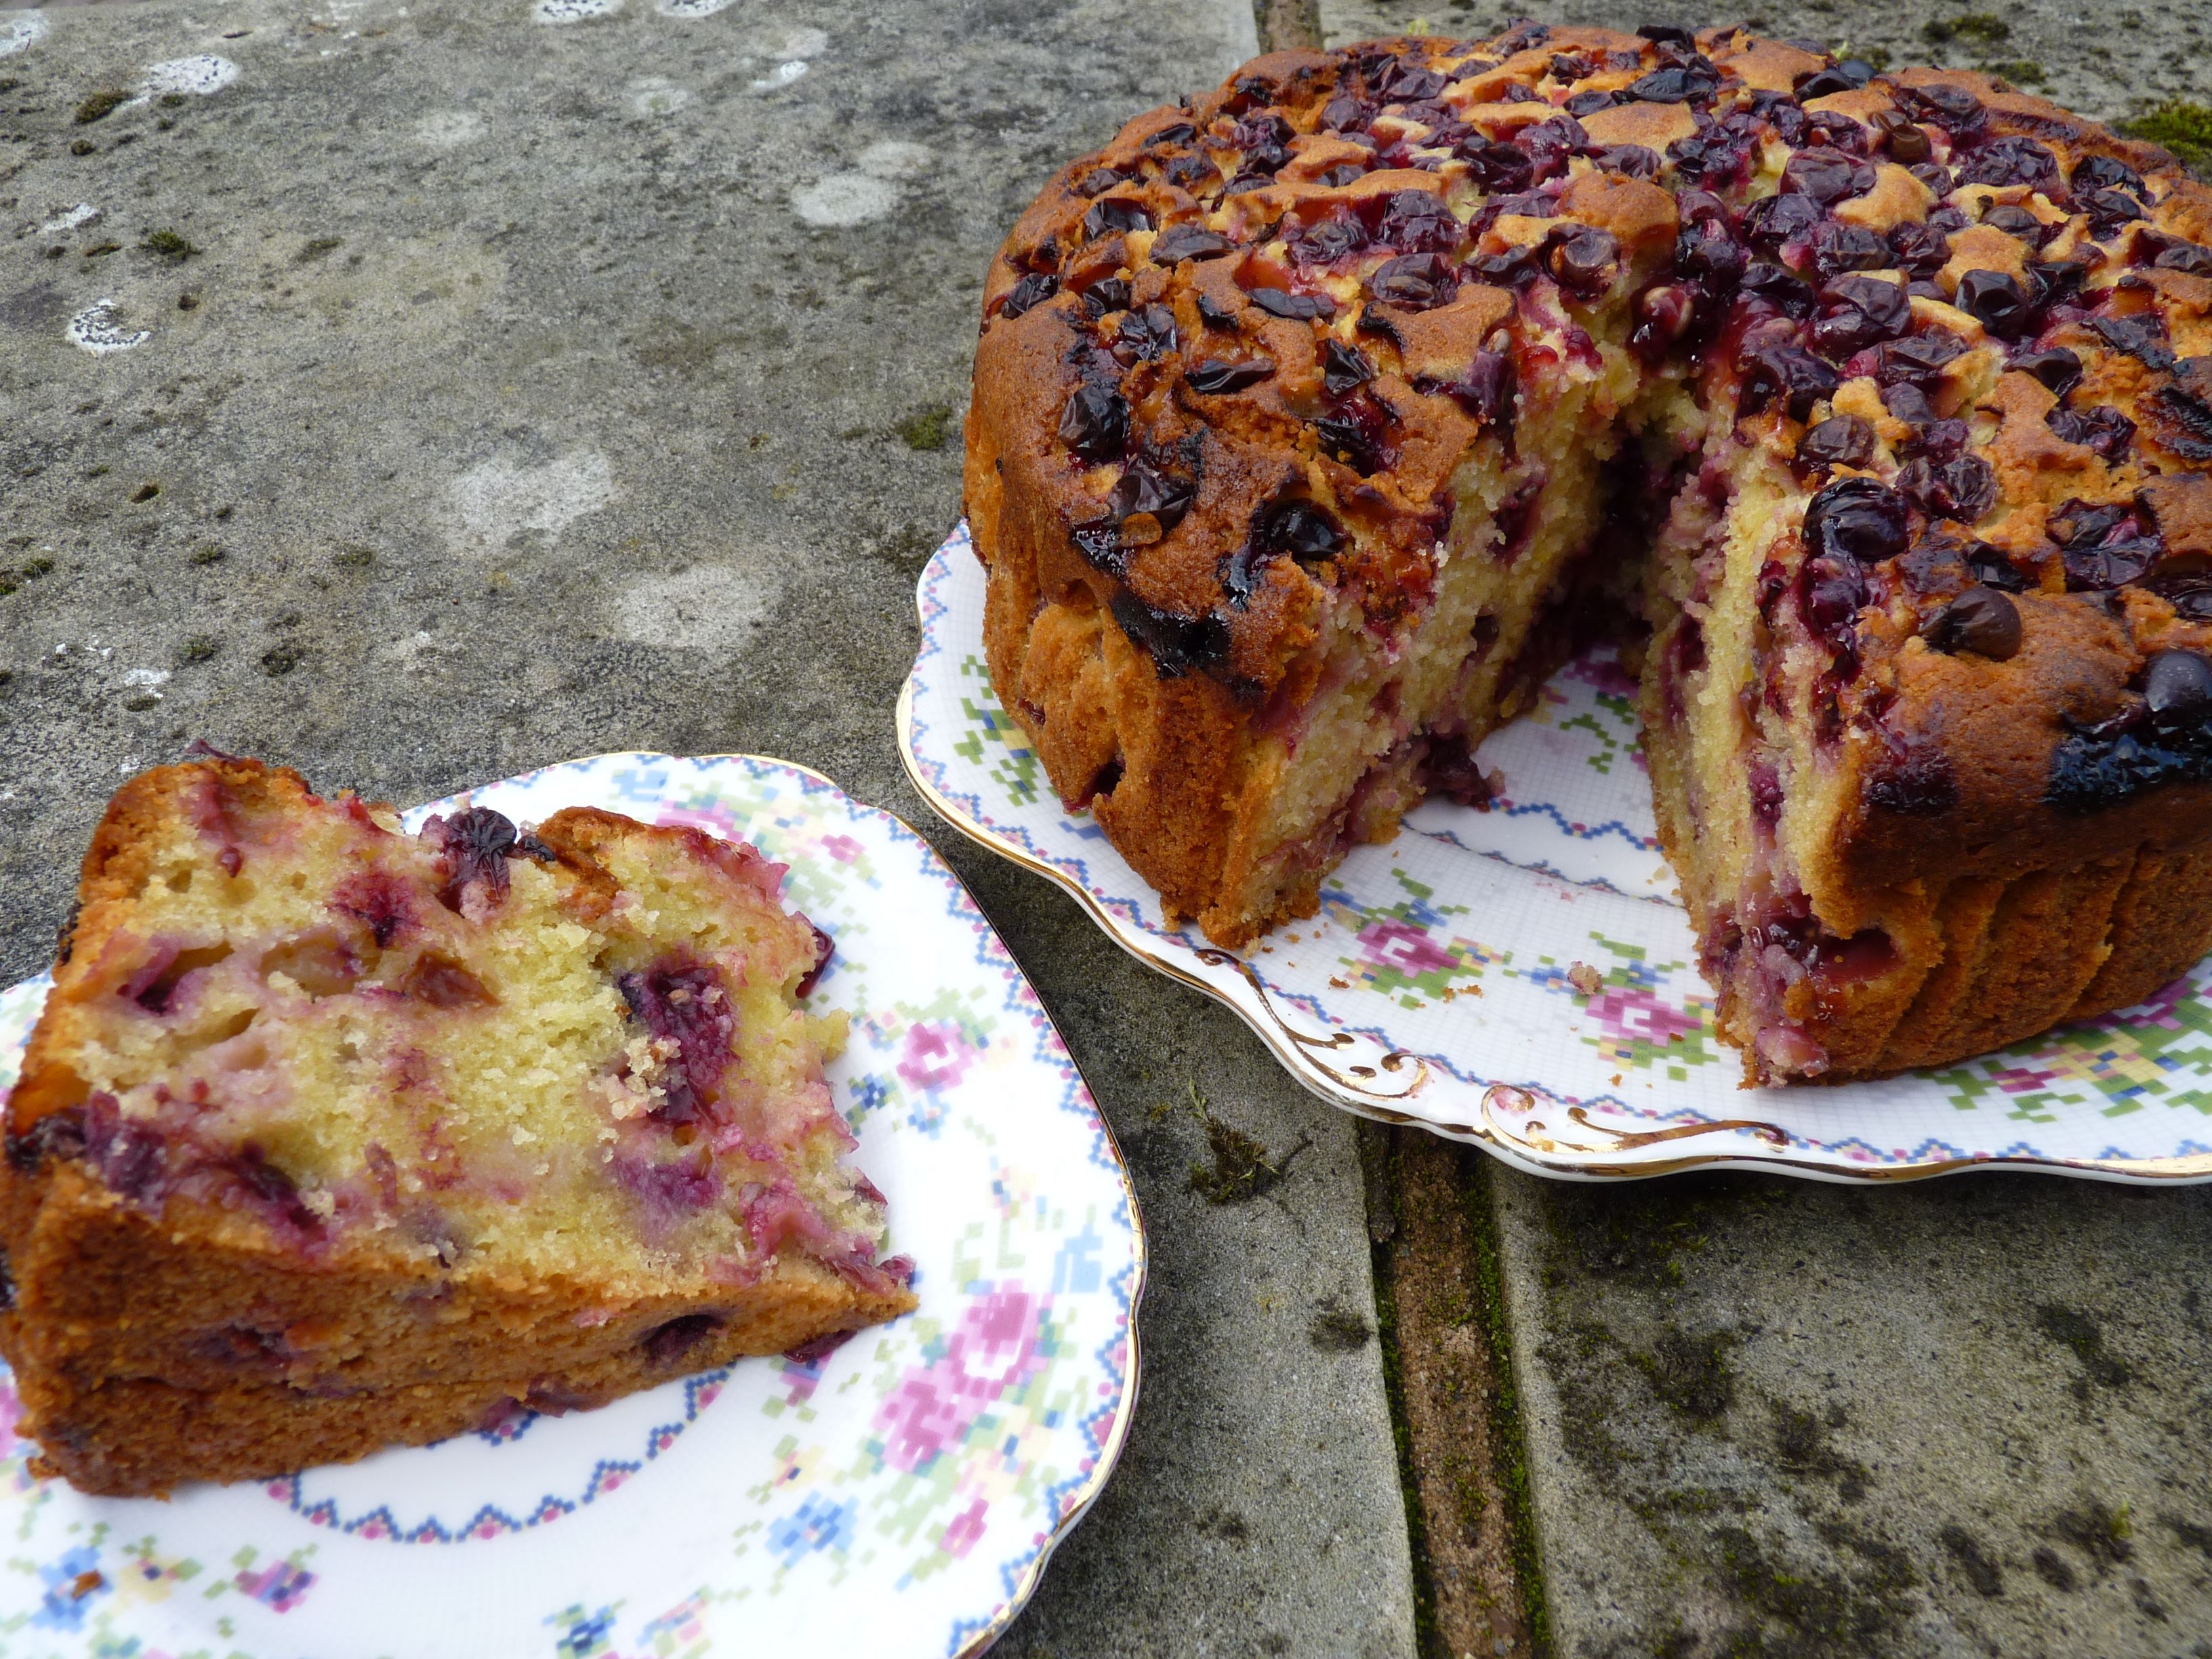
There has been a bumper crop of grapes at my niece’s house this year. There have been lots of grapes in previous years. But this year with the warm weather these grapes are really delicious. They are small and unfortunately seeded, but for outdoor grown English grapes they are very, very good.
Until I picked up a copy of Jamie Oliver’s Jamie’s Italy from the local charity shop I had no idea that grape cake was a thing. He also recommends freezing grapes and enjoying them frozen as a dessert with a bit of chocolate – my goodness, frozen grapes are delicious. So quite a few bunches have been frozen and then a couple of bunches made their way into this cake. The cake is really good. It’s a shame these grapes have seeds. I didn’t remove the seeds prior to including the grapes in the cake batter and they do ruin the texture of the cake a little. But with these grapes being so small, taking the seeds out would have been a long-winded process.
I have altered Jamie’s recipe. Well, I can’t help myself from tinkering. So this is my recipe for grape cake. Blueberries, raspberries or apple (chopped up small) would be a good alternative to grapes if you don’t have any handy. I had a bit of dessert wine left over that needed using up so I included it in this cake. If you don’t have any to hand then just use more milk in its place, so 150ml milk rather than the 75ml. This is a lovely moist cake and I will be trying it with other fruit too.
4 eggs
250g caster sugar
150g unsalted butter, melted
150g extra virgin olive oil
75ml sweet wine (or you could use milk if you don’t have any sweet wine)
75ml milk
1 teaspoon vanilla extract zest of 1 lemon
400g plain flour
1½ tsp baking powder
600g grapes, or blueberries, or raspberries or apple chopped into small dice
Method
Preheat the oven to 180°c, 350°f, gas mark 4 or use the middle shelf of the Aga’s baking oven. Grease and line a 23cm cake tin.
Beat the eggs and the sugar together in a large bowl using an electric mixer until thick and moussey and the whisk leaves a trail. Pour in the cooled butter, olive oil, wine, milk, lemon zest and vanilla extract and beat again until combined. Sift in the flour and baking powder and fold in gently. Add three-quarters of the grapes and stir in gently. Pour the mixture into the cake tin and place into the oven. Bake for 15 minutes then remove from the oven and place the remaining grapes on top of the cake. Push them gently into the batter. Place back in the oven and cook for another 30-40 minutes until the cake feels firm when you press a finger on top. Leave the cake to cool in the tin for ten minutes and then turn out onto a wire rack to cool completely.
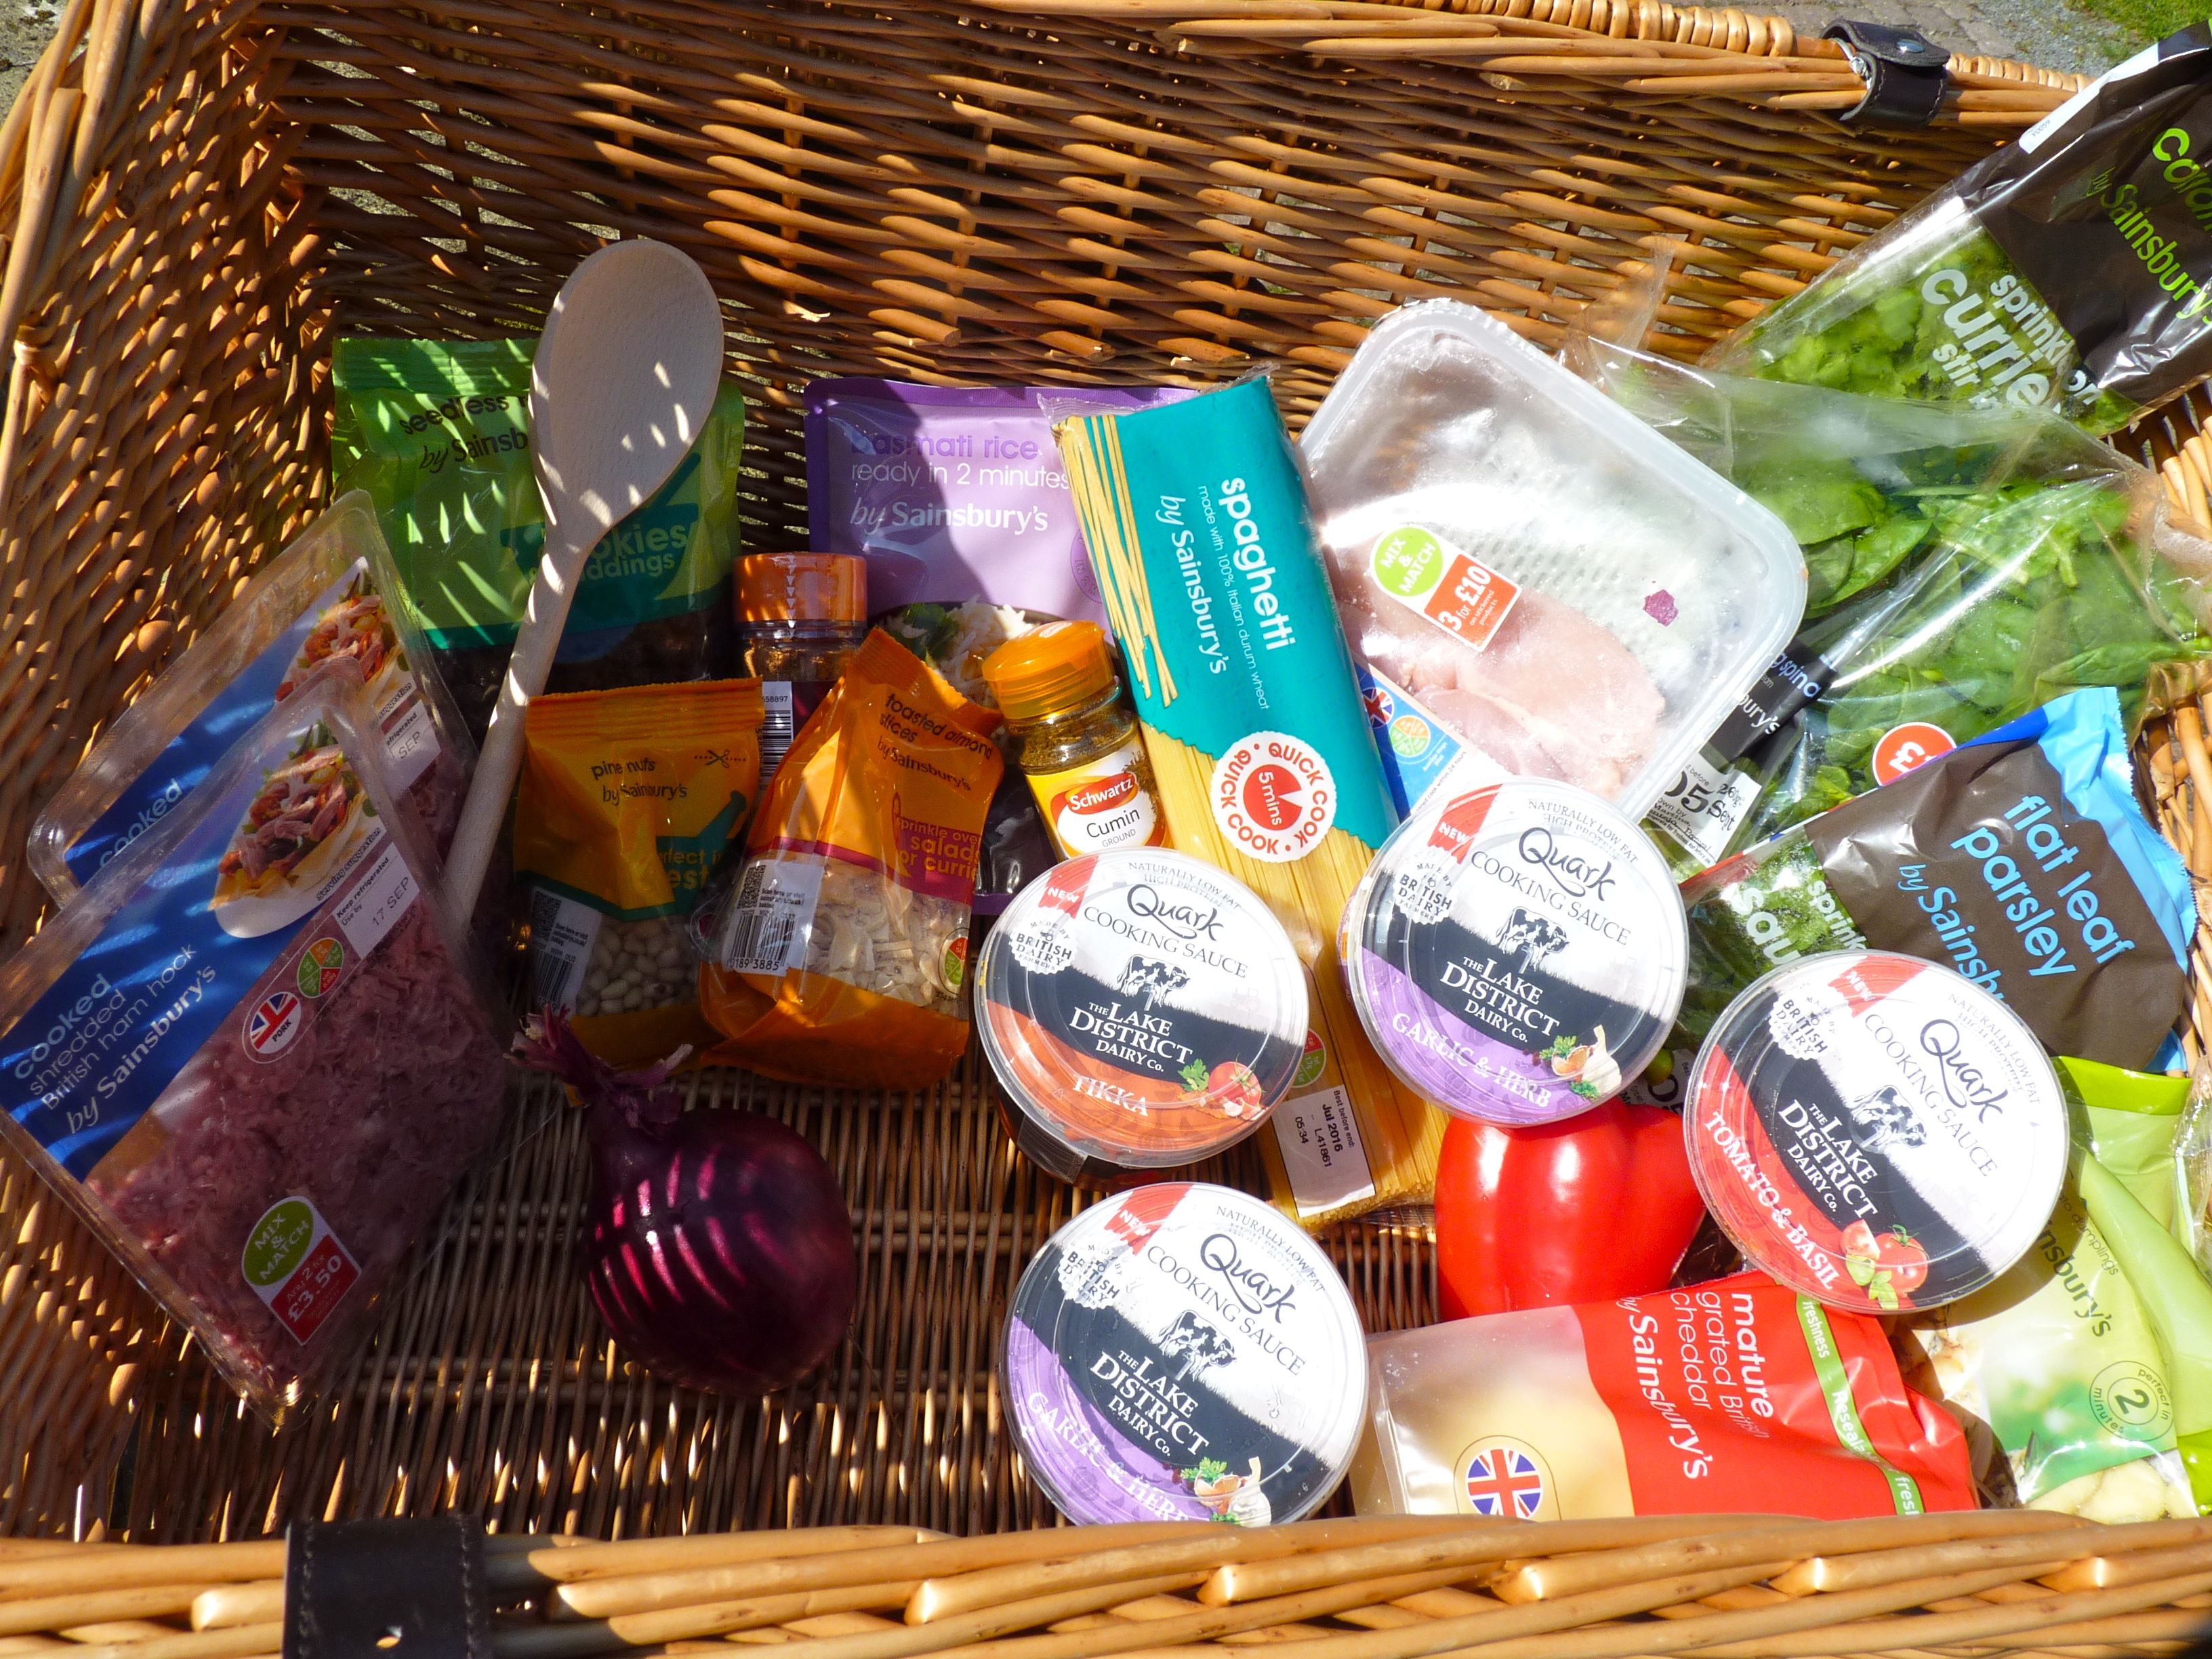
I was sent a hamper by The Lake District Dairy Co. recently. It was no ordinary hamper. It was brimming with food!
The Lake District Dairy Co. has launched a new range of cooking sauces using their Quark. Quark is a naturally low-fat, protein-rich alternative to other creamy delights that you may add to your meal. There are three different flavours; tikka, garlic and herb and tomato and basil.
It was interesting to receive them. I am a cook from scratch type and would not normally be interested in buying a cooking sauce like this. I would normally opt for the plain Quark to add to a sauce of my own making. However, having said all of that they are a very good way of making a very quick, nutritious meal when you simply stir the sauce into a bowl of hot pasta. Perhaps most importantly Mr OC was a big fan of the baked gnocchi that I made by stirring the Garlic & Herb Quark into cooked gnocchi, adding wilted spinach and some chopped basil and coriander, pouring it all into a heatproof dish and topping with grated cheddar and pine nuts. I grilled it until bubbling and brown. He really enjoyed it. It was in his words “the combination of stodgy, cheesy and garlicky” that did it for him. In fact he enjoyed it so much I started to wonder why I cook from scratch as much as I do!
Quark Garlic and Herb Gnocchi
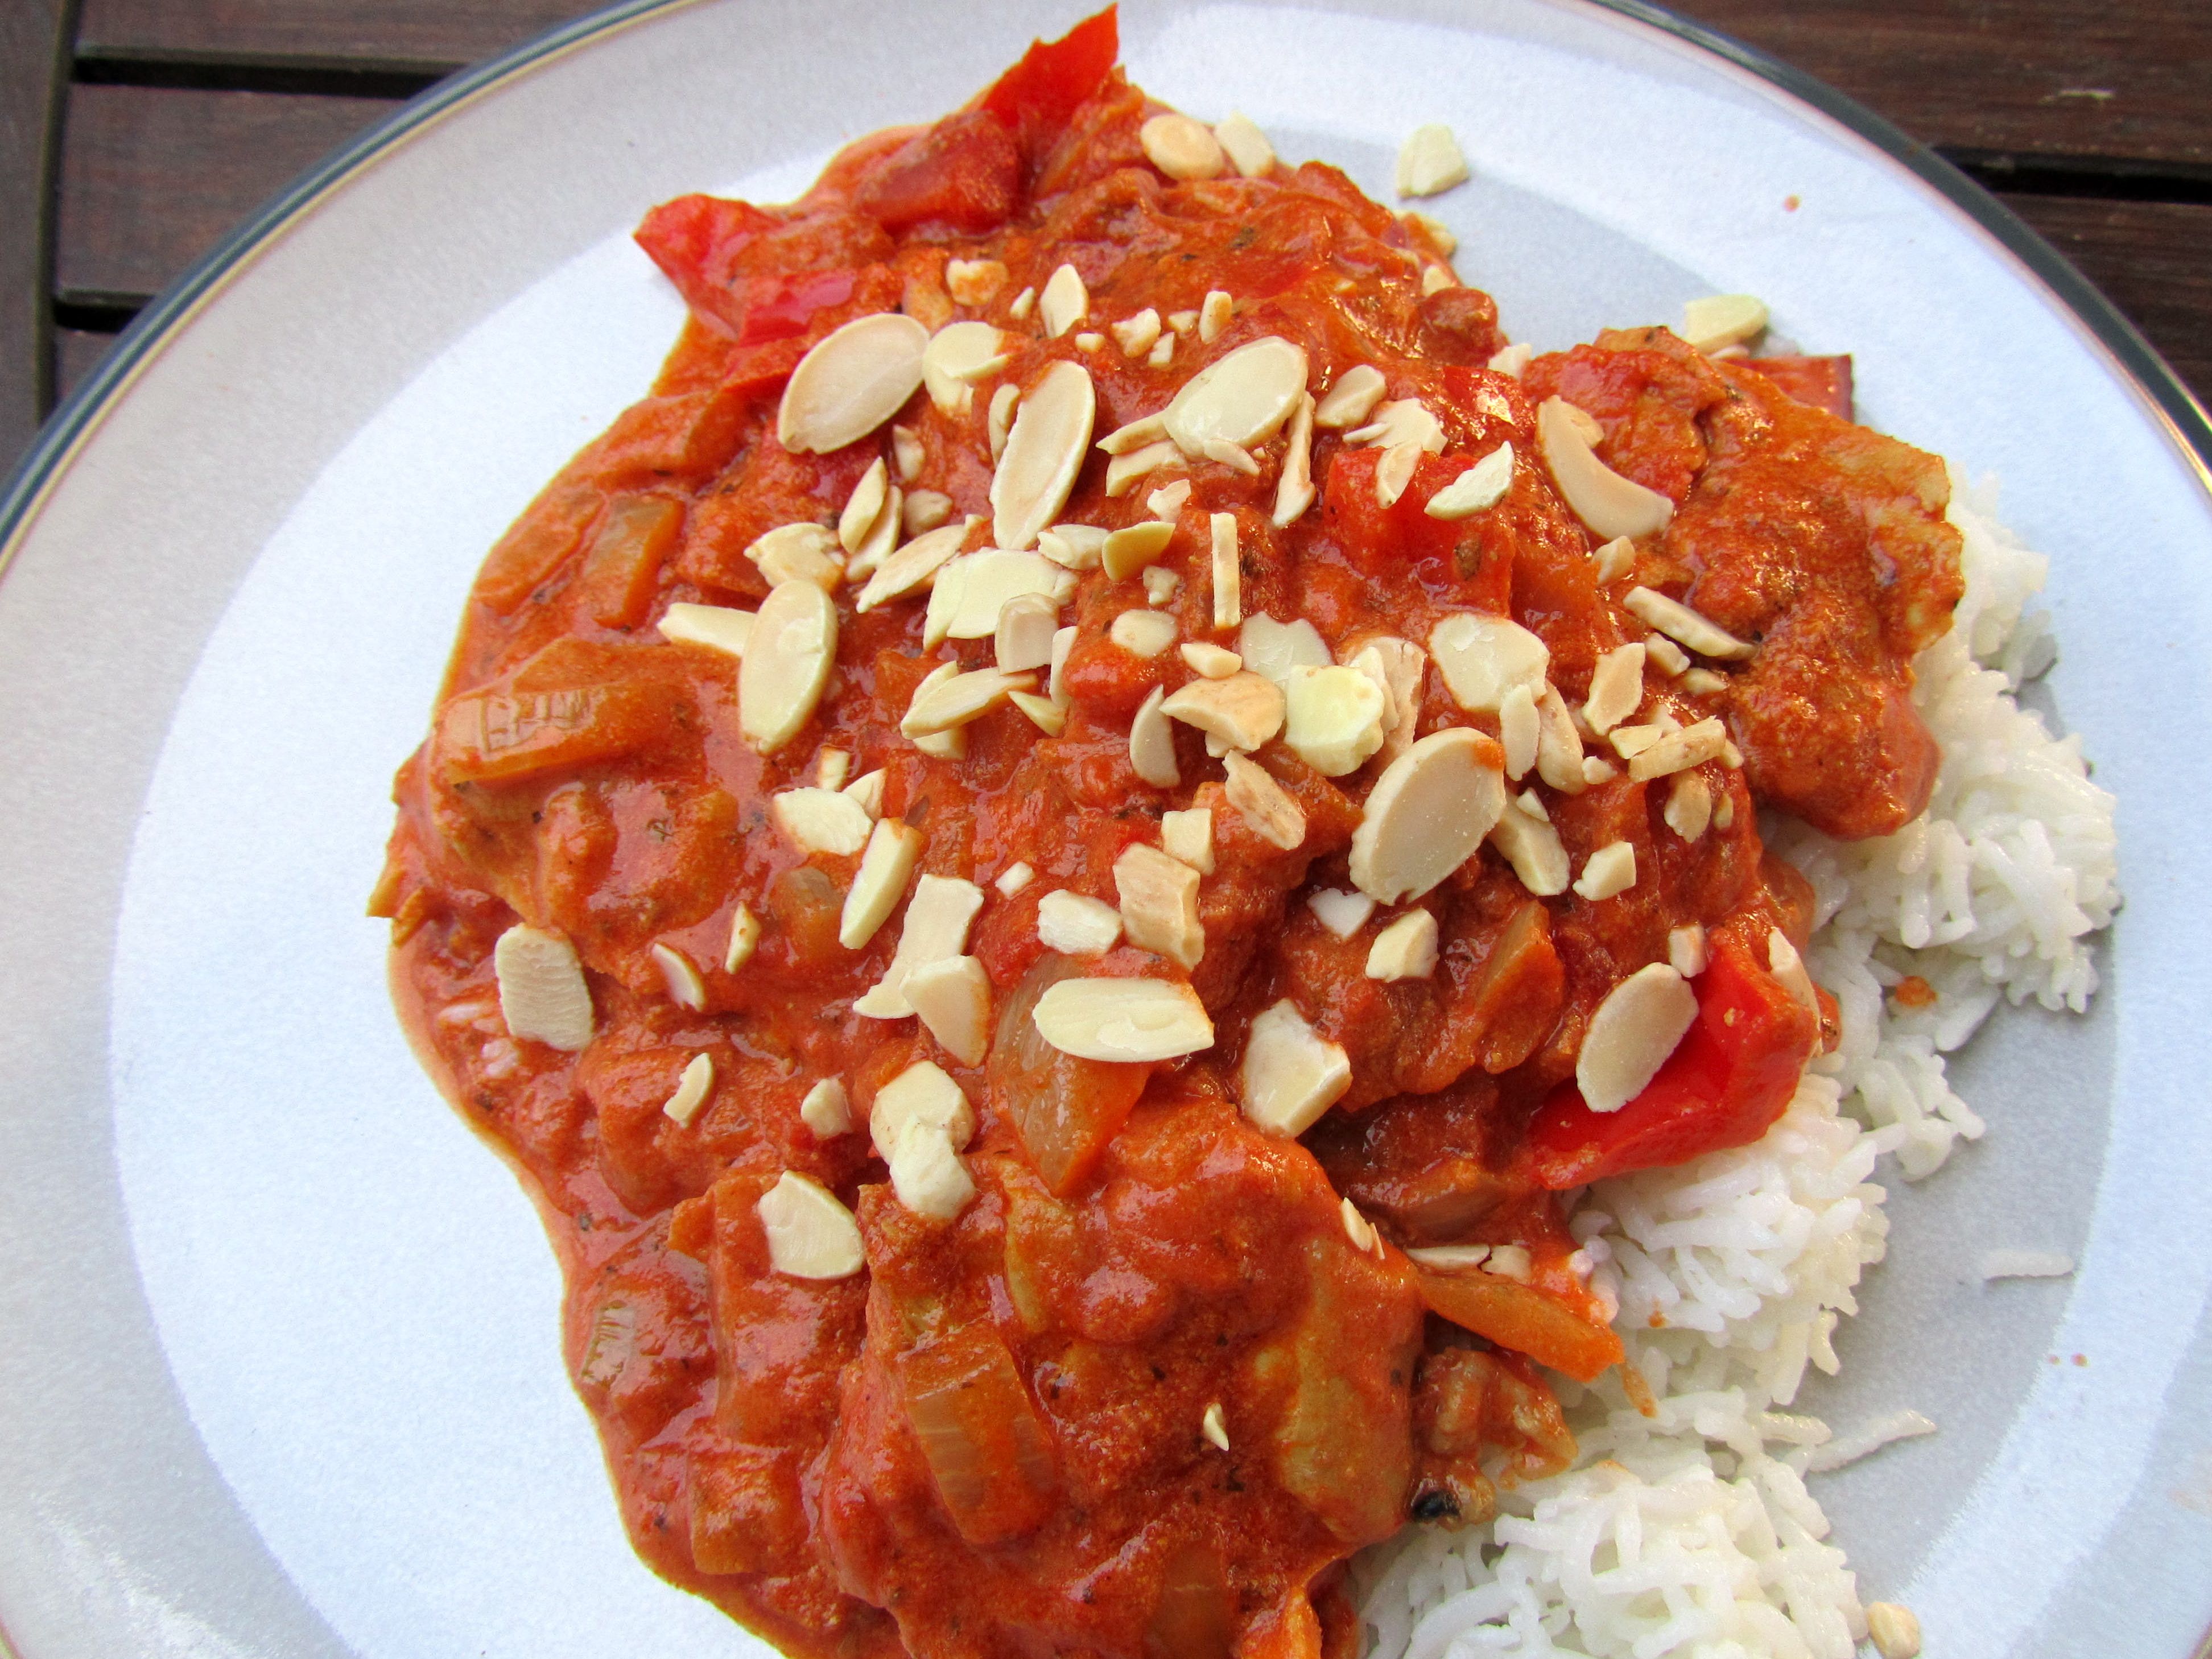
The tikka sauce was added at the end of my normal curry and added a fresh kick.
Quark tikka curry
The tomato and basil Quark was added to my rice stuffed tomatoes, using some huge beef tomatoes that we have grown this year in the greenhouse.
Quark Tomato and Herb rice stuffed tomatoes
All in all it made for an interesting week of meals and although I still prefer to cook from scratch I can really recommend these stir in sauces for those times when time is precious and you want some tasty comfort food that is also good for you.
I was sent a free hamper by The Lake District Dairy Co for review purposes. I did not receive a fee to write this post. All opinions in the review are my own and are honest.
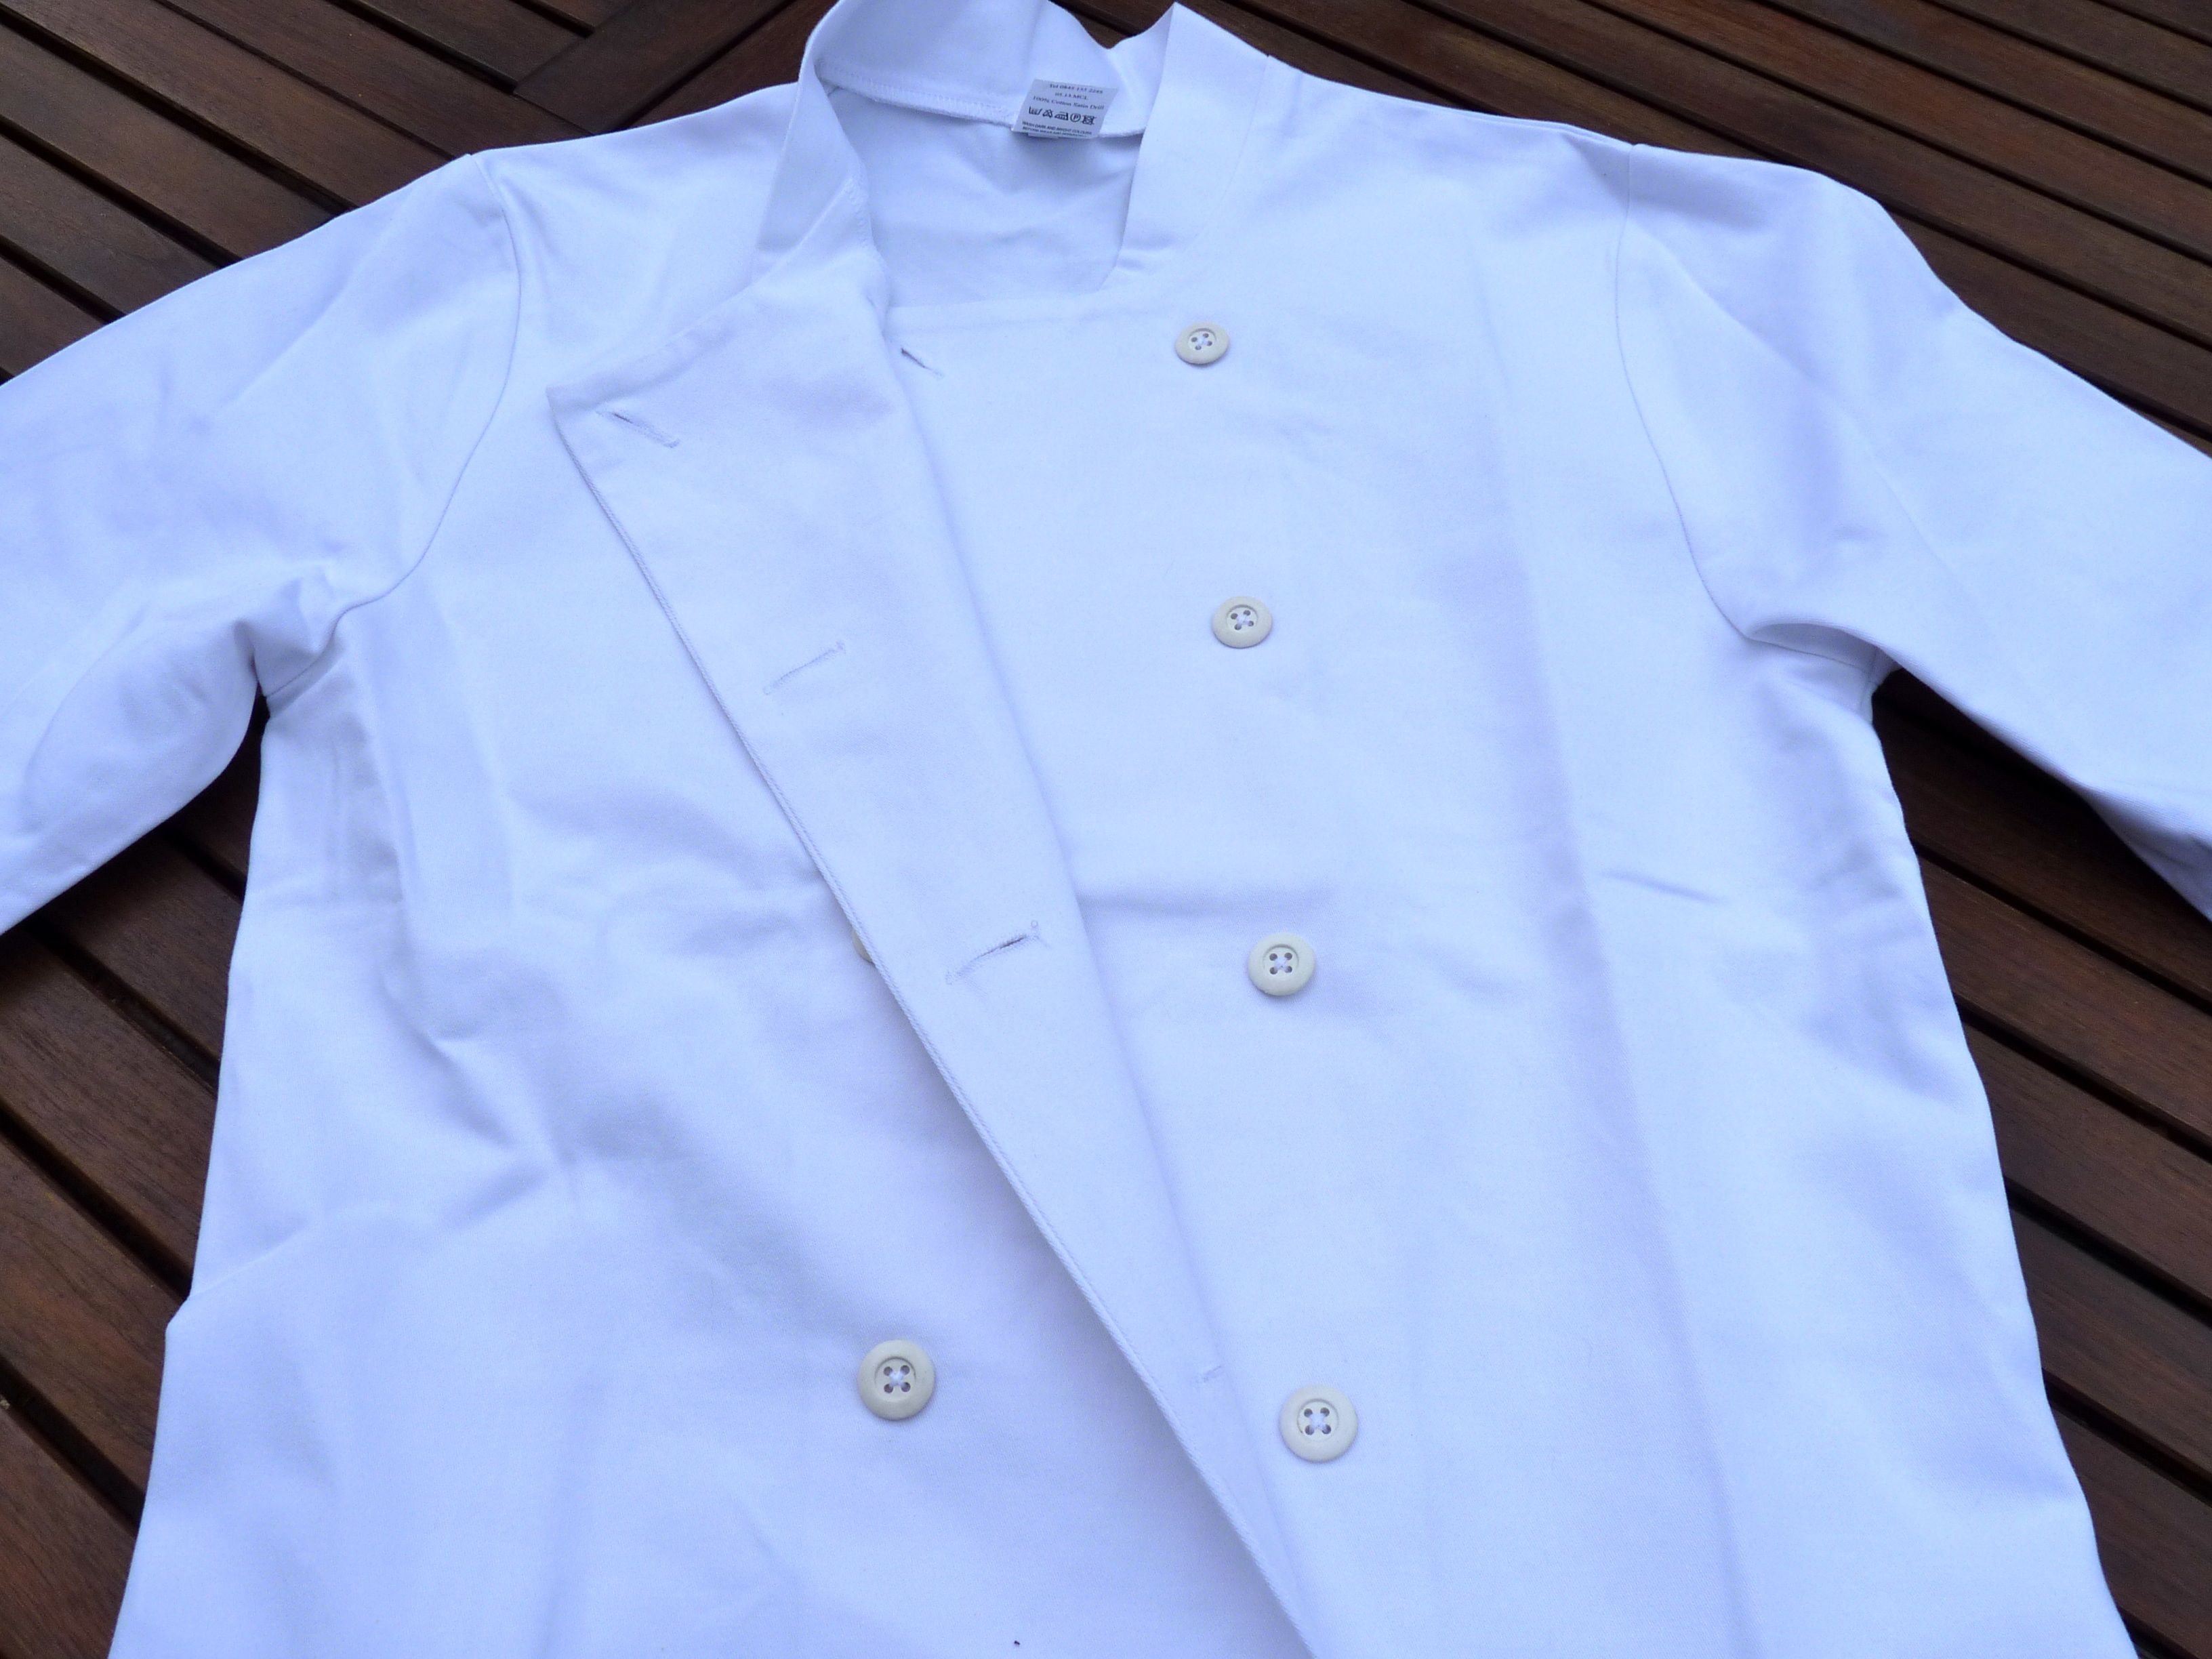
I was approached by the PR team from Viking to see if I would review an item from their culinary range . I had a look through their online selection and there were a lot of things I wanted to try out, but my eye was caught by the chef’s jacket.
I have a plan. In my last post I explained how I have been a stay at home mum for the past five years, keeping my hand in with this blog and volunteering at the local museum and my girls’ school. It’s time for a change though, before I get too stuck in a rut. We have the summer holidays hovering ahead of us. I am going to take this time to decide which way I should go. I can try to get back into the old career and get a full-time job. This option would mean a big life change for all of us but especially the girls.
The second option is to set up my kitchen and dining room as a home bakery, selling bread and cakes locally and running cookery lessons. This would allow more flexibility around the girls.
I have been doing my research into this second option and getting organised so that I can launch shortly after the girls start school again in September.
I have taken my Food Hygiene training in preparation which highlighted the importance of wearing clean, tidy clothing and preferably something that covered your ordinary clothing to protect the food from contamination.
The chef’s jacket then will be my uniform. It is manufactured by Alexandra and is unisex so can be buttoned either the female or male way. It is long enough to protect the bread from contact with my normal clothing. It appears to be tough enough to withstand the regular washing that it will need. I am pleased with the quality of it for the reasonable cost of £14.39 inclusive of VAT. I look forward to testing it fully in the future.
I was not paid for this review but I did receive the chef’s jacket for free from Viking. All the opinions are my own and are honest.
Third Thursday Community Potluck Cookbook by Nancy Vienneau
I started this blog back in 2009 when the job I had back then came to an end. I had a choice – I could get a job in a city about an hour away from home and take the same journey my husband makes every working day or I could take a career break. Our girls were little then, aged 4 and 2 and I didn’t see how we could both leave home before 7 am in the morning. It was a difficult choice and one that I have wrestled with ever since. I was on the cusp of having a proper career. I had finished my PhD in 2005 and had worked as a research consultant in the same field ever since. I loved my job and knew a lot about finance mechanisms for early-stage businesses. But I love my girls more and the notion of leaving them in full-time childcare made me wince. We made the decision to manage on my husband’s income. (We are very lucky that we can.) But I knew I needed to do something that was mine, outside of caring for the girls. Something that I could focus on. My original idea was to publish a recipe book, but I hadn’t a clue how to go about it. I did some research on the net and found food blogs. It seemed like an ideal solution. It would be like keeping a ‘hand in’ whilst I took a career break to look after my girls. It has proved to be a great way to gain some skills in website building and as a way of getting my recipes to an audience.
What I hadn’t realised back then was that I would become part of a community. You begin to read someone else’s blog, make a comment and then another. You read about their lives as well as their baking and after a while you think of them as friends. These are people that you will probably never meet face to face but with whom you feel a connection. I had no idea when I started all of this back in 2009 that I would get to know people from all over the UK and, in fact, from all over the world. For all the bad press that the internet gets, it also opens doors to some marvellous opportunities.
I found Nancy’s blog in the early days and it was this post that sealed it for me. Nancy’s story of the waffle iron rang so many bells for me in terms of what I want for my own daughters. I have been a fan of Nancy’s ever since. She is an amazing woman doing so much good work in her campaigns for healthy and affordable food for everyone. I was really pleased when she announced that she was publishing a book based on her Third Thursday Community Potlucks. I love the concept. Nancy and her friend Gigi met after Nancy had admired a community farm plot run by Gigi. Together they decided that each third thursday of the month they would invite like-minded friends and acquaintances to a gathering at alternatively Nancy’s or Gigi’s house. If you could make it, great – just bring along a seasonal dish and beverage to share with everyone else. I love that they didn’t really ever know how many people would join them on any given potluck evening and that out of these potluck suppers have come weddings and babies.
The book is beautiful, filled with stunning seasonal recipes and gorgeous photos. Nancy encourages you to start your own potluck as a way of bringing people together who wouldn’t normally have met as a way of strengthening your local community. I am very tempted to make the informal bring and share evenings that our book-club* enjoys into something more regular and introducing new faces.
Nancy’s book works through a year, month by month, of Potluck recipes and include the likes of Buttermilk Peach Ice Cream with Salted Caramel Sauce, “Mango Tango” White Butter Cake and Brown Butter Honey Cake and that’s just some of the desserts.
But what is probably the most exciting thing ever is what appears on page 144 of Nancy’s lovely book:
LOOK AT THAT! My name in print thanks to a lovely person living in Nashville whom if I hadn’t started this blogging lark I would never have come across and come to admire. That is the miracle of the internet right there.
I urge you to get yourself a copy of Nancy’s gorgeous book, and obviously not just because it’s got my name in it. I bought mine on Amazon in the UK, but take a look at Nancy’s site Good Food Matters for options if you live elsewhere and maybe start your own potluck gathering and meet some new people face to face.
*What started out as a book club has now become the wine club as we now rarely read books as part of the group but we do our fair share of drinking wine.
Just to let you know, I wasn’t asked to review this book. I did it because it’s a book well worth having. I bought my own copy.
I have become a woman obsessed. Obsessed with achieving the perfect loaf. Not long after I started this blog back in 2009 I had my first success with bread making. It then became a habit, regular kneading and eating. Then bread bought from anywhere just didn’t satisfy any more; it had to be my home-made loaf or nothing. A few years ago I experimented with sourdough, but it wasn’t a hit. I hadn’t waited long enough for the starter to mature and the resulting loaf was just too acidic. The starter was too much trouble to maintain. Back to the yeasted loaf we went.
Then at the beginning of this year I became tempted once more by the attraction of building a sourdough starter. At first taste of that first loaf I was bewitched and so began the quest for creating the perfect sourdough loaf.
I have researched the net and bought the books. I have joined the Real Bread Campaign to get tips from there. I have bought scrapers and a lame to improve my chances. I have researched flours and visited mills. I am learning about hydration and how to manage that sticky dough. The kitchen smells of yeast or freshly baked bread. There is always a fine layer of flour dust on the kitchen shelves that needs to be dusted away. I have had great loaves emerge from the oven and some not so great, but all of them have tasted good.
The bread journey continues. I will keep you updated.
These little cakes are something else I have been making quite a bit recently. A few months ago my nine-year old daughter came home and said this: “Mum, my friend E has rock cakes in her lunch box and I really like them”. Ah yes, I recognise a gauntlet thrown when I see one. So there I was at 6.19 am the next morning making rock cakes to go into her lunch box. You can’t make rock cakes the day before. They need to be made and then eaten, preferably still warm after only a few minutes spent relaxing on a wire rack. But they are also acceptable at lunchtime when baked in the morning. Apparently.
I hadn’t made them for years before this. I don’t know why because they are delicious. I do know why, I had forgotten how good they are. The name rock cake doesn’t exactly sell them to you I realise, but really they are soft, gently spicy and very, very good. Make them as soon as you can, but not necessarily at 6.19 am, if you can help it.
I make mine in the food processor which means they are a matter of minutes to make.
Makes 12 – 15 cakes
225g self-raising flour
1 tsp baking powder
½ tsp mixed spice
100g butter, softened
50g demerara sugar
100g dried fruit (raisins, sultanas, candied peel, a mixture – anything you have in the cupboard)
1 egg and 1 tbsp milk, beaten lightly together
Method
Preheat the oven to 200°c, gas mark 6, or use towards the bottom of the roasting oven of the Aga. Grease a baking sheet.
Place the flour, baking powder and mixed spice in the bowl of a food processor or in a large bowl. Cube the butter and either pulse until it looks like fine breadcrumbs or if doing it by hand rub the butter into the flour using your fingertips and a light touch. Add the sugar and the fruit. Add the egg and milk mixture and pulse again until it comes together or mix with your hands until it comes together in a soft dough.
Spoon small mounds of mixture onto the greased baking sheet, you want them to look rough edged like a rock. Spoon a little extra demerara sugar over each one. Place in the preheated oven and cook for about ten minutes until golden brown. Remove to a wire rack, leave for a minute or two and then eat or wait until lunchtime.
This website uses cookies to improve your experience. You can opt-out if you wish.AcceptRejectSettings
Privacy & Cookies Policy
Privacy Overview
This website uses cookies to improve your experience while you navigate through the website. Out of these, the cookies that are categorized as necessary are stored on your browser as they are essential for the working of basic functionalities of the website. We also use third-party cookies that help us analyze and understand how you use this website. These cookies will be stored in your browser only with your consent. You also have the option to opt-out of these cookies. But opting out of some of these cookies may affect your browsing experience.
Necessary cookies are absolutely essential for the website to function properly. This category only includes cookies that ensures basic functionalities and security features of the website. These cookies do not store any personal information.
Functional cookies help to perform certain functionalities like sharing the content of the website on social media platforms, collect feedbacks, and other third-party features.
Performance cookies are used to understand and analyze the key performance indexes of the website which helps in delivering a better user experience for the visitors.
Analytical cookies are used to understand how visitors interact with the website. These cookies help provide information on metrics the number of visitors, bounce rate, traffic source, etc.
Cookie
Duration
Description
_ga
2 years
The _ga cookie, installed by Google Analytics, calculates visitor, session and campaign data and also keeps track of site usage for the site's analytics report. The cookie stores information anonymously and assigns a randomly generated number to recognize unique visitors.
_gat_gtag_UA_11789200_1
1 minute
Set by Google to distinguish users.
_gid
1 day
Installed by Google Analytics, _gid cookie stores information on how visitors use a website, while also creating an analytics report of the website's performance. Some of the data that are collected include the number of visitors, their source, and the pages they visit anonymously.
CONSENT
2 years
YouTube sets this cookie via embedded youtube-videos and registers anonymous statistical data.
Advertisement cookies are used to provide visitors with relevant ads and marketing campaigns. These cookies track visitors across websites and collect information to provide customized ads.
Cookie
Duration
Description
VISITOR_INFO1_LIVE
5 months 27 days
A cookie set by YouTube to measure bandwidth that determines whether the user gets the new or old player interface.
YSC
session
YSC cookie is set by Youtube and is used to track the views of embedded videos on Youtube pages.