I have been looking back in my recipe archives of this site to remind me of Christmases past. There are such a lot of recipes on here, some of which I make over and over, some I need to make again.
As I remind myself I thought it might be a good idea to share them with you in case you want to make them to share with your family and friends this year.
If you have guests coming then my sausage and sage pie is wonderful on the buffet table and my ham is one from Dorothy Hartley’s 1950’s recipe book and is really good. Left over ham is fantastic in a fidget pie.
Whatever you choose to make this year, I hope the preparations go smoothly and that you can spend time with family and friends. We are all hoping for a better Christmas than last year.
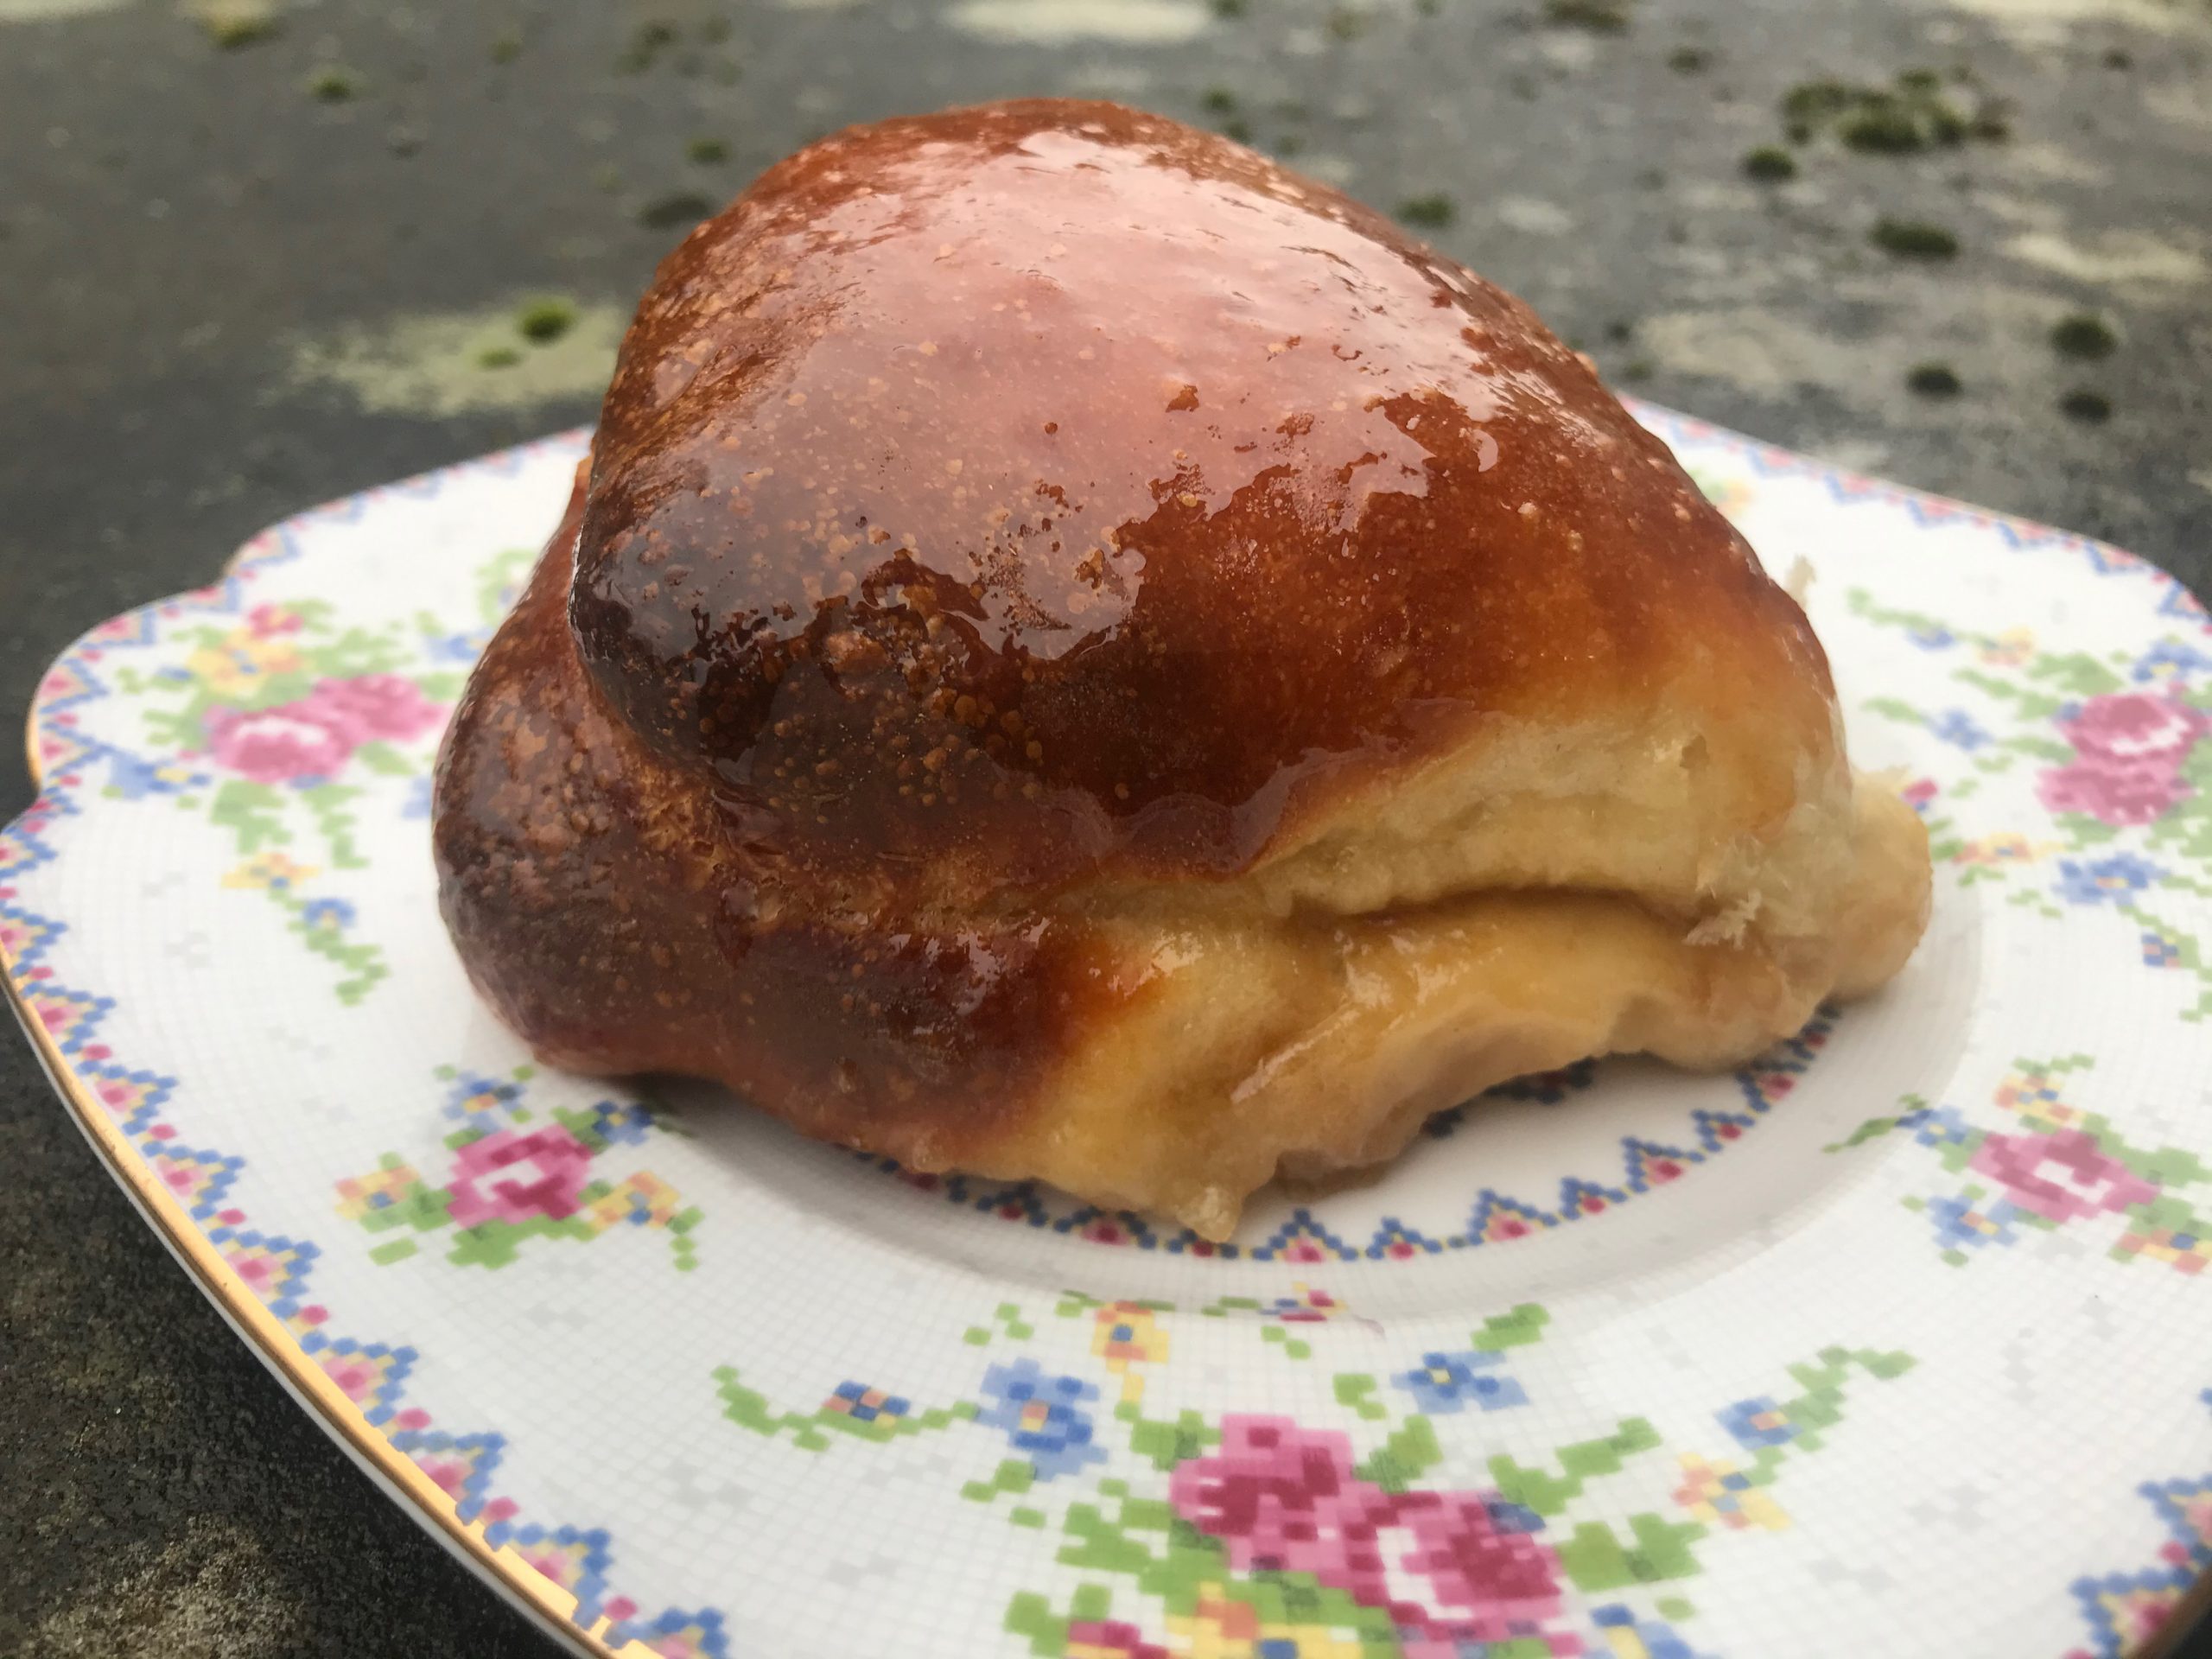
Hands down my most popular recipe is for Shropshire Butter Buns and for very good reason. A butter bun is a fine, fine thing. A sweet dough filled with buttery goodness and with a delicious sticky toffee bottom. Back in 2015 when I posted the original recipe it was one that I had cobbled together from memories and snippets on the internet and it’s a recipe that I am pretty pleased with.
I teach people how to make butter buns on my sweet dough course and either they swoon immediately or look at me with an impassive face as they have yet to experience one. Once they have experienced one though I haven’t known anyone fail to be impressed.
Last week, Edward Aston contacted me. Edward had been an apprentice baker some seventy years ago at a bakery in a local town just a few miles away from here at Tom Wedge’s bakery. Edward tells me that Tom Wedge was the son-in-law of Mr Rhodes of Rhodes Bakery in Market Drayton where the recipe for the butter bun originated. Being keen to pass the recipe on Edward has very kindly sent me the recipe that he still bakes regularly for his children and grandchildren.
So here is what Edward wrote to me:
“I have just read your piece on Shropshire butter buns and thoroughly enjoyed it. The café you refer to in Shrewsbury would be Sidolis if memory serves me well. I believe the original recipe came from Market Drayton, Rhodes bakery I believe but sadly no longer trading. Some seventy years ago I was an apprentice baker to the son in law of Mr Rhodes a brilliant baker named Tom Wedge who had his own bakery in Broseley, Shropshire. That bakery is also sadly no longer trading and none of his family is involved in the trade. In view of this I now feel that it is time to make sure his original recipe should be preserved and I can think of no one better to share it with. Your dough and method are absolutely fine but the filling and construction is not authentic. So here goes for what it is worth. For the filling use equal weights of butter and light soft brown sugar. Beat them together until light and very fluffy now add about 20% of the butter sugar mixture total weight of lemon curd and beat well again. You should now have a cream like spreadable mixture. Now to construct the buns, place the dough circle flat and spread the mixture thinly on half of the circle, fold to make a half circle and then spread half of that and fold again to make a quarter circle. To bake place the buns in groups of four to form a circle on the baking tray. This was the traditional way of selling butter buns, in rings of four. I hope this is of use to you and will help to keep this beautiful confection alive. I like you am a great fan of the butter bun.”
How wonderful is that? I was so pleased and felt very honoured to have received such an email. I have spent a very happy morning today filming myself making the buns so that you can all see how I have translated Edward’s note to me and hopefully make the authentic Shropshire Butter Bun for yourself. I agree very much with Edward that we should keep the butter bun alive.
Learn to make Shropshire butter buns and other delicious sweet treats on my online course
If you would like to watch the video of me making these beauties you can do on my YouTube channel.
Ingredients:
For the dough: 300g strong white flour (bread flour) 250g plain white flour 10g fine salt 7g easy bake yeast (instant yeast) or 10g fresh yeast (the fresh yeast can be dissolved in a little of the warm water that you will be using for the recipe) 50g caster sugar 150ml milk 150ml warm water 50g butter 1 egg
For the filling: 150g unsalted softened butter 150g light soft brown sugar 60g lemon curd
For the glaze: 50g caster or granulated sugar 50g water
Method:
Warm the milk and the butter together in a pan over a gentle heat. Yeast dies at 55C so you don’t want the water to get too hot.
Place the flours, sugar, salt and yeast in a large bowl. Keep the salt and yeast separate as salt can kill yeast. If you are using fresh yeast dissolve in a small amount of the water that you are using for the recipe before adding it to the flour.
Add the egg, warm milk and warm water and mix well. You can now use a stand mixer to mix the dough, knead for 10 minutes or use the stretch and fold method to develop the gluten in the dough. Leave the dough to ferment until it has become light and airy and has doubled in size. This can be at room temperature and take 1-2 hours or in the fridge overnight.
Meanwhile make the filling. Beat the sugar and butter together until soft and fluffy. Add the lemon curd and mix to combine. Set aside.
Make the glaze by placing the sugar and water in a small pan over a gentle heat. Stir until the sugar has dissolved and then simmer for a couple of minutes.
When the dough has become light and airy turn it out of the bowl onto a lightly floured surface. Cut the dough into 8 large pieces or 12 smaller pieces. I like the bigger bun but you might prefer the smaller size.
Roll each piece into a circle. Place a teaspoon of the filling not each circle. Fold the circle over and seal the edges. Place another teaspoon of filling onto the half moon shapes and fold in half again so that you now have a triangular shape.
Place four of the triangles onto a baking tray (you can use baking parchment on the tray to save the washing up effort) to make a circle and repeat with the remaining triangles.
Leave in a warm place to prove or place in the fridge for several hours or overnight.
When the buns have risen by about half preheat the oven to 200C, gas mark 6, 400F or use the roasting oven of the Aga and bake for 20-25 minutes. depending on your oven.
As soon as they come out of the oven brush them with the simple syrup glaze generously and leave them on the tray for 10 minutes to soak up any excess butter and allow the treacly toffee to stick to the bun. Finish cooling on a wire rack and eat the toffee bits stuck to the tray as a cook’s bonus.
Try both this recipe and my version and let me know which one you prefer or which one brings back happy memories of enjoying butter buns.
Edit: Edward has been in touch to give additional information “Just two small points I would like to offer to make things easier. First, after making the dough balls cover them with a cloth and give them about 10 minutes bench rest. This will make them easier to roll and prevent pull back. The second is the glaze which is improved by the addition of a spoonful of golden syrup which makes the glaze more viscous and offers better coverage with less risk of the glaze being absorbed. Finally a sprinkle of caster sugar used to be added for presentation.”
In the comments section Neil Jones mentions a recipe he was given by the son of a baker. Please see the image of the recipe he has shared with us:
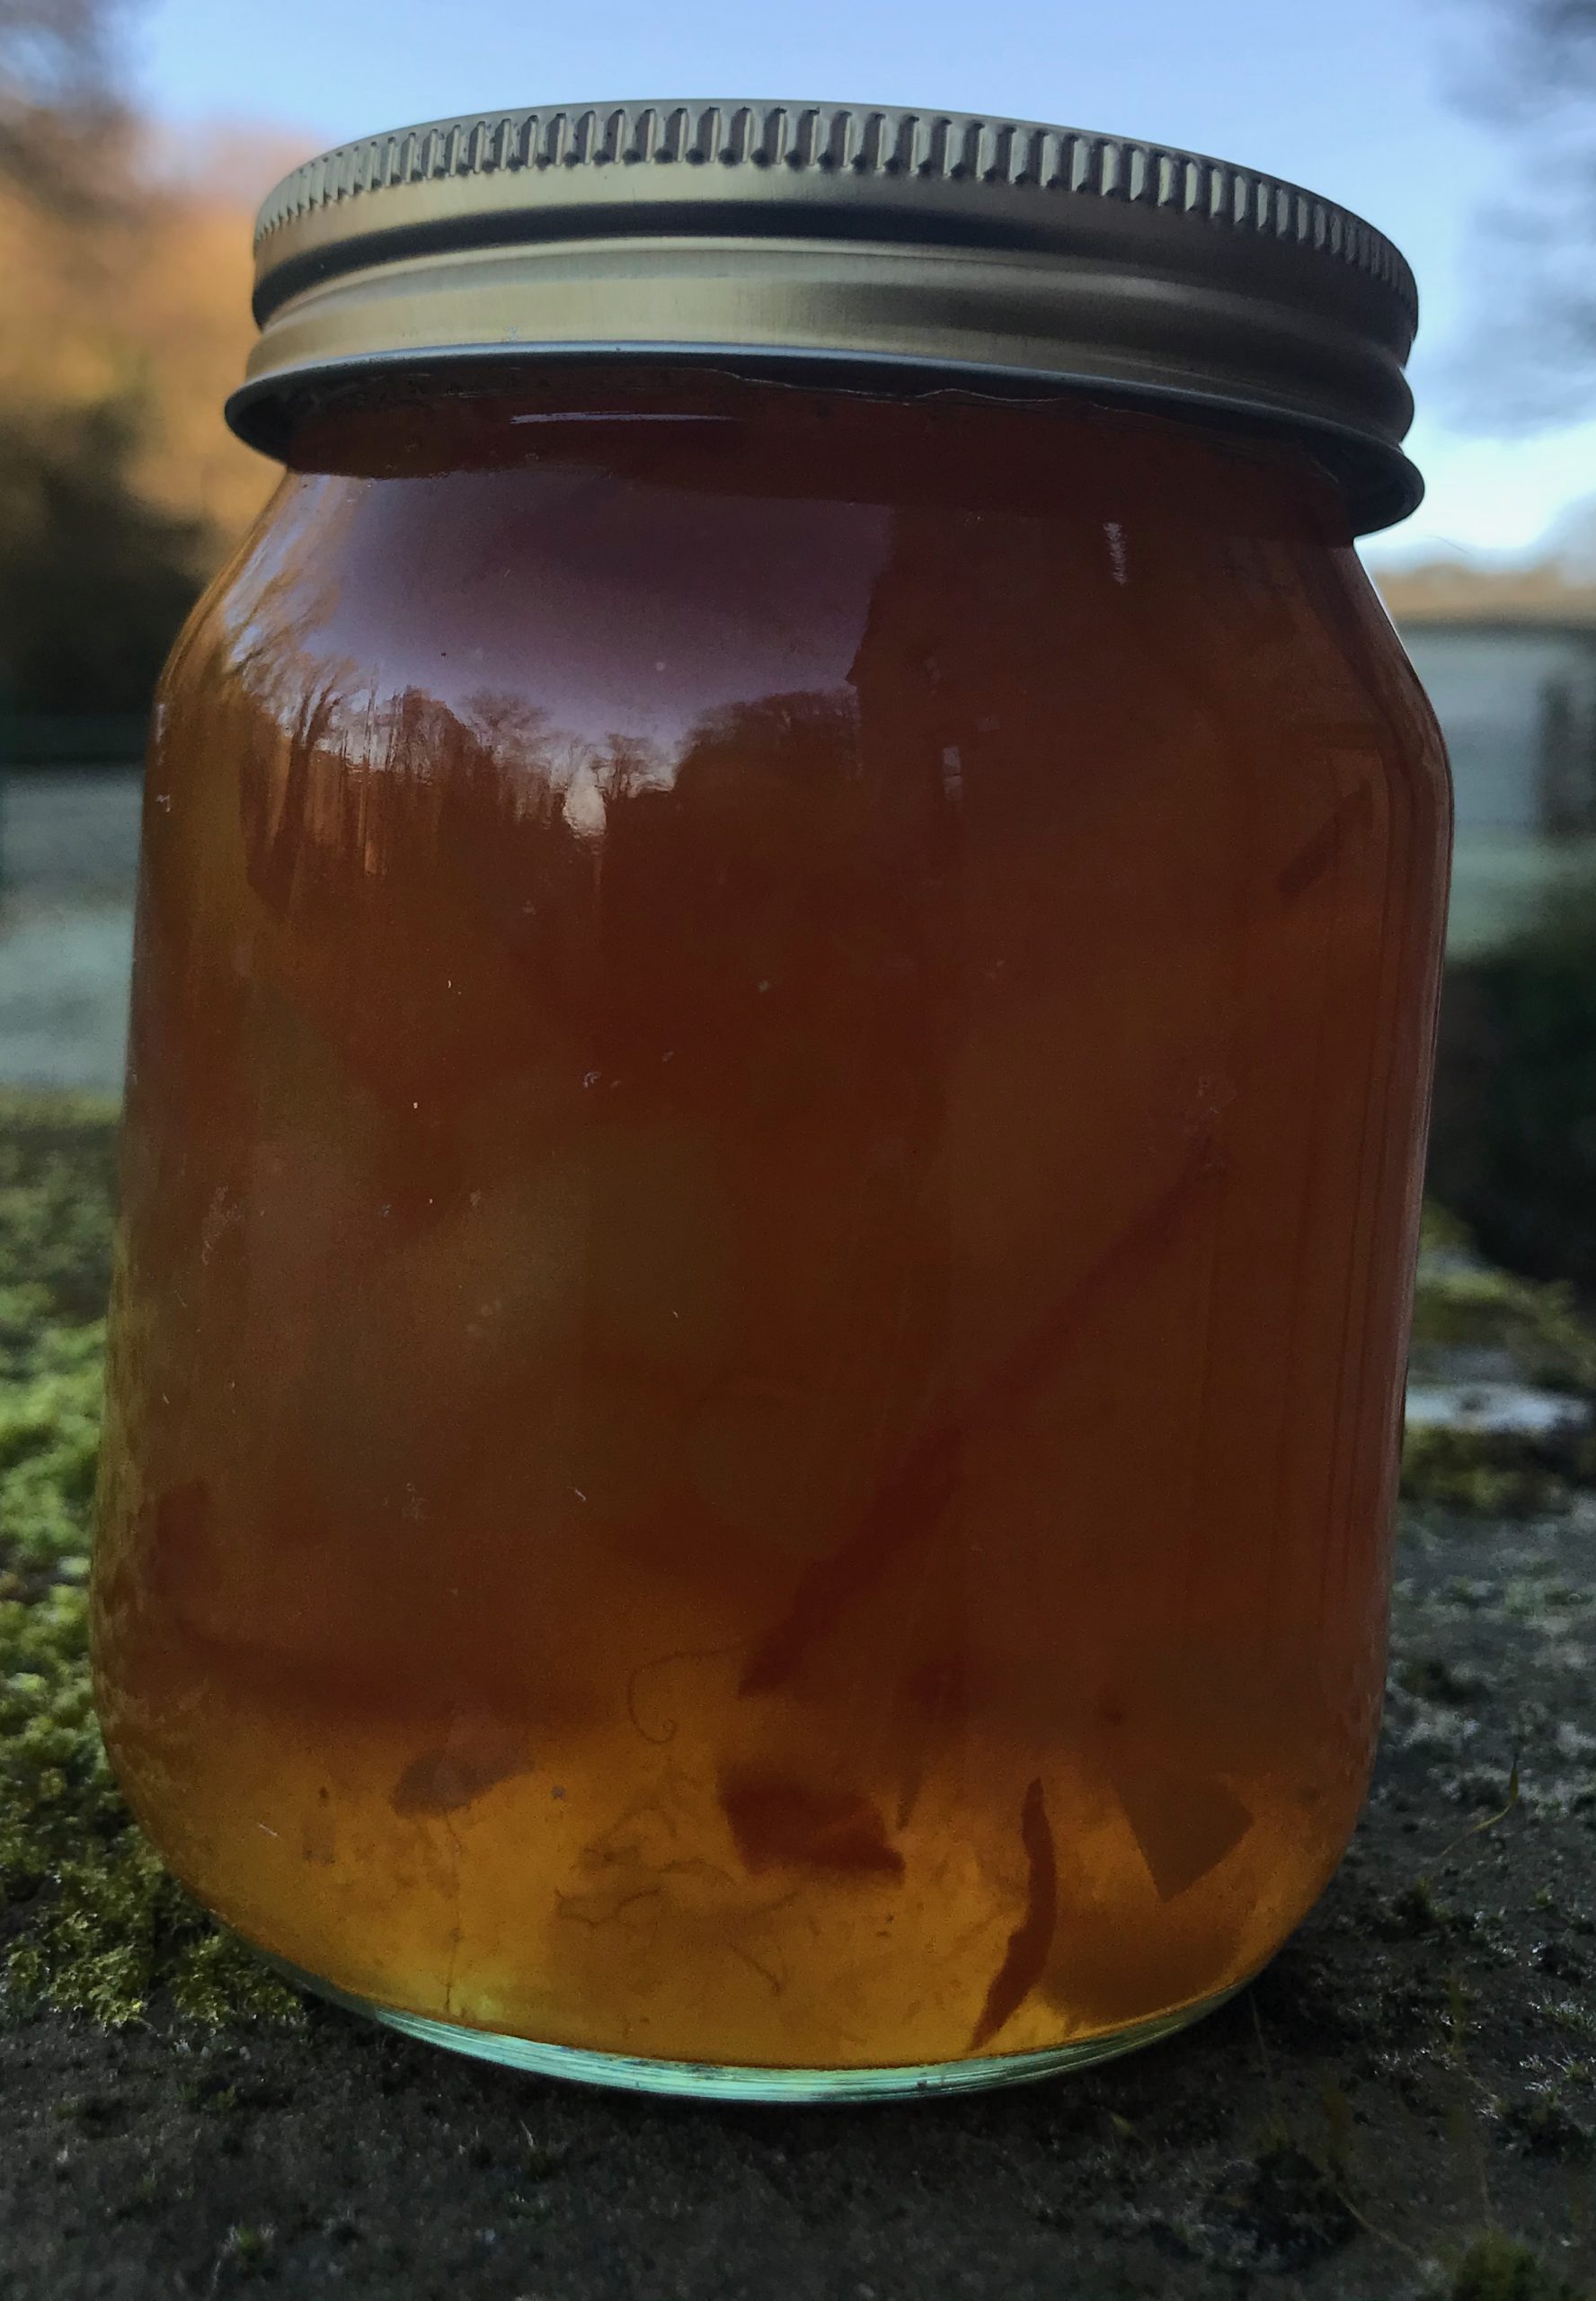
In the depths of January we all need a sliver of brightness. Marmalade delivers that. It brightens up my morning toast every day.
Every year I look forward to the seville oranges arriving in the shops. I buy two kilos. One kilo to make marmalade straight away and one kilo to put in the freezer to make more in the summer. No one should be without a jar of marmalade in the cupboard.
Frozen oranges can be used straight from frozen using the method below.
My Aga Marmalade is my go to recipe, this just has the added zing of ginger. Feel free to omit it if ginger is not your thing.
1 kg seville oranges 1 lemon, sliced in half 10cm piece of root ginger 2kg granulated sugar 1 litre water 200g stem ginger in syrup
Method This makes 8-10 jars of marmalade. Sterilise the jars by washing them well and then pop into a low oven (100C) for about 15 minutes.
Place the oranges, lemon and piece of root ginger in a pan. Add the water. The water should just cover the oranges if it doesn’t try using a smaller pan. I then place a smaller saucepan lid that fits inside the pan on top of the oranges to keep them submerged. Bring this to the boil and then lower the temperature to simmer the oranges until they are soft. This can take a couple of hours. If you are using an Aga you can then place the pan in the simmering oven.
Once the oranges are soft leave them to cool in the water. Once cool take the oranges out of the water and cut them in half. Scrape all of the pulp back into the cooking liquid including the pulp from the lemon. The lemon and piece of root ginger can both be discarded. Place the pulpy liquid back onto a medium heat and bring to the boil. Boil for 6 minutes. Strain the liquid through a sieve, pushing through as much pulp as you can. It is this pulp that will help the marmalade to set and give the marmalade plenty of flavour.
Cut the orange peel as thick or thin as you prefer. Pop a saucer in the freezer so that you can test the marmalade for wrinkles. Cut the stem ginger into small pieces (depending on how small or large you will want to eat it).
Put the sugar in with the water and stir over a gentle heat until the sugar has fully dissolved. Add the peel and stir well. Bring to the boil and boil rapidly, it should be rolling like lava from a volcano for 15 minutes. Take the cold saucer and place a spoonful of the marmalade on to it. Add the stem ginger. Leave to cool and then push your finger through to test for set. It should just wrinkle slightly. If it doesn’t boil it until it does. Take the pan off the heat and leave to cool for 10 minutes before pouring into the sterile jars and sealing.
This was originally posted on my website Veg Patch Kitchen Cookery School.
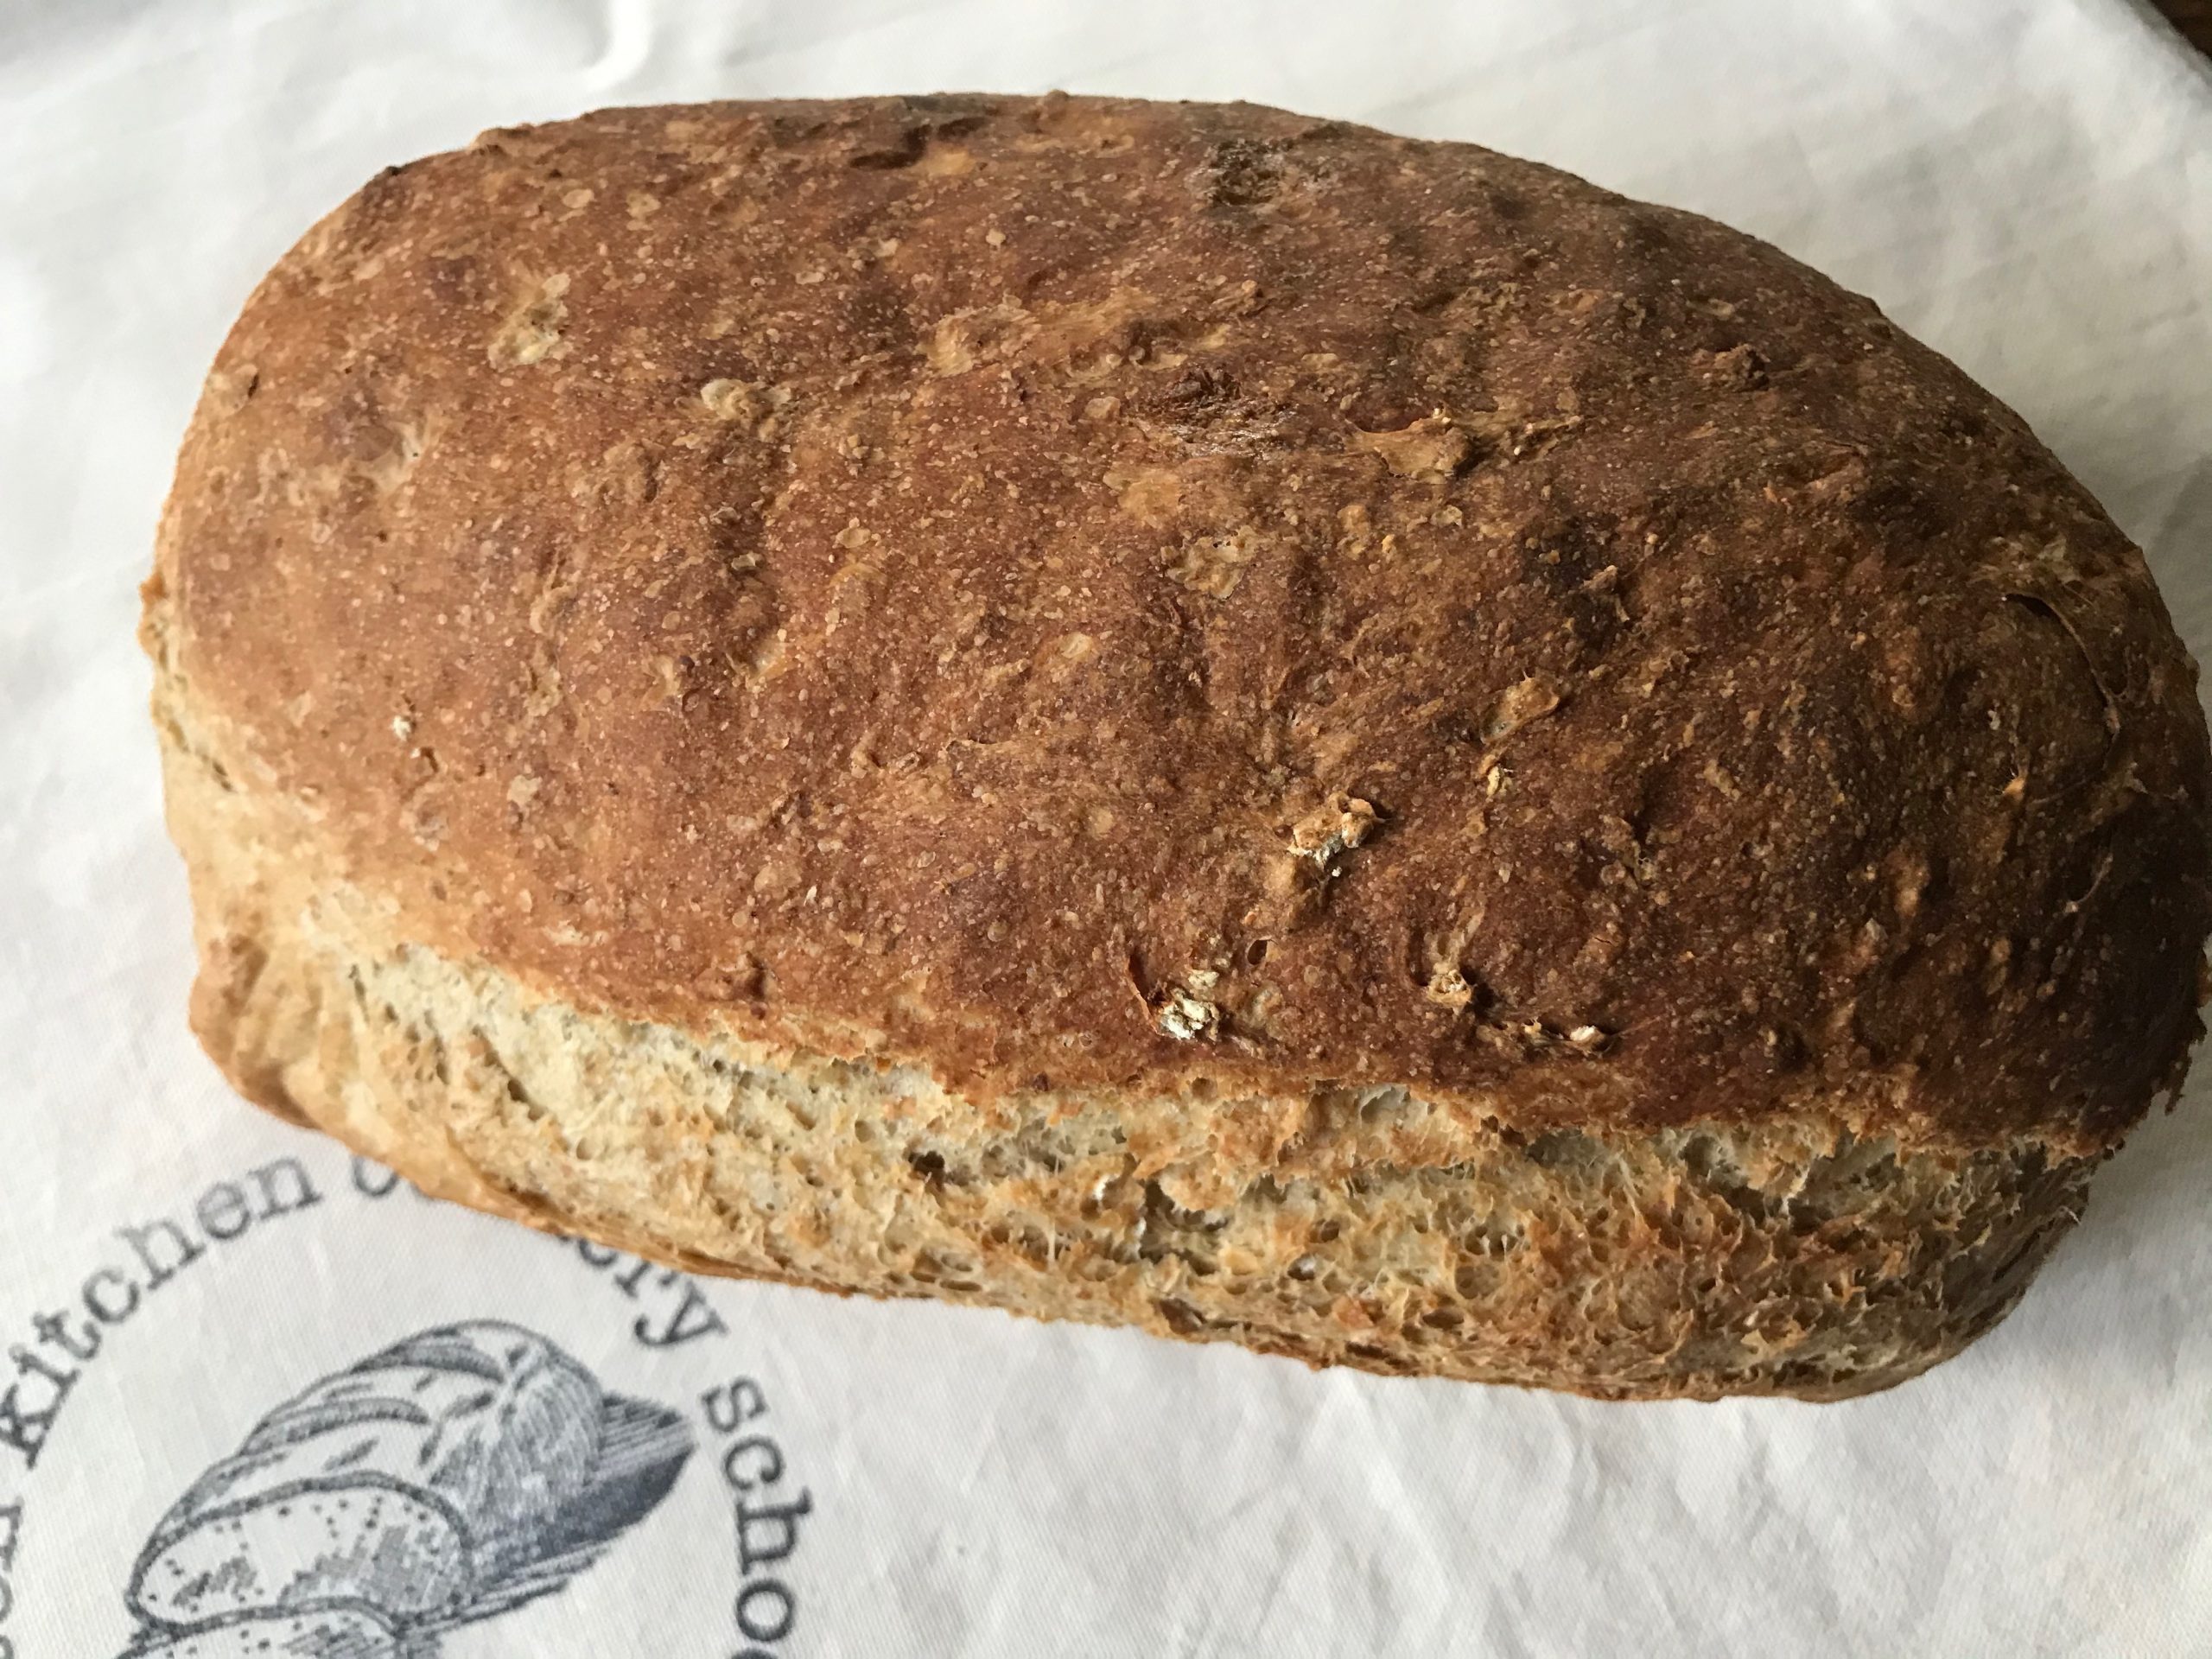
This oat and honey bread is our eldest’s favourite loaf. It has a denser texture due to the oats, with a delicious sweetness with the honey. It makes lovely toast and is great with soup.
Ingredients
350g strong (aka bread) white flour 100g wholemeal bread flour 50g porridge oats or jumbo oats 5g easy bake (aka instant yeast)yeast or 1 sachet or 15g fresh yeast 5-10g fine sea salt 20g – 40g honey (depending on taste) Approx 320-370g water
Method
Place the flours and oats in a large bowl. Add the yeast or crumble in the fresh yeast, mix through the flour. Add the salt and mix through. Add the honey.
Add 320g water, you will need more but start with this amount and then splash in more as needed as you are mixing. Using a clawed hand mix the dough. There should be no dry bits and the dough should feel on the sticky side. The bran in the wholemeal and the oats will continue to absorb more water as the dough rests, so this loaf is better made on the stickier side. Cover the bowl with a large inflated bag/ shower cap or proving cloth and leave to rest for a minimum of 10 minutes, up to an hour if you are busy. Then do stretch and folds as shown in this video or knead your dough to develop the gluten.
Allow the dough to ferment, either at room temperature for 1-2 hours or in the fridge for several hours or overnight until the dough is light and airy and has doubled in size.
Shape the dough as you prefer and allow to rise again. This can happen either in the fridge or at room temperature. It will prove in as little as 30 minutes in a warm room, will take up to 2 hours in a cool room or several hours in a fridge. You want the dough to become airy but not double in size. Here is a video to show you what you are looking for in a fully proved loaf.
Preheat the oven to 220C, gas mark 7, 425F. Place a solid sheet in the oven to place the loaf onto. If you are using a dutch oven preheat it in the oven at the same time.
Unless your loaf is in a tin you will need to score it with a sharp knife so that it bursts in the oven at this slash rather than the weakest point.
When the oven is ready and the loaf is ready place on the preheated solid shelf and steam the oven. You can steam the oven by spraying with a plant mister (avoid the glass door and light) or by placing a cup of hot water in a roasting tray in the bottom of the oven (be careful not to burn yourself). Bake for 30-35 minutes until fully baked. It will look evenly golden, sound hollow when knocked on the bottom and will show 90C on a thermometer probe.
Allow to cool thoroughly on a wire rack. Enjoy.
You can learn all about making bread and transform from a novice to a confident bread baker with my online masterclass Bread Made Easy.
This post was first published on my sister website Veg Patch Kitchen Cookery School where there are lots of articles about bread making.
Here is my master recipe for a basic white bread. I call it my master recipe because once you have mastered this one it can be adapted really easily into a multitude of different breads. It’s the recipe I use in my online Bread Made Easy masterclass. In the masterclass I show you how to shape the dough into different breads, rolls, make pizza bases, pitta breads, focaccia and add flavours such as marmite and tomato. This is the perfect recipe for anyone starting out in bread making.
You can use the stretch and fold method or a stand mixer to make this dough. Both methods make bread making really easy to fit into your busy day.
Simple white bread
Ingredients
500g strong (aka bread) white flour 5g easy bake yeast (or 1 sachet for ease) or 15g fresh yeast 5-10g fine sea salt Approx 320-340g water
Method
Place your flour in a large mixing bowl. Add your yeast and mix through the flour. If you are using fresh yeast you can crumble the yeast through the flour like you would rub butter through flour when making pastry. Add the salt and mix through the flour.
Add 320g of water to begin with and using one hand like a claw begin to mix the dough. There should be no dry bits, so splash in more water gradually as needed. You want the dough to feel soft and slightly sticky. Watch this video to see what your dough should look like and how to stretch and fold it to develop the gluten. If you prefer to knead this video will show you how. You can also use a stand mixer, this article describes my preferred method for using a stand mixer.
Once you have developed the dough using either the stretch and fold method, kneading or a stand mixer it is time to let the dough ferment. Keep the dough covered well, either with a large plastic bag, a shower cap or a proving cloth. If you keep the dough at room temperature it will have become light, airy and doubled in size in an hour or a little longer in a cool kitchen. To improve the flavour and texture of the loaf you can ferment it in the fridge overnight or for several hours. This is ideal if you have a busy day ahead and won’t be hanging around in the kitchen. It takes ten times longer for a loaf to prove in a fridge than at room temperature.
When the dough has risen and become light and airy, it’s time to shape it. You can shape it as a round loaf, a tin loaf, a bloomer or as rolls, or pitta breads, or pizza bases or turn it into a focaccia… the world is your oyster. You now need it to prove it a second time so that it rises again. Once shaped, cover it well and leave at room temperature or pop back in the fridge for several hours. This time don’t let it rise to double its original size or you risk it being overproved. Instead aim for about a rise of about half as much as its original size. You want it to feel uniformly airy as you gently press a hand on the top. If it feels less airy in the centre leave it for a bit longer before baking. This video will help you.
Make sure you preheat your oven to 220C, gas mark 7, 425F, so that when the loaf is ready it can go into a hot oven. It is a good idea to place a solid oven shelf or baking tray in there for you to place your loaf onto. Bread benefits from hitting a hot surface as this will improve oven spring. If you have a dutch oven heat this up in the oven too. A dutch oven will really help improve the bake of your loaf. This article has lots of information about dutch ovens.
When your loaf is ready to bake, score it with a sharp knife so that it bursts at this slash rather than at the weakest point. Place your loaf in the hot oven. If you are not baking in a dutch oven you will need to steam your oven. You can do this with a plant mister or by placing a cup of water in a roasting tray on the oven floor. Be careful when steaming the oven not to burn yourself or spray water onto a glass oven door or the light. Steam helps the loaf achieve oven spring, as well as improving the caramelisation of the crust and getting a thinner, more crisp crust.
Bake the loaf for 30-35 minutes. Check that it is baked by knocking it on its bottom, it should sound hollow. You can also use a temperature probe, if the centre of the loaf reaches 90C it is fully baked. Allow the loaf to cool on a wire tray completely before cutting into it.
You can learn how to make bread the easy way with my online masterclass Bread Made Easy.
Wishing you all a very Merry Christmas, whatever form it might be taking this year. I hope you will be able to have a restful break and enjoy a little cheer. Fingers crossed that 2021 will bring something more positive for us all eventually.
Every Christmas I try to make some homemade treats for family and friends. I am not sure this year whether I will manage to deliver the treats to loved ones. If I do, it will be doorstep delivery and a wave from a distance. But, I have made a start anyway and in a worse case scenario I will eat the treats.
Honestly, my waist has never been so rotund. Comfort eating has become a definite thing for me since March.
These candied oranges are really easy. I intend to dry some of them and dip them in dark chocolate and (possibly) give away. The others I might just eat, served in a bowl with plenty of cream splashed over. You could use them to decorate a chocolate Yule log or the top of a trifle. Here is the recipe for Candied peel if you would prefer.
I used five oranges as I do intend to give them away but the recipe below is for two oranges. If you are using more than two you just need to make more simple sugar syrup. As a guide I used 350g of sugar and 350g of water to cover my five oranges and that has made a lot of extra syrup that I will use over desserts or make a fruit salad with at some point over Christmas.
2 oranges 150g caster or granulated sugar 150g water
Method
Slice the oranges thinly. Place the sugar and water into a medium sized pan and stir over a gentle heat until the sugar has completely dissolved. Add the oranges. Place a small plate or a saucepan lid that will fit inside the pan to keep the oranges submerged in the syrup. Simmer gently for 45 minutes -1 hour until the peel of the orange is tender and the point of a knife easily pierces it. Take the pan off the heat and allow to cool. Decant into a sterile jar. These will keep easily for 1 month. Keep in the fridge once open.
If you would like to dry them, take them out of the syrup and place on a wire rack with baking parchment underneath to catch the drips and allow to air dry.
It’s about now that I start to plan what I am going to bake. My planning is no indicator of what will end up being baked. That is down to whether I run out of time. Time management was never my forte.
But for now, let me have my expectations. I have ordered some ham hocks from a local butcher so they will definitely get cooked and my favourite way of doing this is to follow Dorothy Hartley’s method. I have also ordered sausage meat so Sausage and sage pie is likely. These are my mainstays, they root me in a feeling of a tradition and I think this year this might be exactly what we need.
Sausage & Sage Pie
I have been filming a Christmas breads online course so we have been eating stollen, mincemeat wreath, cinnamon star, Christmas tree bread and blue cheese and pear focaccia until it comes out of our ears. I will be investing in a pair of elasticated trousers.
If I get time I will revisit my Ginger and marzipan cake because the flavours of that scream Christmas and one night I will make my Mushroom and Chestnut Wellington, although our youngest won’t touch mushrooms with a barge pole so it will have to be a night when she wants to make her own dinner (which is a lot of the time as she is a fussy eater).
So, this is my dream Christmas baking… I wonder how much, if any, of it I will actually pull off.
What are your plans for Christmas baking this year?
Regular readers will know that the other hat I wear is my Veg Patch Kitchen Cookery School hat. I set up the cookery school at the end of 2014 and ran my first bread making class in January 2015. It’s a job that I absolutely love. I am passionate about bread and in particular sharing just how easy it is to make delicious bread at home.
It all started here at The Ordinary Cook. In 2009, my contract with a fantastic job came to an end. The economic crash had happened and the sector I worked in was changing. I worked for a public sector venture capital fund investing European and UK government funding in small and medium sized creative businesses in the West Midlands to help them achieve growth and contribute to the region’s creative economy. I had worked for the fund for four years and had studied it as part of my PhD for five years before that. I loved the job and the team I worked with. However, I had also worked (part time and mostly from home) through both maternity leaves. It’s hard to take maternity leave when you are a freelance. In 2009 we had a 5 year old and a 3 year old. I had to make a decision, get another job and work for not very much money after childcare costs or take a career break. I took the career break. I found it tough. It was wonderful being at home with the girls but I suddenly realised that my identity had been tied up with my career and that had gone.
So I set up this blog. It was a lifesaver. I could focus on creating recipes and I could have conversations with people all over the world about food whilst also being a stay at home mum. It was the best of both worlds, (except I never have managed to monetise this blog).
I love baking and experimenting yet back in 2009 I just couldn’t get the hang of yeast cookery. It seemed beyond my talents. I put it on the back burner and decided it was not for me. But I hate to be beaten by anything and it kept gnawing at me that I really should be able to make decent bread instead of a brick. So, I kept practising and reading about bread and I finally cracked it. I was making the most delicious bread I had ever tasted. I became obsessed with bread.
In 2014, with the girls now 10 and nearly 8, and Richard on a constant pay freeze, it became obvious that I needed to go back to work. It was a terrifying thought after five years out of the workplace. I felt that no-one would employ me and that I would be laughed out of any interview. My sister suggested I do a bread class from her house and I said yes. I am so grateful to my sister for that. It helped me prove that I was capable of it. Veg Patch Kitchen Cookery School was born.
At the start of this year it felt that it was going to be the best year yet, my classes were becoming fully booked a couple of months in advance. Then we all know what happened. My last face to face class was on 20th March. My cookery school is too small to allow proper social distancing and our whole ethos is based on providing a really lovely day of learning, relaxing, chatting and eating. I felt that none of this would be possible with masks, visors and hand sanitisers. So the school has remained closed and it looks until it will stay that way until at least after Easter 2021.
The months since have been spent filming, editing and subtitling videos and researching online teaching platforms to offer an online alternative. It’s been an interesting and steep learning curve but finally last week the bread masterclass was launched.
I have created a comprehensive masterclass that takes a step by step approach to bread making to show you just how easy it is to make bread at home and to fit bread making into your day. For me, this feels like a light at the end of the tunnel. It means that the business can keep going. I always knew that I would reopen at the end of all this, but I miss teaching people and this allows me to still do that, albeit in a very different way.
No time for a breather though as this week I will get started filming a Christmas breads class just in time for the (restricted) festivities.
This year has forced all of us to find new ways to work and play, tell me about yours.
We have a pear tree in our garden that has produced one or two fruits each year since we have lived here. The fruit are very small and I have always assumed that it is either a stunted tree or some equivalent of the crabapple. This year though, it is heavily loaded with small fruit.
It was this that drew my mum’s eye and led her to comment that she thought it was a Tettenhall Dick pear tree. I looked at her askance and then realised that she wasn’t joking.
My mum’s gran had this pear tree in her garden in Willenhall which is not that far from Tettenhall so it would make sense for her to have a Tettenhall Dick tree, but I have no idea how this variety of tree has ended up in our garden, but someone must have specifically chosen to plant it here. Great gran used to bottle them and they are reputed to be ideal for bottling and making Perry, so I guess it makes sense to have this in the garden rather than a pear tree that is hard and uneatable one minute and mush the next.
So, the Tettenhall Dick… from a quick google search I have found that it is quite a rare tree, named, after Tettenhall, an area in Wolverhampton and about twenty miles away from here. It was a tree that could be found all over the Black Country but many of the trees have long since been uprooted. You can read all about a chap trying to bring them back from the brink in this article. There are also lots of interesting stories connected to the pear in this blog post and comments by Brownhills Bob.
As my great gran used to bottle them I feel it is my duty to give it a go, in her honour, this year. I want my mum to try them and see if they remind her of the happy childhood she had with her gran.
Most of the pears aren’t ready yet, but some are already starting to fall, so I used the tried and tested technique of giving the pear a little wiggle and if it comes easily off the tree it is ready to be used for bottling. If it stays firm then leave it longer to ripen.
I used my trusted copy of The Sainsbury Book of Preserves & Pickles by Heather Lambert, first published in 1981, as my guide for bottling as it is something I have never ventured before. It has always seemed a bit complicated, but actually now that I have given it a go I think I will be doing it more often.
My sister gifted me a very large Kilner type jar last year so I have used this, but I would advise on using two smaller ones if you can. This one was too big to stand in the simmering oven of the Aga so had to be balanced precariously in a tin and on a pyrex dish so that the syrup wouldn’t leak whilst the seal was taking place. If I had a normal sized oven it probably wouldn’t be an issue. Using smaller jars if you have them will be a better option because fruit in an unopened smaller jar will last for longer than fruit in an opened large jar.
I was surprised at how little sugar you need to bottle pears. I am used to making jam or chutney where you need a fair amount of sugar to either preserve or counteract the vinegar. For this recipe I only needed 125g sugar to every 600ml of water.
Feel free to spice the pears however you like, I added cloves and allspice berries, but use whatever you like or have, suggestions include lemon peel, orange peel, cinnamon, star anise. Experiment to your heart’s content.
Ingredients: Pears – enough to fill the jar that you are using 125g sugar to every 600ml water Optional spices/flavourings
You will need a sterile kilner jar (or several depending on how many pears you have to bottle) or similar that has the rubber ring intact. Preheat the oven to 150C, 300F, Gas Mark 2.
Wash the pears and peel. If you are using large pears you can halve them and remove the core. I left mine whole. Place them in acidulated water whilst you prepare them all to stop them browning (acidulated water is water with a squeeze or lemon or teaspoon of vinegar added).
Half fill your jar with water and measure how much water that is. This will give you a guestimate of how much sugar syrup you will use once the pears are in the jar.
Now calculate how much sugar you will need using 125g for every 600ml of water and place the sugar and water in a pan and stir over a gentle heat until the sugar is fully dissolved. Stop stirring and bring the syrup to a gentle boil.
Fill the jar with pears, pressing them down if you can to make sure the jar is filled as much as it can be. Pour the boiling sugar syrup, slowly and carefully, to completely cover the fruit and fill the jar to the top. Give the jar a gentle bang on a surface covered with a cloth to remove any air bubbles.
Close the jars but don’t completely seal. Place in the oven for an hour. Remove from the oven and seal (using a cloth to protect your hands as it will be very hot). Leave undisturbed for 24 hours. Check fora good seal by loosening the clip and attempting to gently lift the lid. It should be firmly sealed. If the lid opens you can try to seal again by following the instructions above one more time or eat the fruit immediately.
The fruit will stay good in a sealed jar for 3 years.Once you have broken the seal eat within a few days and keep in the fridge.
If you too have Tettenhall Dicks loitering in your garden let me know.
This website uses cookies to improve your experience. You can opt-out if you wish.AcceptRejectSettings
Privacy & Cookies Policy
Privacy Overview
This website uses cookies to improve your experience while you navigate through the website. Out of these, the cookies that are categorized as necessary are stored on your browser as they are essential for the working of basic functionalities of the website. We also use third-party cookies that help us analyze and understand how you use this website. These cookies will be stored in your browser only with your consent. You also have the option to opt-out of these cookies. But opting out of some of these cookies may affect your browsing experience.
Necessary cookies are absolutely essential for the website to function properly. This category only includes cookies that ensures basic functionalities and security features of the website. These cookies do not store any personal information.
Functional cookies help to perform certain functionalities like sharing the content of the website on social media platforms, collect feedbacks, and other third-party features.
Performance cookies are used to understand and analyze the key performance indexes of the website which helps in delivering a better user experience for the visitors.
Analytical cookies are used to understand how visitors interact with the website. These cookies help provide information on metrics the number of visitors, bounce rate, traffic source, etc.
Cookie
Duration
Description
_ga
2 years
The _ga cookie, installed by Google Analytics, calculates visitor, session and campaign data and also keeps track of site usage for the site's analytics report. The cookie stores information anonymously and assigns a randomly generated number to recognize unique visitors.
_gat_gtag_UA_11789200_1
1 minute
Set by Google to distinguish users.
_gid
1 day
Installed by Google Analytics, _gid cookie stores information on how visitors use a website, while also creating an analytics report of the website's performance. Some of the data that are collected include the number of visitors, their source, and the pages they visit anonymously.
CONSENT
2 years
YouTube sets this cookie via embedded youtube-videos and registers anonymous statistical data.
Advertisement cookies are used to provide visitors with relevant ads and marketing campaigns. These cookies track visitors across websites and collect information to provide customized ads.
Cookie
Duration
Description
VISITOR_INFO1_LIVE
5 months 27 days
A cookie set by YouTube to measure bandwidth that determines whether the user gets the new or old player interface.
YSC
session
YSC cookie is set by Youtube and is used to track the views of embedded videos on Youtube pages.