The Ordinary Cook loves to cook. If I am not cooking or baking then the chances are I am thinking about cooking and baking. I love sharing recipes and ideas and my website is my space to do this.
Donald Russell, an online butcher based in Aberdeenshire recently sent me some of their diced beef and pork (pork recipe to follow) for review. The meat was delivered in a polystyrene box packed with dry ice to keep it frozen in transit and it did a very good job. Donald Russell has a wide variety of meat available, delivered to your door, with plenty of recipes on their website to tempt you too.
A couple of years ago Mr OC reached a milestone birthday and our good friend Tony bought him a rotisserie barbecue for making souvla and souvlaki. We have used it as much as the weather allows us too ever since. So I was really pleased to receive this meat for review. This beef recipe is my interpretation of the espatada that we eat when we go on our holidays to Madeira. Espatada, is cubed beef rubbed with garlic, salt and bay leaf, cooked over coals on a skewer or a bay leaf twig and then hung on your table and served with cornbread which soaks up the delicious juices. I have to have espatada at least twice on holiday. Then I cook it whenever the occasion arises when we are at home and the rotisserie can be fetched out. This time though, because the weather knew I wanted to cook this beef for review it decided to rain most of the week. This beef was, therefore, cooked at the top of the roasting oven of the Aga, which is as close as I can get to grilling meat in an Aga. It does a perfectly decent job and the beef was delicious.
440g diced beef steak
1-2 cloves of garlic, chopped finely
juice and rind of ½ lemon
1-2 tbsps olive oil
1 tsp coarse sea salt
1-2 bay leaf crumbled
pepper
Soak some wooden skewers in water for at least 1 hour to prevent them burning or use metal skewers.
Method
Dry your diced steak with kitchen towel and place into a glass bowl or a freezer bag. Glug in some olive oil, the rind and juice of the lemon. Sprinkle over the chopped garlic, salt, bay leaf and a touch of pepper. Mix the marinade well into the beef using your hands or by shaking the freezer bag. Leave to marinate for at least an hour and preferably three.
Thread the meat securely onto the skewers and place on a grill rack over a roasting tin (line the tin with foil to save washing up). Place under a hot grill or in an oven at its highest setting for 10-15 minutes, turning once or twice until lightly charred. If you have the barbecue fired up then cook them over the hot coals. Leave to rest for a few minutes, squeeze a bit more lemon juice over the top before taking off the skewers and enjoying in a flatbread or with cornbread or a salad.
I received four packs of diced meat free of charge for the purposes of review from Donald Russell Online Butchers. All of the opinions in this post are my own and are honest.
Update January 2020 – I have kindly been given the recipe from an old local bakery and so have made a video demonstrating the recipe for these buns. You can watch the video below or on my YouTube channel. You can also find the alternative filling in this post.
These are the buns that I dream of. I do actually dream about them. When I was young you could buy these from an Italian family bakery that had shops in Shrewsbury and other local towns. They were my all time favourite cake and one that I would choose every time I saw them on their stainless steel platter. The memory of the taste has stayed with me and when the café doors were closed for the final time, it remained just that, a memory. Many times in recent years I have thought about how I might go about making them, but I couldn’t get my head around how you might layer the bun and enclose all that buttery goodness.
A few weeks ago a lady contacted me asking if I had the recipe for the Shrewsbury Butter Bun. Before she contacted me it never occurred to me that the butter bun was a local phenomenon. Of course, now I realise it is. A few weeks prior to this I found out that a friend’s husband had family connections with the café and I was considering whether she might think I was mad if I asked her if he knew the secret to the butter bun. The two things happening so close together felt like fate and I knew that it was time I got my act together and found out how I could go about making the butter bun.
Learn to make the Shropshire Butter Bun and other delicious buns on my online course
I haven’t asked my friend’s husband. I thought it best not to ask him to reveal family secrets. But I did find an entry for butter buns on the internet which revealed the folding technique. At last, the answer to all my dreams. I can’t find the link again, which is frustrating, but if I do I will post it here. I have used the recipe that I teach for all my enriched dough recipes on the bread making course. It’s a recipe that can be adapted for a fruit bun, chelsea bun, iced finger etc.
I have trialled these twice now, with success each time. I was frustrated with the first batch that all the sugary butteriness oozed out during the baking. With the second batch I tried sealing the bun with a little milk to prevent the leakage. I now realise that you just can’t seal them, and this is the point. All that sugary, butteriness gathers in the tray and encrusts the bottom of the butter bun. May it ooze for all its worth, enough of the filling manages to stay in to create the delicious buttery layers.
These little beauties are now going to be one of the choices for students to make during the enriched dough part of the bread making course so that I can share the butter bun love with as many people as possible. I urge you to get out your flour and make some as soon as you possibly can.
Makes 10 buns
Lightly grease two baking trays. Oven temperature, 220°c, gas mark 7 or the floor of the roasting oven of the Aga.
For the buns 300g strong white flour (bread flour) 250g plain white flour 10g fine salt 7g easy bake yeast (instant yeast) or 10g fresh yeast (the fresh yeast can be dissolved in a little of the warm water that you will be using for the recipe) 50g caster sugar 150ml warm milk 150ml warm water ( I add boiling water to cold milk and that way both get warm, just make sure that the liquid is only hand hot or you will kill the yeast) 50g butter 1 egg
For the filling 150g softened butter 150g caster sugar ½ tsp vanilla paste or extract
For the glaze 50 ml milk or water 50g caster sugar
Method
In a large bowl mix together the flours, salt, yeast and sugar. Pour in the water, milk, egg and add the cubed butter. Mix together well ( I use my hands like a claw) and then tip out onto a work surface (no extra flour needed) and knead for about 10 minutes until feeling smooth and elastic or you can use the stretch and fold method or use your stand mixer. The dough will be sticky during the kneading process, which is fine. Better sticky than dry.
Form the dough into a ball, and place into a bowl and leave to rise until double the original size, covered with a large bag or lightly oiled clingfilm. With all of the sugar, milk, egg and butter this dough will take longer to rise than a bread dough. In a cool kitchen expect this to be about two hours, less in a warm kitchen.
In a bowl mix together the softened butter, caster sugar and vanilla paste for the filling.
Place the sugar and milk or water for the glaze in a small pan and heat gently to dissolve the sugar. Increase the heat to medium and bring to the boil. Set aside.
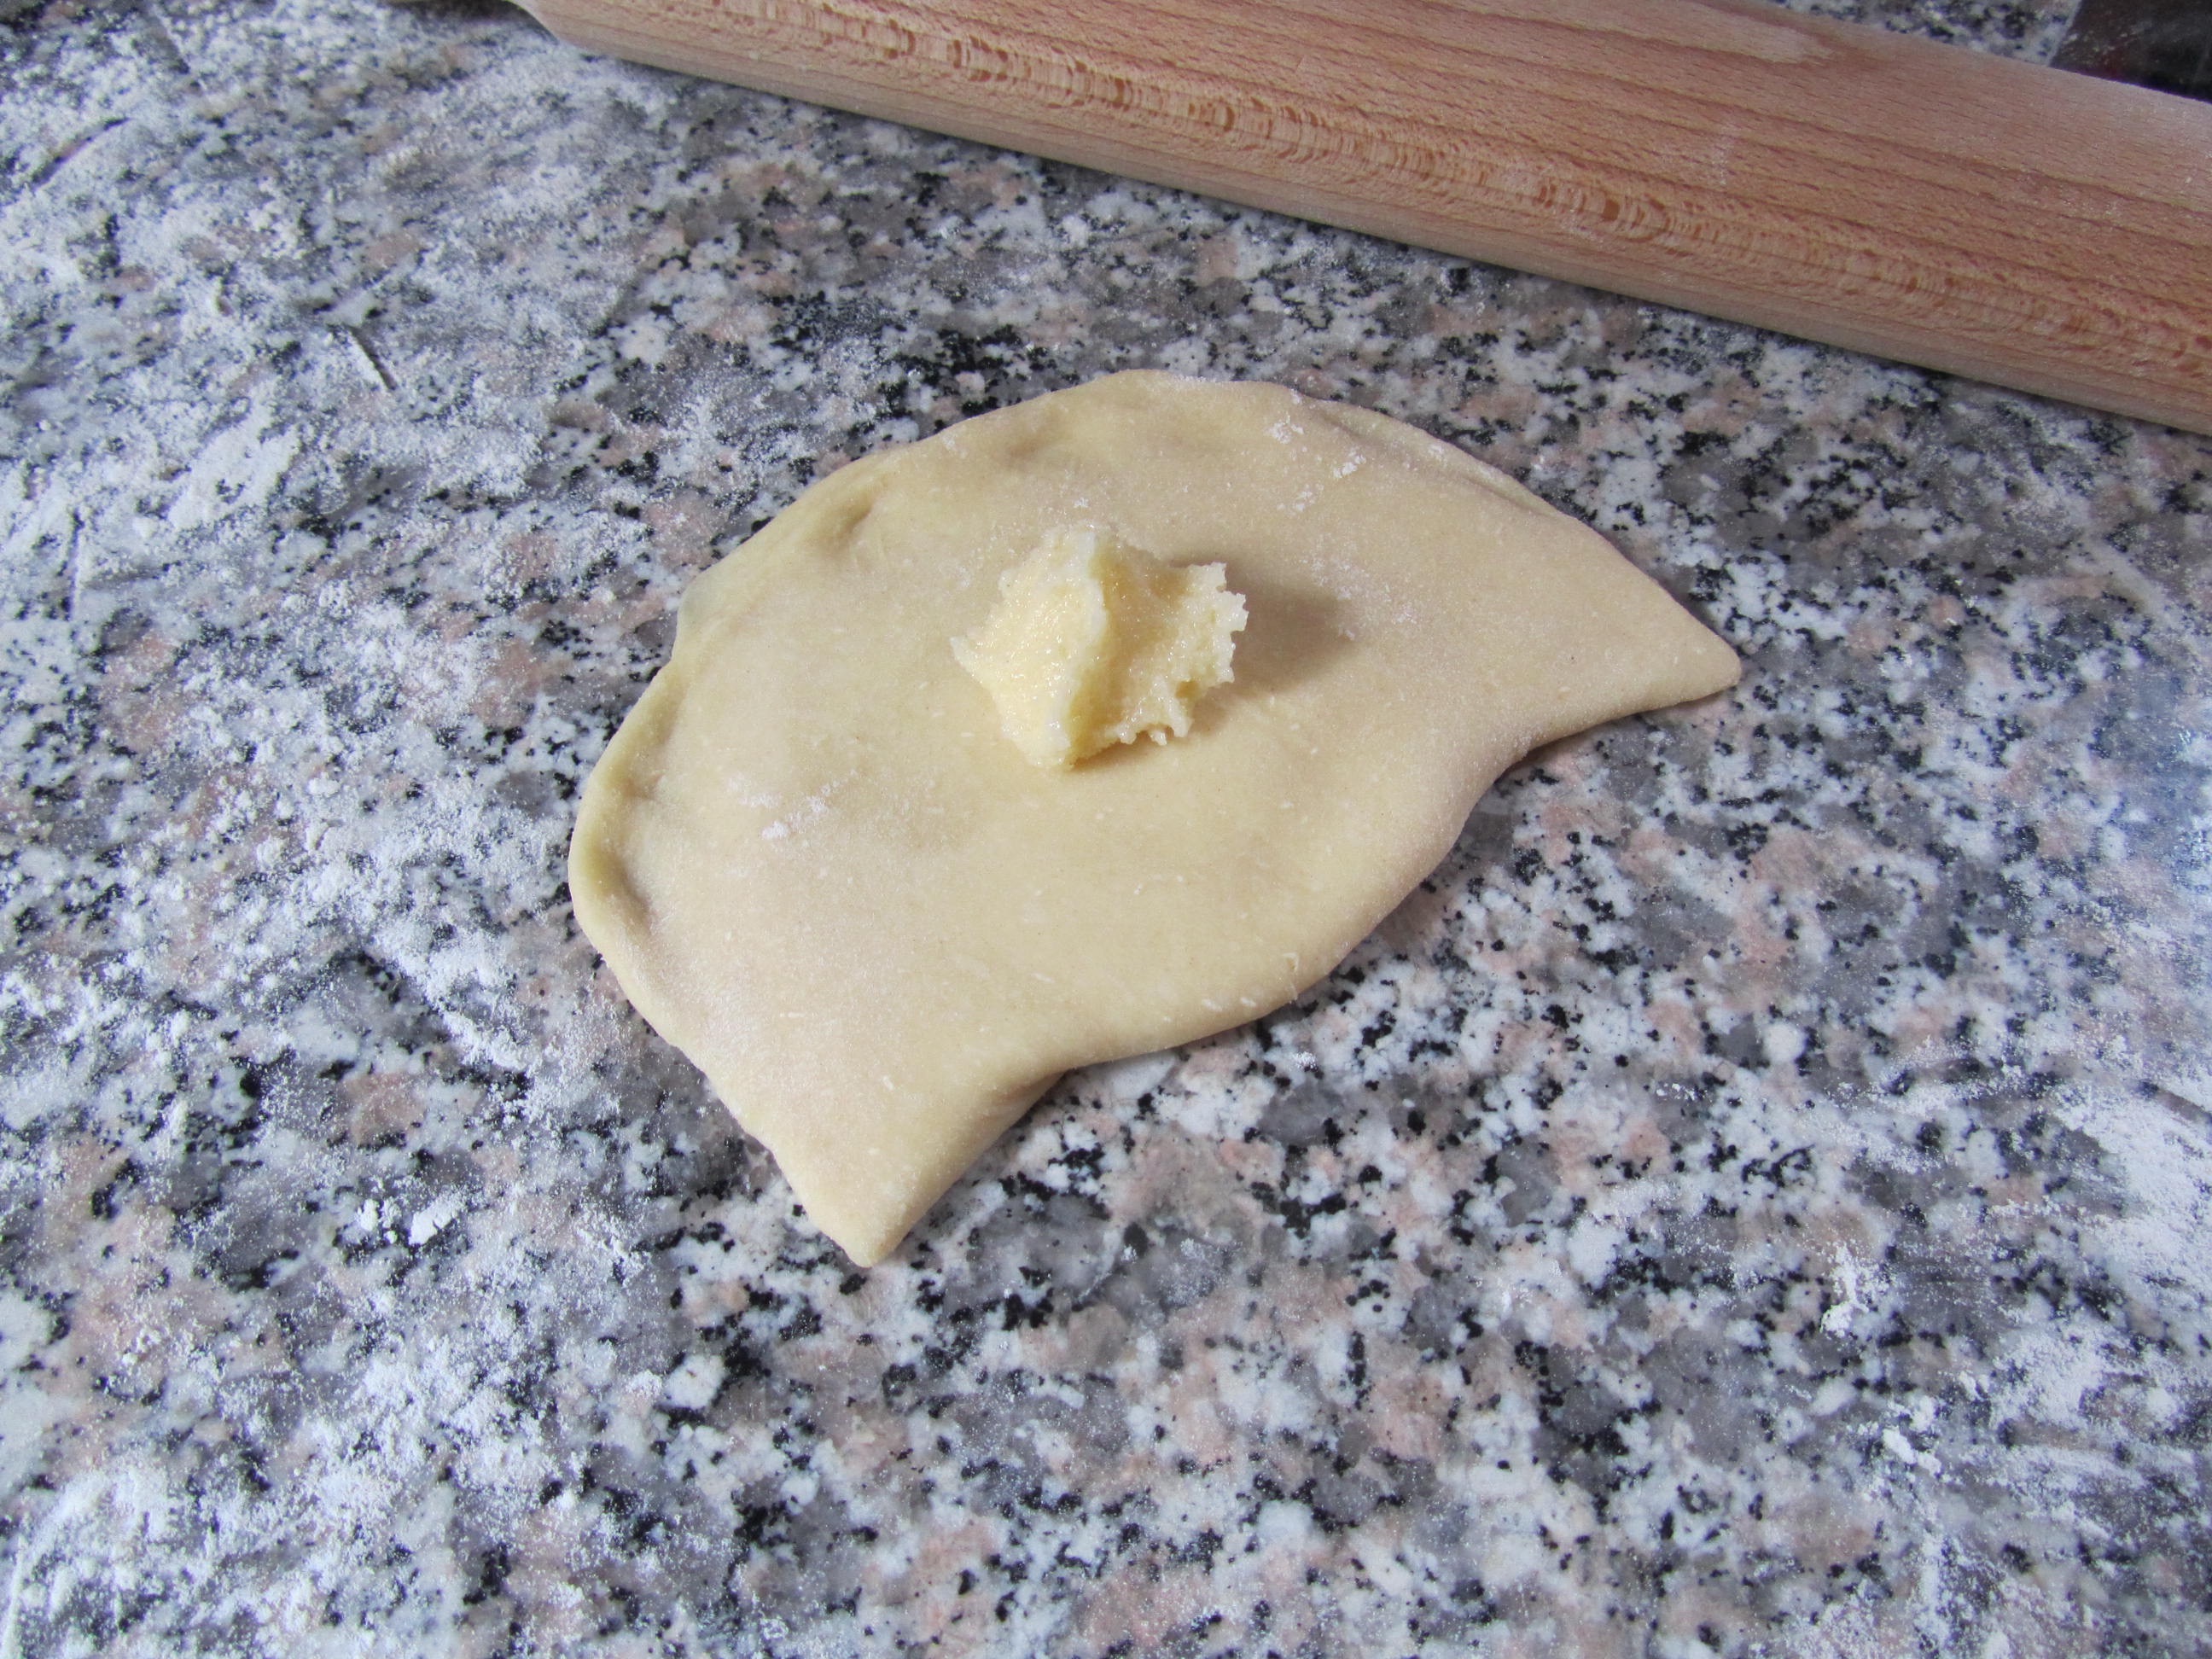
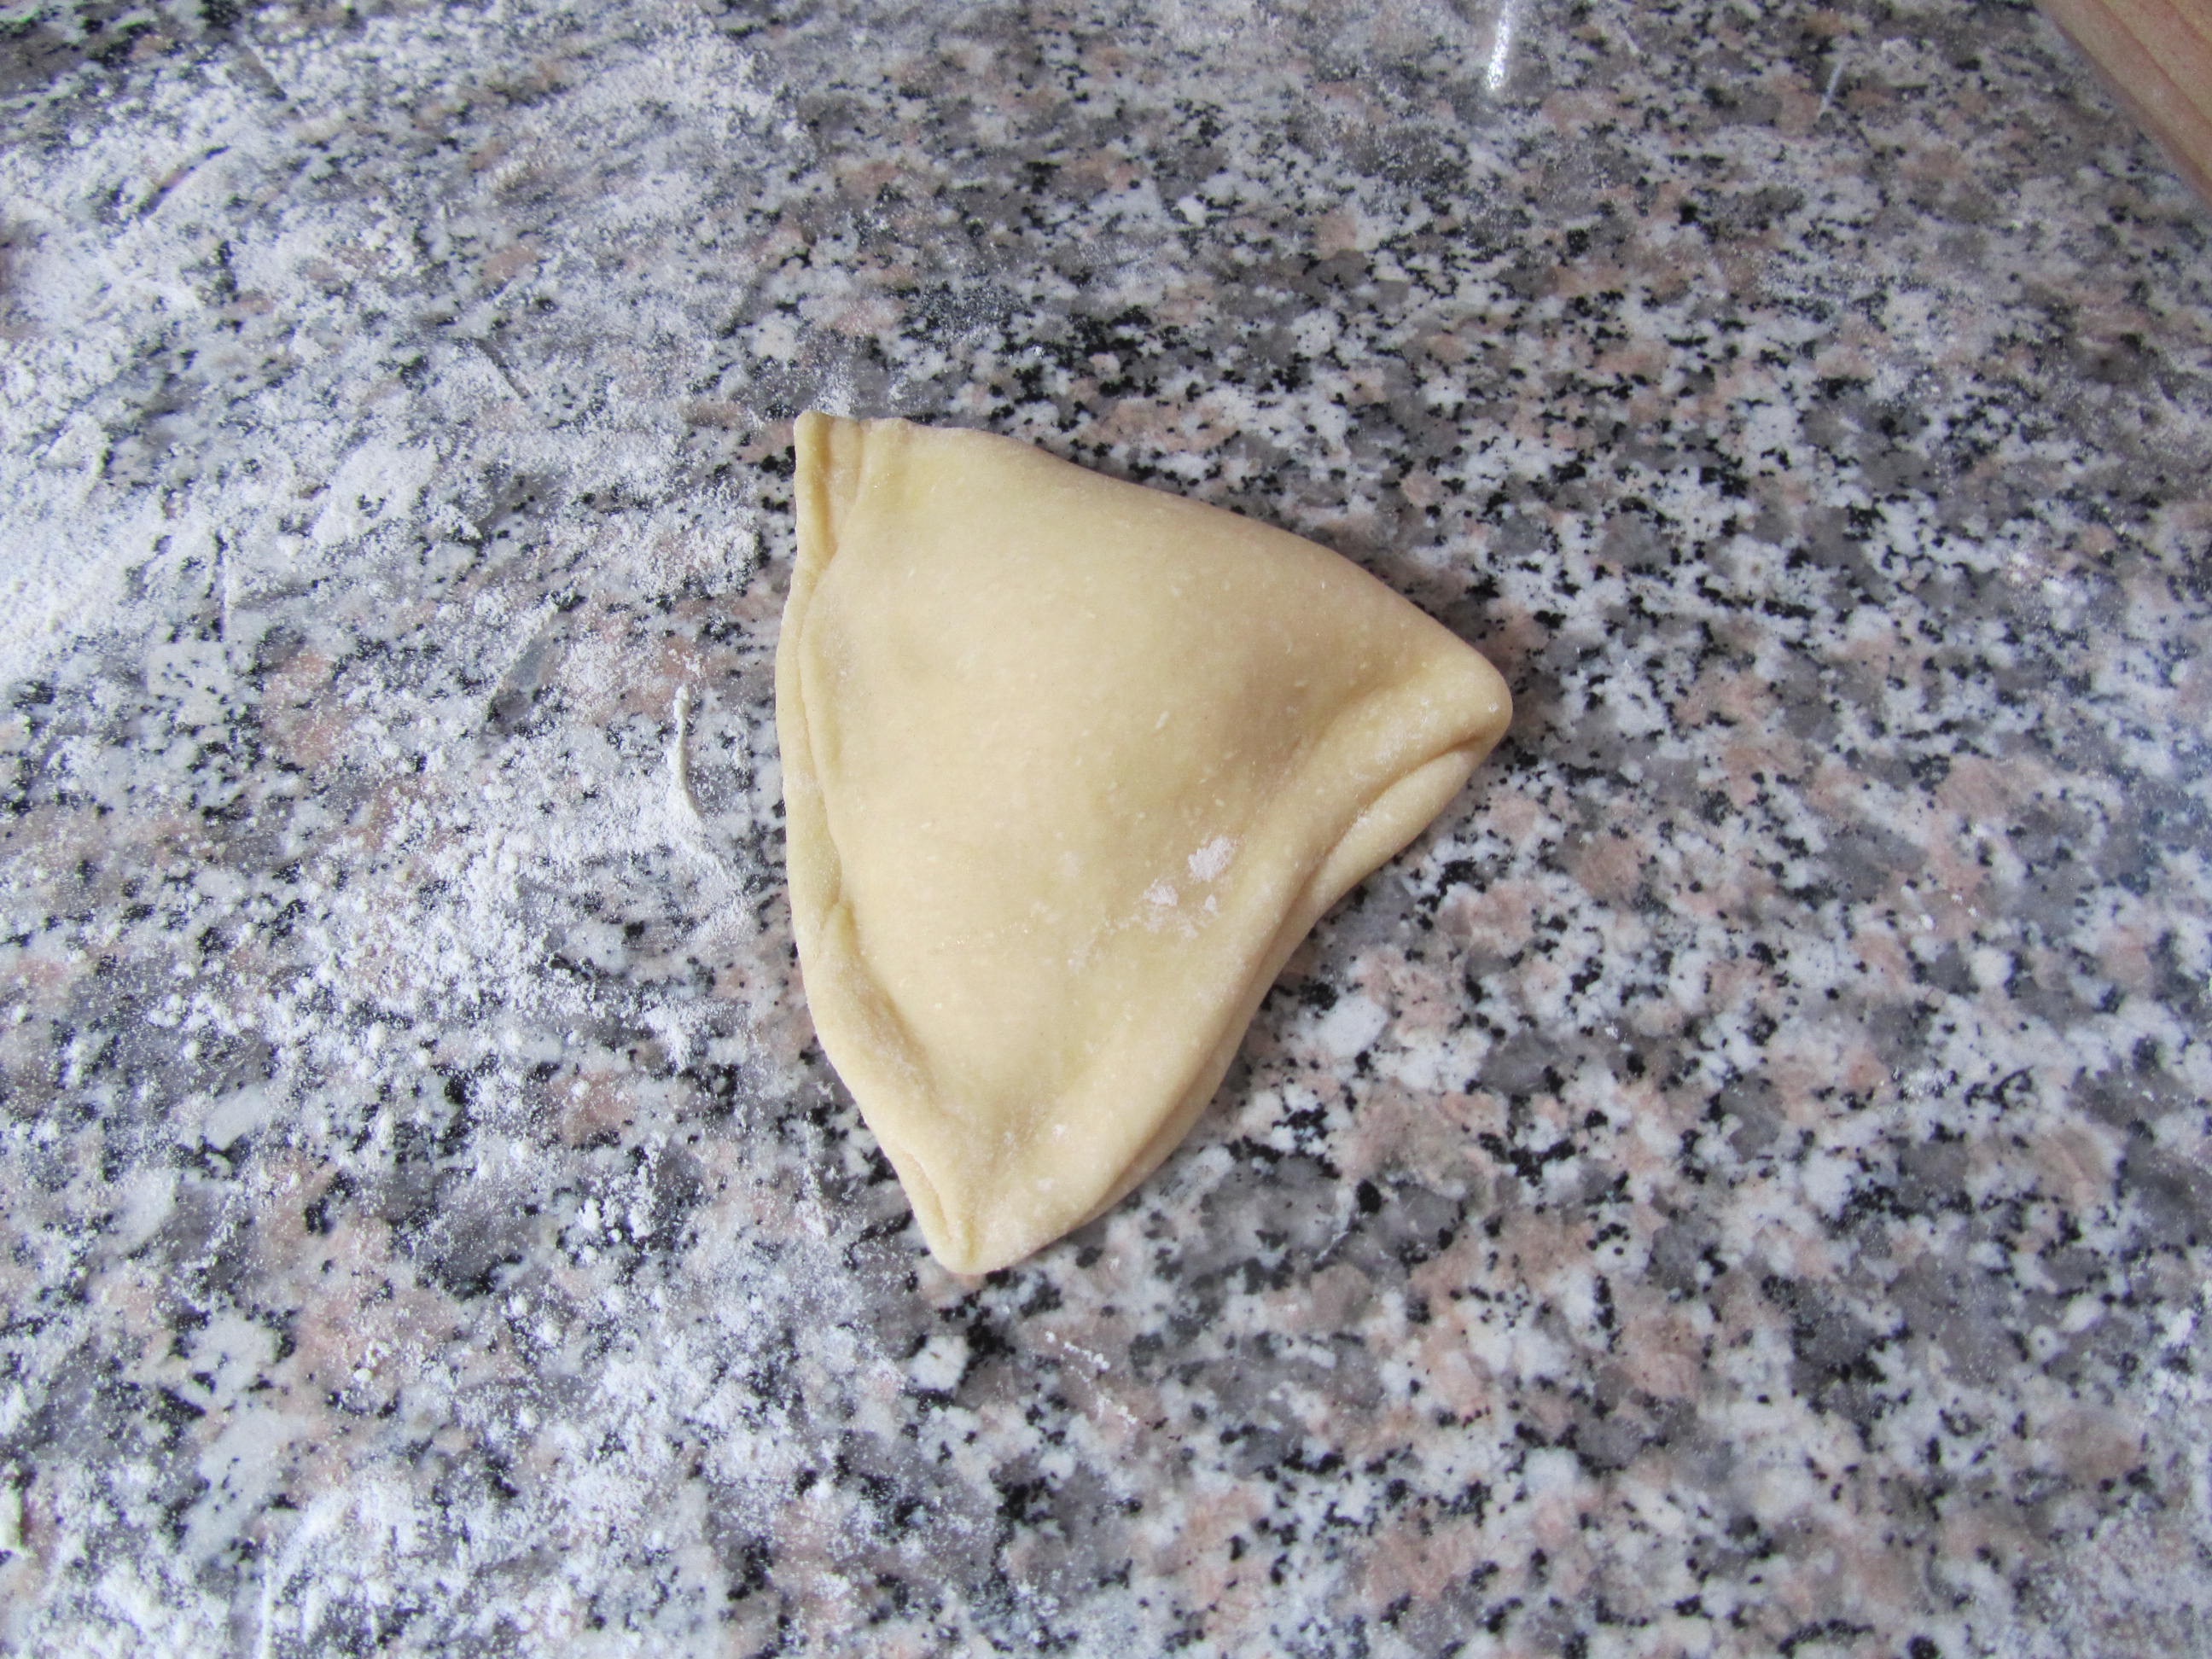
Once the dough has doubled in volume, take it carefully out of the bowl onto a lightly floured surface. Roll into a sausage shape and cut into ten equal pieces. Roll each piece into a ball. Take one ball and roll out thinly into a circle. Place a teaspoon of the filling mixture in the middle of the circle. Fold over the circle to create a semi-circle. Flatten the dough over the butter and press the seam down well. Place a second teaspoon of the filling in the middle of the semi-circle. Fold the dough over to create a triangle. Flatten again and press the seam well (See pics below). Place onto a lightly greased tray and repeat with the other balls of dough. Leave to rise for 20 -30 minutes. Place on the floor of the roasting oven of the Aga, or onto the middle shelf of an oven preheated to 200°c, gas mark 6 for 15 minutes until golden. Glaze the buns whilst hot with the sugar and milk using a pastry brush. Leave to settle on the tray for ten minutes, in this time they will have sucked back up some of the sugary butteriness that has oozed out, and then lift onto a wire rack to cool completely.
The girls have broken up from school and seven weeks of freedom stretches ahead of them. What halcyon days… I remember them well, the sheer loveliness of being able to roam and suit myself and the sun always seemed to be blazing. But I might remember it differently from the actual reality.
What this means for me, of course, is that I will be here less often probably. We will be baking and cooking, I just won’t have the time to tell you about it.
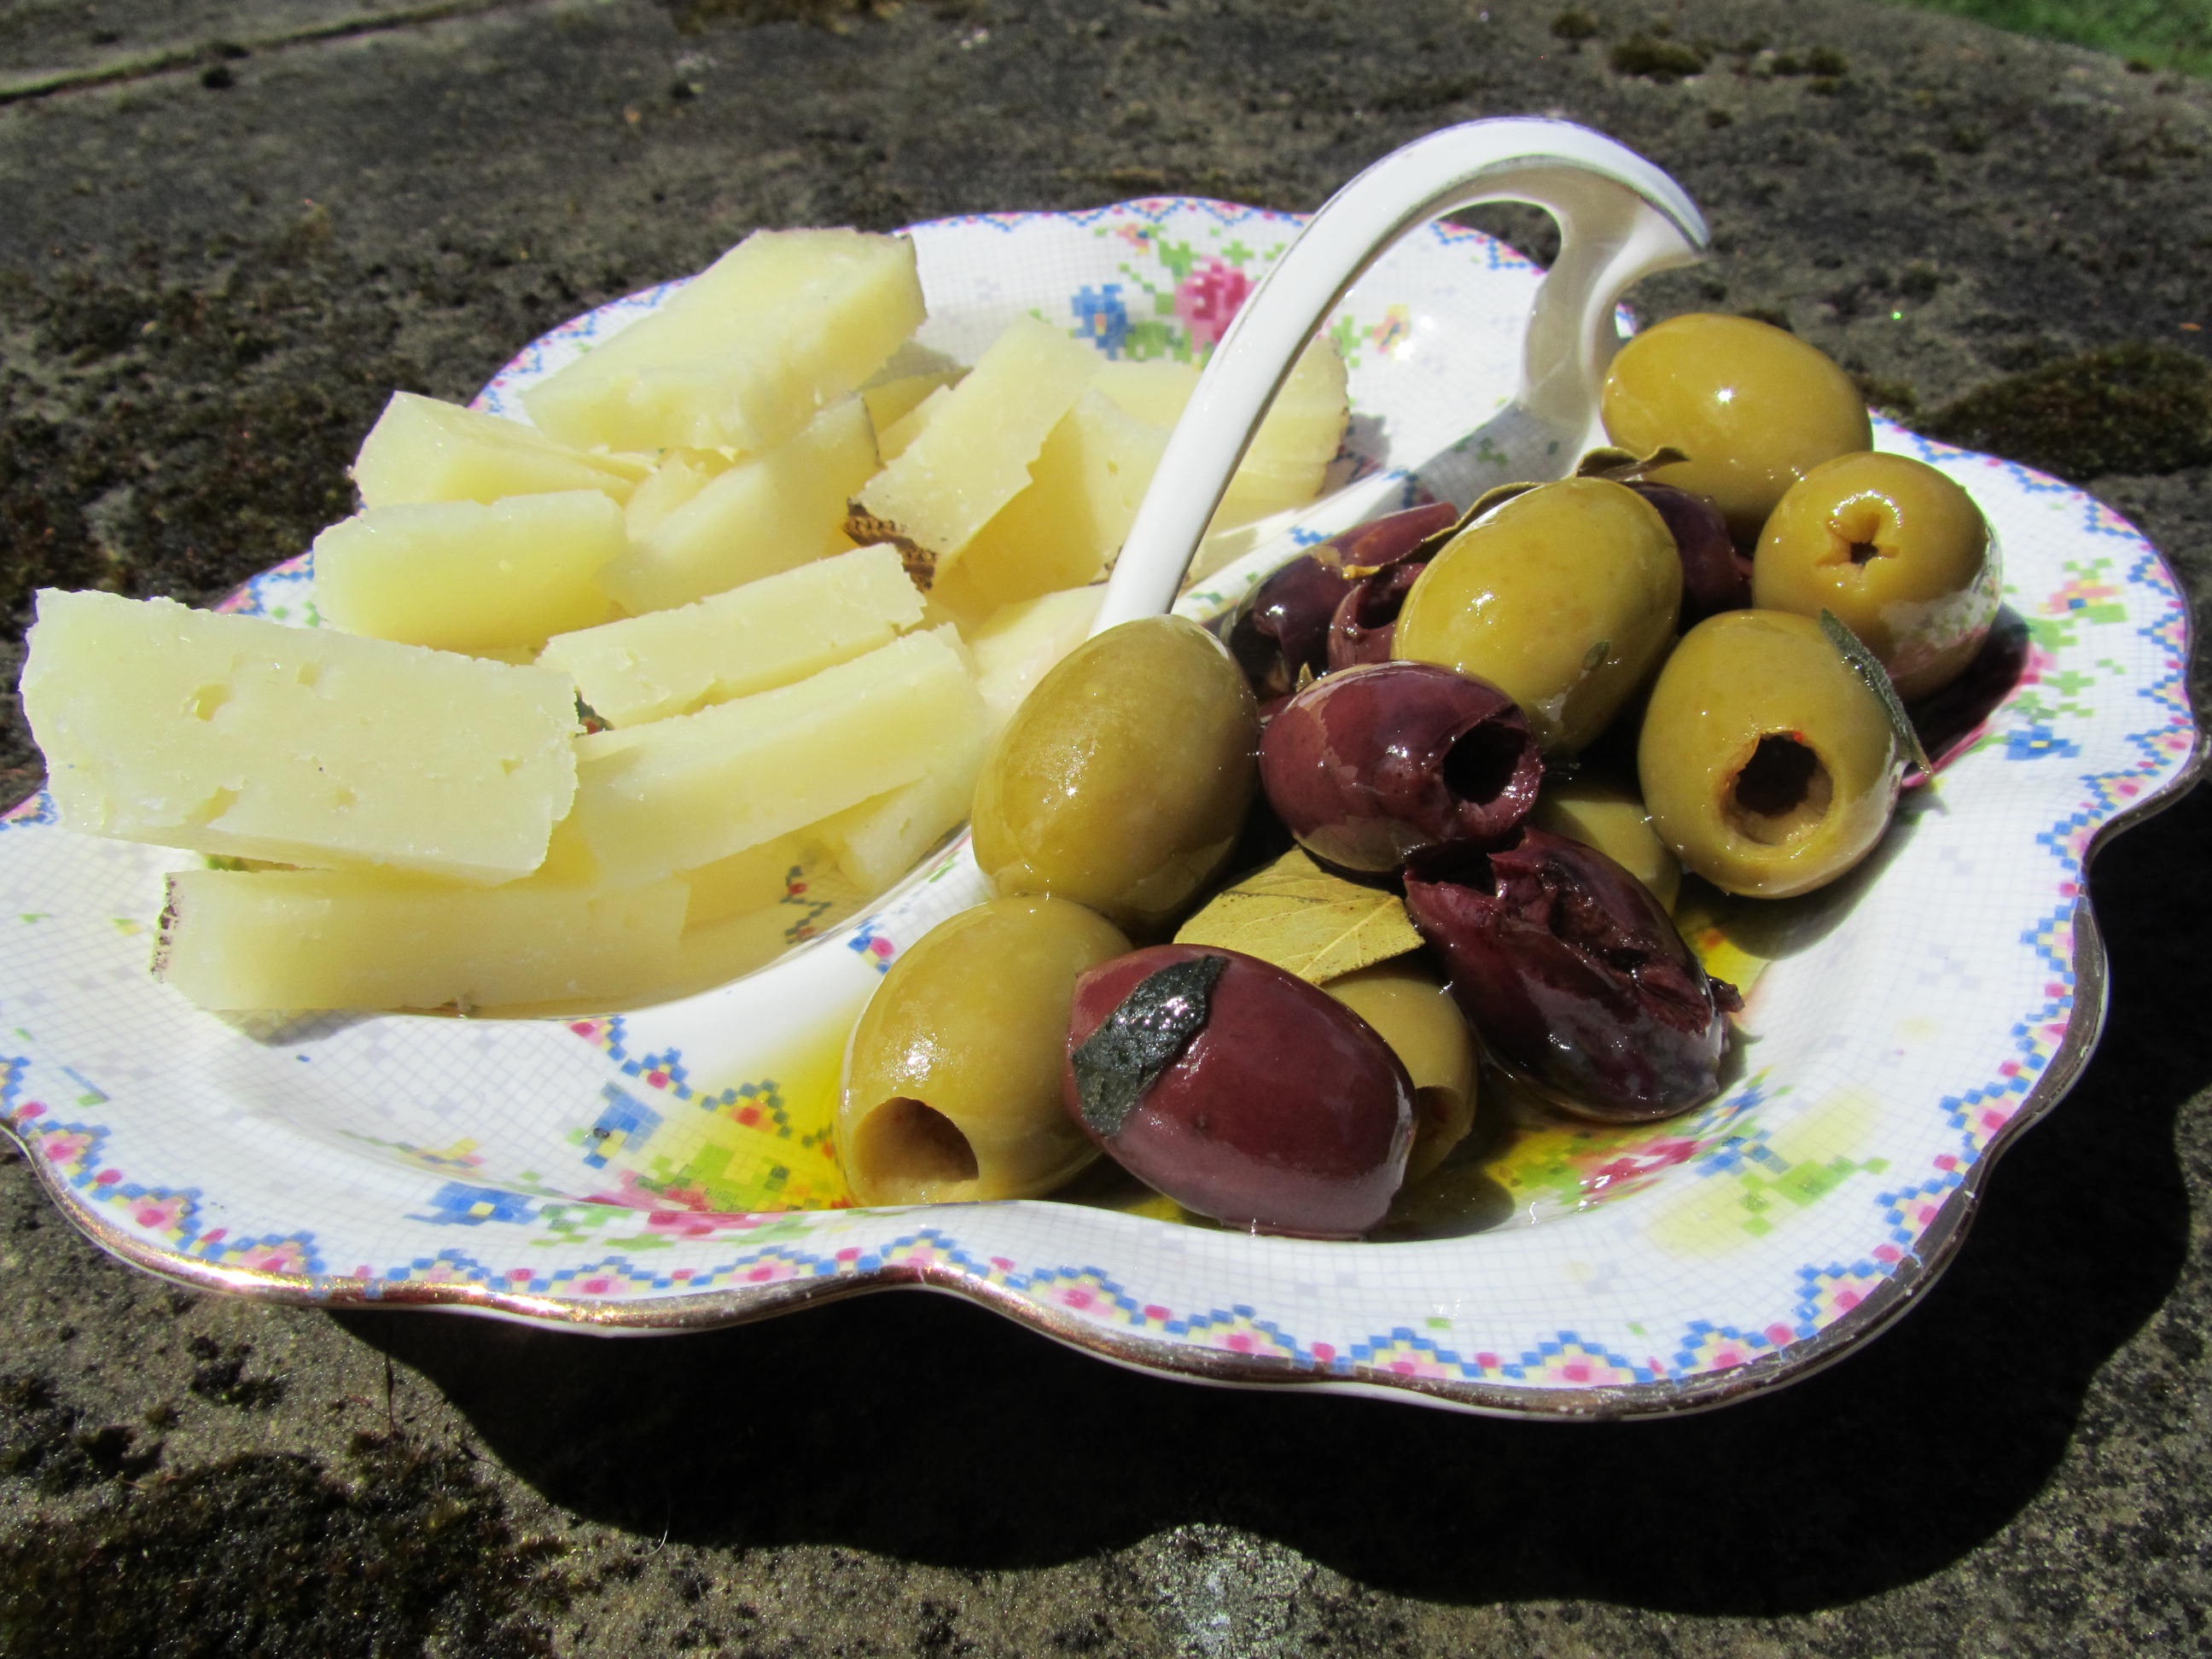
Before the school term ended a few of us mums took the chance to have a sneaky afternoon of eating in my garden. It was really lovely. It was a friend’s birthday, so the perfect excuse for all of us to indulge. Everyone bought something along to share and a proper feast was set before us. I made the birthday cake, a lemon one, as requested, and I dipped into Rachel’s book and made her marinated olives. I am not going to give you the recipe because you really, really should buy the book as it is wonderful and full to the seams with things you will want to cook. I served the olives with manchego cheese, which paired perfectly.
These cookies came about because I love peanut butter. I eat it off a spoon straight out of the jar. I felt like making peanut butter cookies, but because I like it so much there is not enough left in the jar to make biscuits. I did have a bag of hazelnuts in the cupboard though.
I am pleased that I didn’t have enough peanut butter as these are really, really very good, chewy and dense biscuits.
Makes about 16
200g hazelnuts
50g butter, softened
100g soft light brown sugar
1 small egg (mine weighed 45g)
50g white spelt flour (or you can use plain flour)
Method
Spread the hazelnuts on a baking tray and place into a preheated oven at 200°c, gas mark 7, or on the floor of the roasting oven of the Aga for about 3 minutes until toasted. Turn the oven down to 180°c, gas mark 4. Place a clean tea towel into a bowl, spread out to catch the nuts (this keeps the nuts from escaping onto the floor). Gather the nuts in the towel and rub them vigorously. Most of the skins will rub off. Pick out the nuts from their skins. Place 150g of the nuts into a food processor and blitz until really fine. Add the butter, sugar and egg and whizz until combined. Add the flour and whizz again until combined. Add the remaining 50g of hazelnuts and whizz until the hazelnuts are broken up but still chunky. Take a chunk of the dough that’s about the same size as a walnut. Roll into a ball and flatten slightly. You can use the tines of a fork to mark a pattern if you like. Place onto a greased baking tray and bake in a preheated oven at 180°c, gas mark 4, or the centre of the baking oven for 12-15 minutes until golden. Place on a wire rack to cool.
When I picked the elderflowers yesterday the first thing I made was a vinegar scented with elderflower. I used white wine vinegar, which has quite a strong vinegar taste to it. Now that it’s infused when you take a big sniff you get the vinegar first with a delicious waft of the sweet, intoxicating scent of elderflower at the end. It is really good in salad dressings. We had some last night on our bagged salad and I have just sprinkled some on my lunch of melon, strawberries and goat’s cheese with a glug of olive oil. It is delicious and delicate and well worth making. It is very easy to make. The hardest bit is sterilising the bottle (and that’s hardly hard) and if you use the bottle that the vinegar came in you don’t even need to do that.
350 ml – 500ml white wine vinegar
5- 6 elderflower heads, carefully picked and checked for insects
Method
Pour the vinegar into a non-reactive pan (stainless steel) and place the elderflower heads in the vinegar. Heat gently until just hot. Do not allow it to boil. Remove from the heat and leave to cool. When cool remove the elderflower heads and sieve the vinegar through some muslin to make sure that any stray insects are removed. Pour into a sterilised bottle or back into the bottle the vinegar came out of.
I haven’t made jam for a long time. I keep meaning to fetch some damsons out of the freezer, but I always find that something else has jogged its way to the top of my to-do list. This morning though, our broadband connection was down. The horror! It’s only when you don’t have the internet that you realise how much you use it. I decided to change my plans and I remembered that when I had gone to feed the chickens yesterday that I had thought about the elderflowers being ready. I was chatting at the weekend about elderflower champagne. I decided it was now or never.
I went out in my sandals (why do I always do that?) to forage. The tree by the chickens wasn’t very fruitful. I managed a couple of sprigs, but realised that this is probably the tree that the jackdaws sit in waiting for their opportunity to do their own foraging in the chicken corn. There was just too much bird poo. So I ended up half way down a steep, fairly muddy bank in my sandals precariously reaching for the best blooms.
You have to take great care when picking elderflowers. Not only do I suggest your wellies or a pair of sturdy shoes, but that you very gently grasp the bloom and snip carefully. Carry said bloom with care to the waiting bowl and gently lay it in there. When you are ready to use them do a thorough examination for insects and carefully lift any off. Do not be tempted to give the blooms a shake. The sweet scent of the elderflower is captured in its pollen and it is this that you want in your jam/cordial/champagne/ vinegar. No matter how careful you are when you pick them a cloud of pollen will still be released, reminding you to be even more careful with the next snip, whether you are threatened with tipping yourself down that steep bank or not.
I bought my elderflower heads inside and wondered what I should do with them. I have made elderflower cordial before and I love it, but I fancied something a bit different. I fancied a scented vinegar, so I started with that (recipe to follow in another blog post) and then I thought about the gooseberries that Mr OC and I had been admiring in our garden on Saturday. Mr OC had mentioned gooseberry jam. I took that as a hint. Out I went, still in sandals, to tackle the gooseberries. Those little bushes really don’t want you to take their fruit. Several exclamations later I emerged with just over 1 kilo of gooseberries and my hands prickled and thorn ridden. There are plenty left to ripen further for a fool or an ice-cream. Perhaps gloves might be an idea next time.
The resulting jam is heavenly. It has a sherbet fizz to it, that makes your lips pucker, ever so slightly, then the heady scent of elderflower and the sweet tang of gooseberries. If someone were ever to ask me what the colour green tastes like I would say this jam, after wondering whether they required help. The jam itself has a rose hue to it that just makes you feel happy. I am glad the internet was broken this morning.
Makes 5-6 random sized but about 300-400g jars
1kg gooseberries, topped and tailed and washed
6-8 elderflower heads, carefully picked and carefully inspected for insects
500ml of water
1 kg white sugar
Method
Place the topped and tailed gooseberries in a jam pan or large saucepan, pour over 500ml water and place the elderflower heads on the top. Bring the water to a gentle simmer and cook until the gooseberries are soft but still whole. Remove the elderflower heads (which will have gone brown in the heat). Add the sugar and stir until dissolved. Bring the jam to a rolling boil and boil until the jam is set. To test, place a couple of saucers in the freezer to get really cold. After nearly ten minutes of boiling spoon a little of the jam onto a cold saucer and leave for a minute. Push the tip of your finger through and if the jam wrinkles it is set, if not leave to boil for a few minutes more. My jam took about 15-18 minutes today and it is very softly set, which is the way I prefer it. Leave the jam to cool in the pan for 10 minutes and then spoon into warm sterile jars and seal.
To sterilise my jars, I wash them really well in soapy hot water, rinse really well in clean water. Place on a baking tray and place in a low oven for twenty minutes. I then fill them as soon as they come out of the oven.
We are off to a friend’s straight after school tonight so I have made these brownies to take with us for a treat. I have also asked one of the students attending Sunday’s bread making course for cake requests and brownies are at the top of her cake list. It made sense then, to trial these and cook again on Saturday, ready for Sunday.
They are an adaptation of Ruby Tandoh’s excellent Salted Milk Chocolate Brownies from The Guardian Cook section published on 7 February this year. I can’t resist fiddling with recipes so I have added peanut butter, used dark chocolate instead of milk and used half and half of caster sugar and soft dark brown sugar. I have also swapped the plain flour with wholemeal spelt.
When I made Ruby’s brownies the first time, (with just a few changes), it became quite clear that by sprinkling sea salt on the top of these beauties just makes them even more tempting and addictive.
If you have a fancy for a gooey, deeply chocolatey, salty and nutty cake (and who wouldn’t?) get your teeth wrapped around one (or two, or three) of these.
Makes 9 brownies
175g unsalted butter
150g dark chocolate
50g cocoa powder
100g caster sugar
100g soft dark brown sugar
3 eggs
50g wholemeal spelt flour
¼ tsp fine salt
About 100g crunchy peanut butter
Sea salt flakes
Method
Melt the chocolate and the butter together in a bowl over a pan of barely simmering water. Stir in the cocoa powder. Leave to cool slightly.
Whisk the sugars with the eggs in a large bowl until the mixture is thick and doubled in volume.
Pour the chocolate mixture onto the egg mixture and fold carefully together until well mixed. Add the flour and the salt and fold in. Pour the batter into a foil lined 20cm square cake tin. Drop blobs of peanut butter into the batter and swirl with a skewer. Sprinkle the sea salt flakes over the top.
Bake in a preheated oven at 180°c, gas mark 4 for 25-30 minutes or in the Aga’s baking oven with the rack set on the bottom rung for 20 minutes until the brownie is crusted on top but still has a bit of a wobble. It should be undercooked so that when it cools it is fudge and dense in texture with a crust.
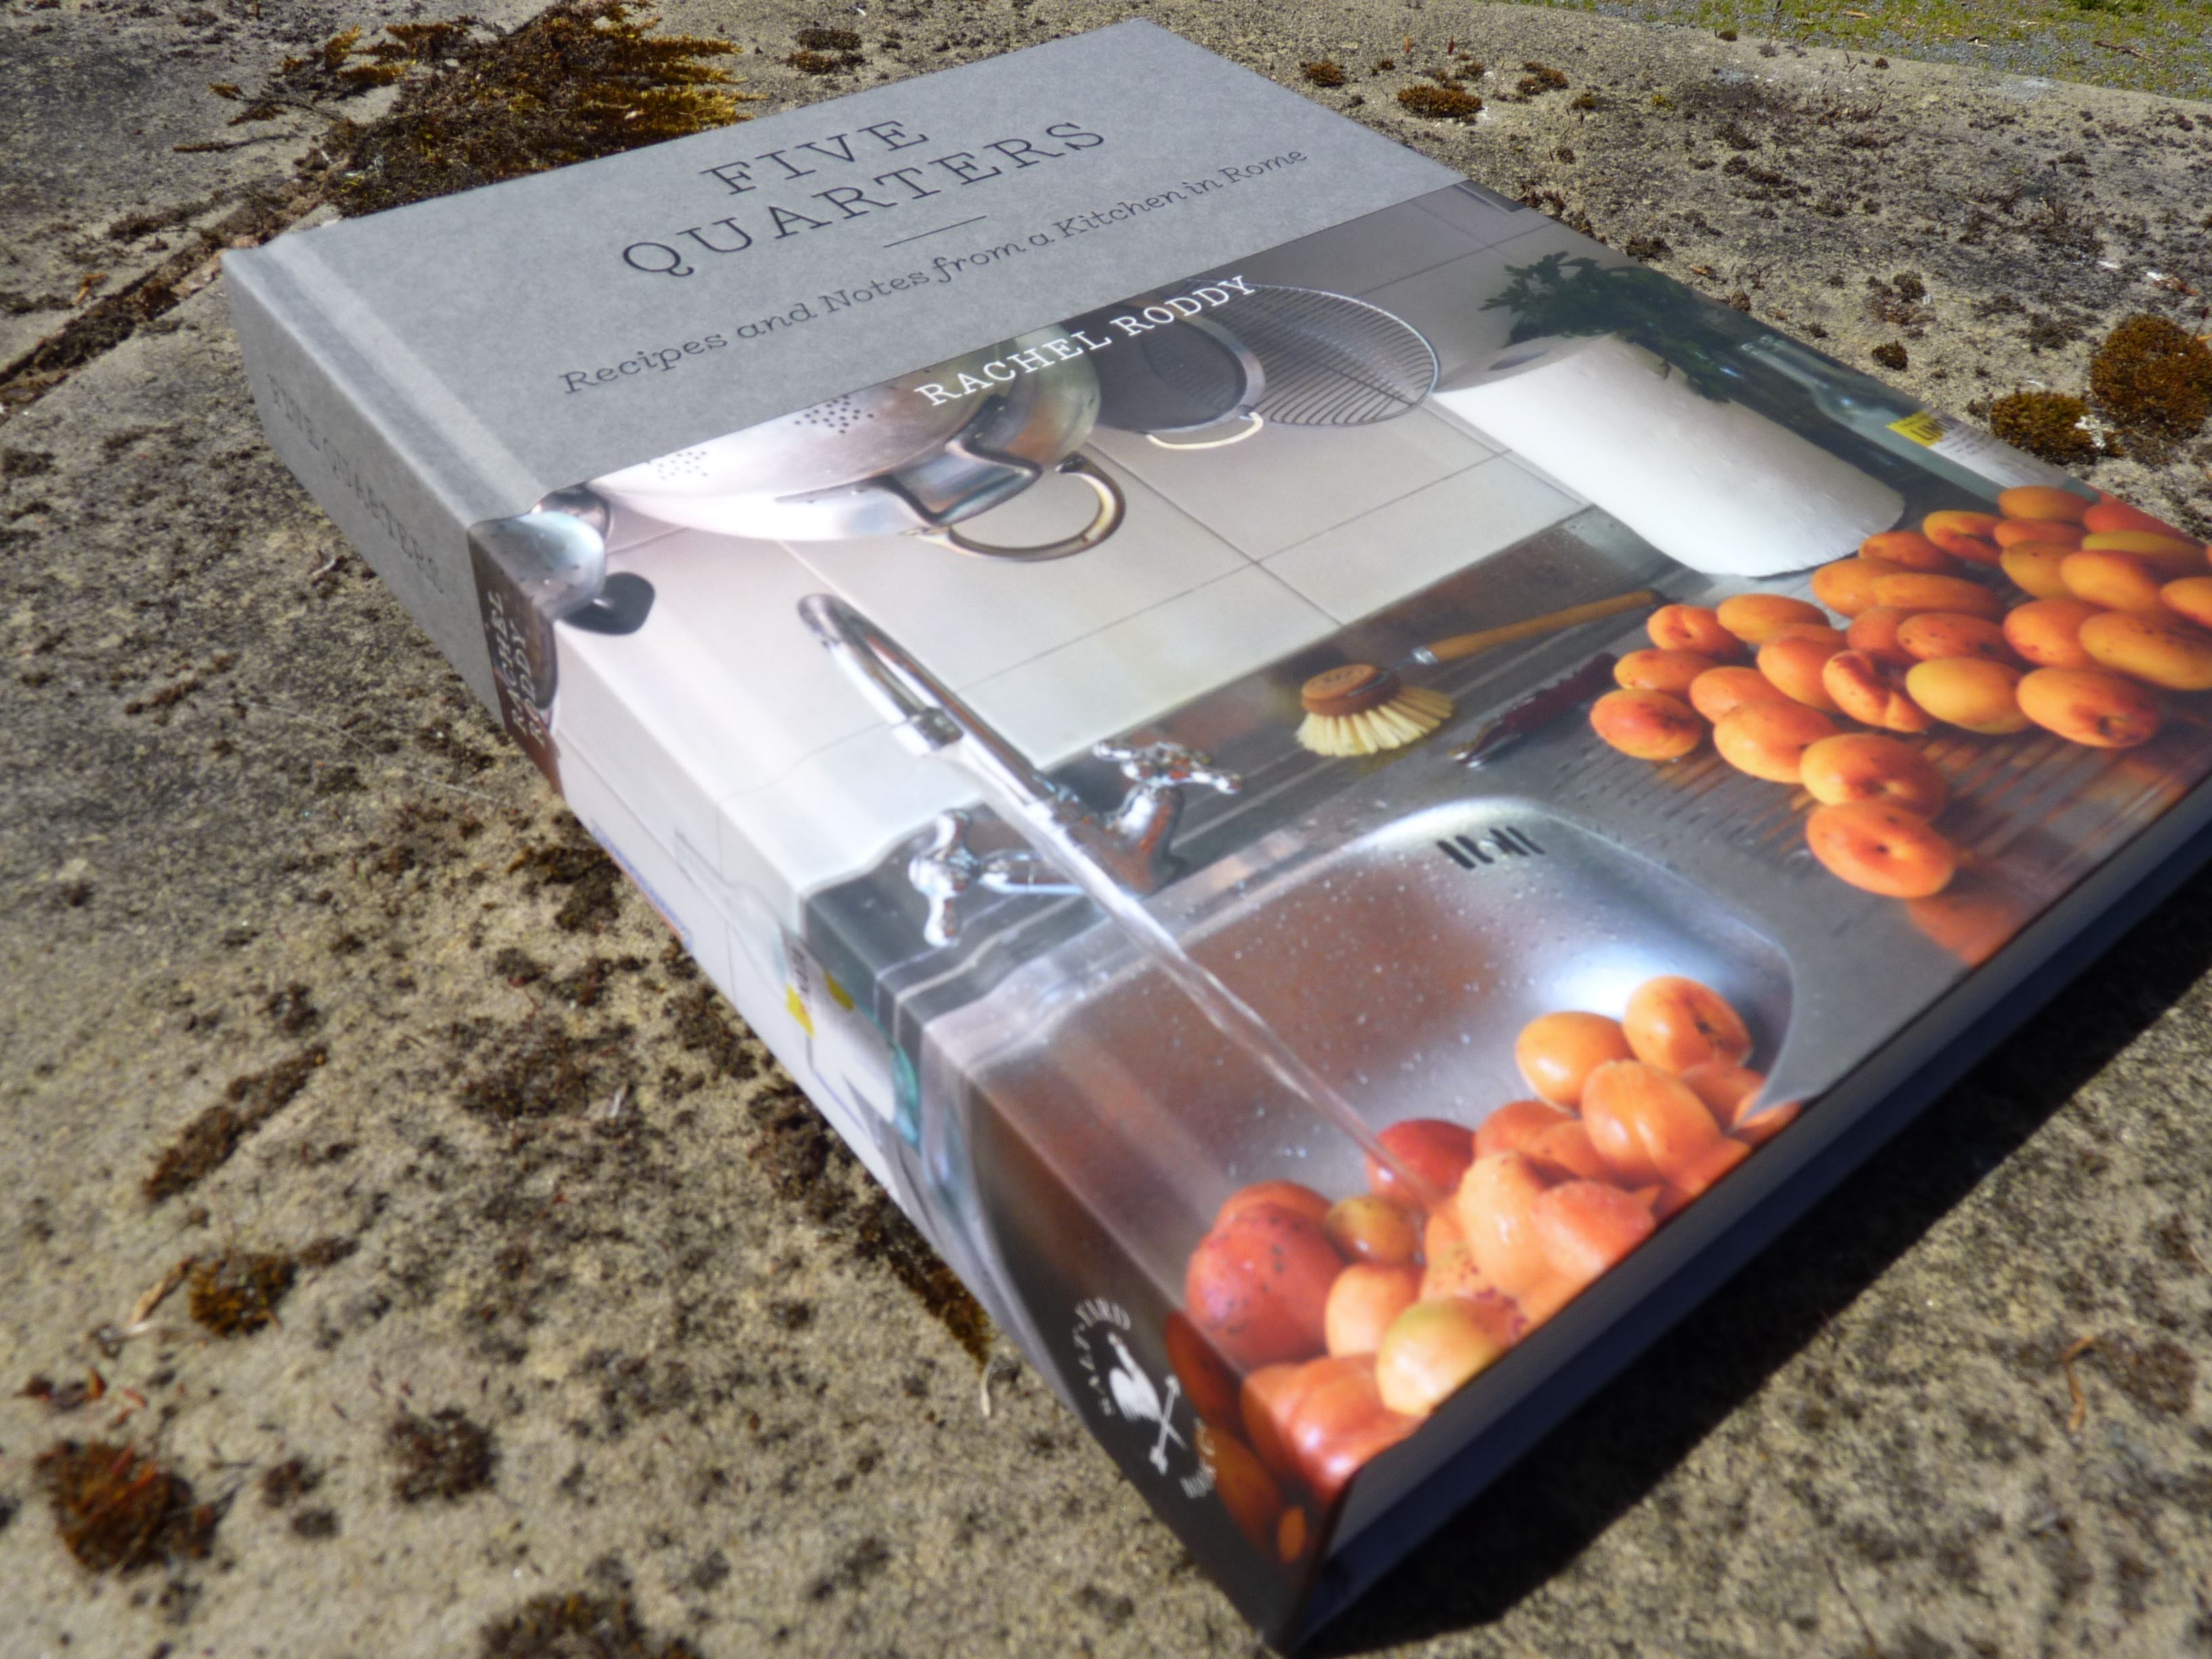
Five Quarters, Recipes and Notes from a Kitchen in Rome, Rachel Roddy
Look what I have!
I have been waiting for this book for six years. I found Rachel’s blog when I first started digging round in this world of food blogging. I happened to click on a link from somewhere and I was captivated. I sat there and just read and read. Rachel’s writing is beautiful, inspiring and grabs you. I don’t think she has ever written a post that I have just scrolled down to get to the recipe. You feel the need to read every word. She makes you smile, laugh and very occasionally want to cry. She makes you feel as if you are sitting right there, at her kitchen table, listening to her and watching her as she assembles yet another delicious plateful of food. If not at the kitchen table, then on the chair that used to prop open the door.
The more I read, the more I want to read. I kept asking when she was going to write all of this in a book… and here it is.
So tonight, the tea might not get cooked and the husband might get ignored. I will be reading.
As we were shopping yesterday I spotted how reasonably priced a large punnet of blueberries was and couldn’t resist. I had some on my yoghurt for my first breakfast (this usually takes place at about 6 it, it was a bit later this morning) and then on some porridge for my second breakfast (usually about 9.30-10ish). I know I am greedy. I felt the need, this afternoon, to make muffins with them. I have made 24 small muffins and I will freeze most of them and pull out a couple each day to put into the girls’ lunchbox. They will either eat them or they won’t. I will find out when it comes to emptying their lunch box. Be assured though that just because my girls may leave them languishing in their lunch box doesn’t mean that they aren’t delicious, because they are.
As I was about to search for recipes I noticed that Choclette has made some very delicious blueberry and lemon cupcakes with an outrageously purple icing, which you must take a look at.
These muffins are ones that even I can eat without feeling guilty, as they are made with spelt flour. This new diet that I have undertaken has really pointed out to me how rubbish I am at excluding foods in my diet. I have been quite strict about not eating bread for the past two weeks, so that I cut down my consumption of wheat. Then this morning we popped into a café and I found myself eating a scone. Honestly, I am rubbish. I found this my being rubbish at food exclusion out when I was pregnant. At the time pregnant women were advised to not eat peanuts. I thought I had done a really good job of this until I thought about all the bowls of Crunchy Nut Corn Flakes and Snickers bars I had eaten. Honestly, I am rubbish!
So here is the recipe for the muffins that the girls will be eating (or not) for their lunches.
150g white spelt flour
70g wholemeal spelt flour
120g soft brown sugar
1 tsp baking powder
½ tsp bicarbonate of soda
220g melted butter
3 eggs, beaten
100ml greek yoghurt
200g blueberries
2 tablespoons of demerara sugar and 1 tsp ground cinnamon mixed together
Method
Mix the flours, sugar, baking powder and bicarbonate of soda together in a bowl. until thoroughly mixed.
In another large bowl mix together the eggs, melted butter and yogurt until well mixed. Pour the dry ingredients into the wet ingredients and give a quick mix. Don’t be overzealous in the mixing, just enough to combine the ingredients. This will keep the muffins light. Add the blueberries and stir in gently.
Blob spoonfuls of the mixture into 24 cupcake cases or 12 muffin cases, sprinkle each one with a little of the demerara sugar mixture and bake in a preheated oven at 180°c, gas mark 4 or the middle of the Aga’s baking oven for 15 minutes. Leave in the tin for a minute or two, then cool completely on wire racks.
I love my food. I love baking cakes and eating them. I love chocolate. I love a roast dinner. I love vegetables picked in the garden and placed into a waiting, boiling pot. I love food.
I love writing this blog. It has given me purpose when I needed purpose. It has inspired me in the kitchen. It has given me a reason to spend more time in the kitchen. It has taught me new skills – cooking skills, yes, but also how to write one of these blog things. It has led to new, albeit virtual, friendships with people all over the UK and the world.
This year, the blog has faded a little into the background of my life and I haven’t given it the effort that it deserves. One of the reasons for this is the creation of Veg Patch Kitchen. My focus has been diverted into setting up the cookery classes.
Another reason though is that I have been struggling with food this past year. For about eighteen months, and perhaps with hindsight, a great deal longer, I have had stomach ache, back ache, bloating and a general feeling of sluggishness. On bad days I have had little energy for anything very much. My brain exists in a fug. Coherent thoughts become difficult. It has been frustrating. It has also been worrying. I have been wondering what was causing all of this. I have been through tests and thankfully nothing serious has been found. A possible diagnosis is Irritable Bowel Syndrome. Did I tell you that I love my food?
Now, I have to work out how to make myself feel better. I have to keep a consistent food diary so that I can work out which foods are upsetting my gut. I mustn’t do it for a week or two then get wrapped up in life again and forget about it. I must focus.
Food, a massive part of my life, has become something that is making me unwell. I have been researching online and found out about FODMAPS. These are foods that are not so easily digested and therefore should be avoided and guess what, wheat is on there. This means that I have to curb my bread obsession. I can still bake lots of bread for everyone else though and it certainly doesn’t stop me teaching others how to bake it, and I am continuing to enjoy my spelt sourdough as that is allowed in small doses. I am also trialling gluten-free bread making so that I can teach others, so maybe this will help too.
All in all, I hope this goes to explain a little about why so few blog posts have been appearing here. I have been baking, but mostly the cakes that are already an established favourite of the girls and most of them are already on here, although I must get round to posting my coffee and walnut cake.
Maybe, as a result of this The Ordinary Cook will change direction a little bit and less cakes and more savoury recipes will start to appear. Watch this space.
This website uses cookies to improve your experience. You can opt-out if you wish.AcceptRejectSettings
Privacy & Cookies Policy
Privacy Overview
This website uses cookies to improve your experience while you navigate through the website. Out of these, the cookies that are categorized as necessary are stored on your browser as they are essential for the working of basic functionalities of the website. We also use third-party cookies that help us analyze and understand how you use this website. These cookies will be stored in your browser only with your consent. You also have the option to opt-out of these cookies. But opting out of some of these cookies may affect your browsing experience.
Necessary cookies are absolutely essential for the website to function properly. This category only includes cookies that ensures basic functionalities and security features of the website. These cookies do not store any personal information.
Functional cookies help to perform certain functionalities like sharing the content of the website on social media platforms, collect feedbacks, and other third-party features.
Performance cookies are used to understand and analyze the key performance indexes of the website which helps in delivering a better user experience for the visitors.
Analytical cookies are used to understand how visitors interact with the website. These cookies help provide information on metrics the number of visitors, bounce rate, traffic source, etc.
Cookie
Duration
Description
_ga
2 years
The _ga cookie, installed by Google Analytics, calculates visitor, session and campaign data and also keeps track of site usage for the site's analytics report. The cookie stores information anonymously and assigns a randomly generated number to recognize unique visitors.
_gat_gtag_UA_11789200_1
1 minute
Set by Google to distinguish users.
_gid
1 day
Installed by Google Analytics, _gid cookie stores information on how visitors use a website, while also creating an analytics report of the website's performance. Some of the data that are collected include the number of visitors, their source, and the pages they visit anonymously.
CONSENT
2 years
YouTube sets this cookie via embedded youtube-videos and registers anonymous statistical data.
Advertisement cookies are used to provide visitors with relevant ads and marketing campaigns. These cookies track visitors across websites and collect information to provide customized ads.
Cookie
Duration
Description
VISITOR_INFO1_LIVE
5 months 27 days
A cookie set by YouTube to measure bandwidth that determines whether the user gets the new or old player interface.
YSC
session
YSC cookie is set by Youtube and is used to track the views of embedded videos on Youtube pages.