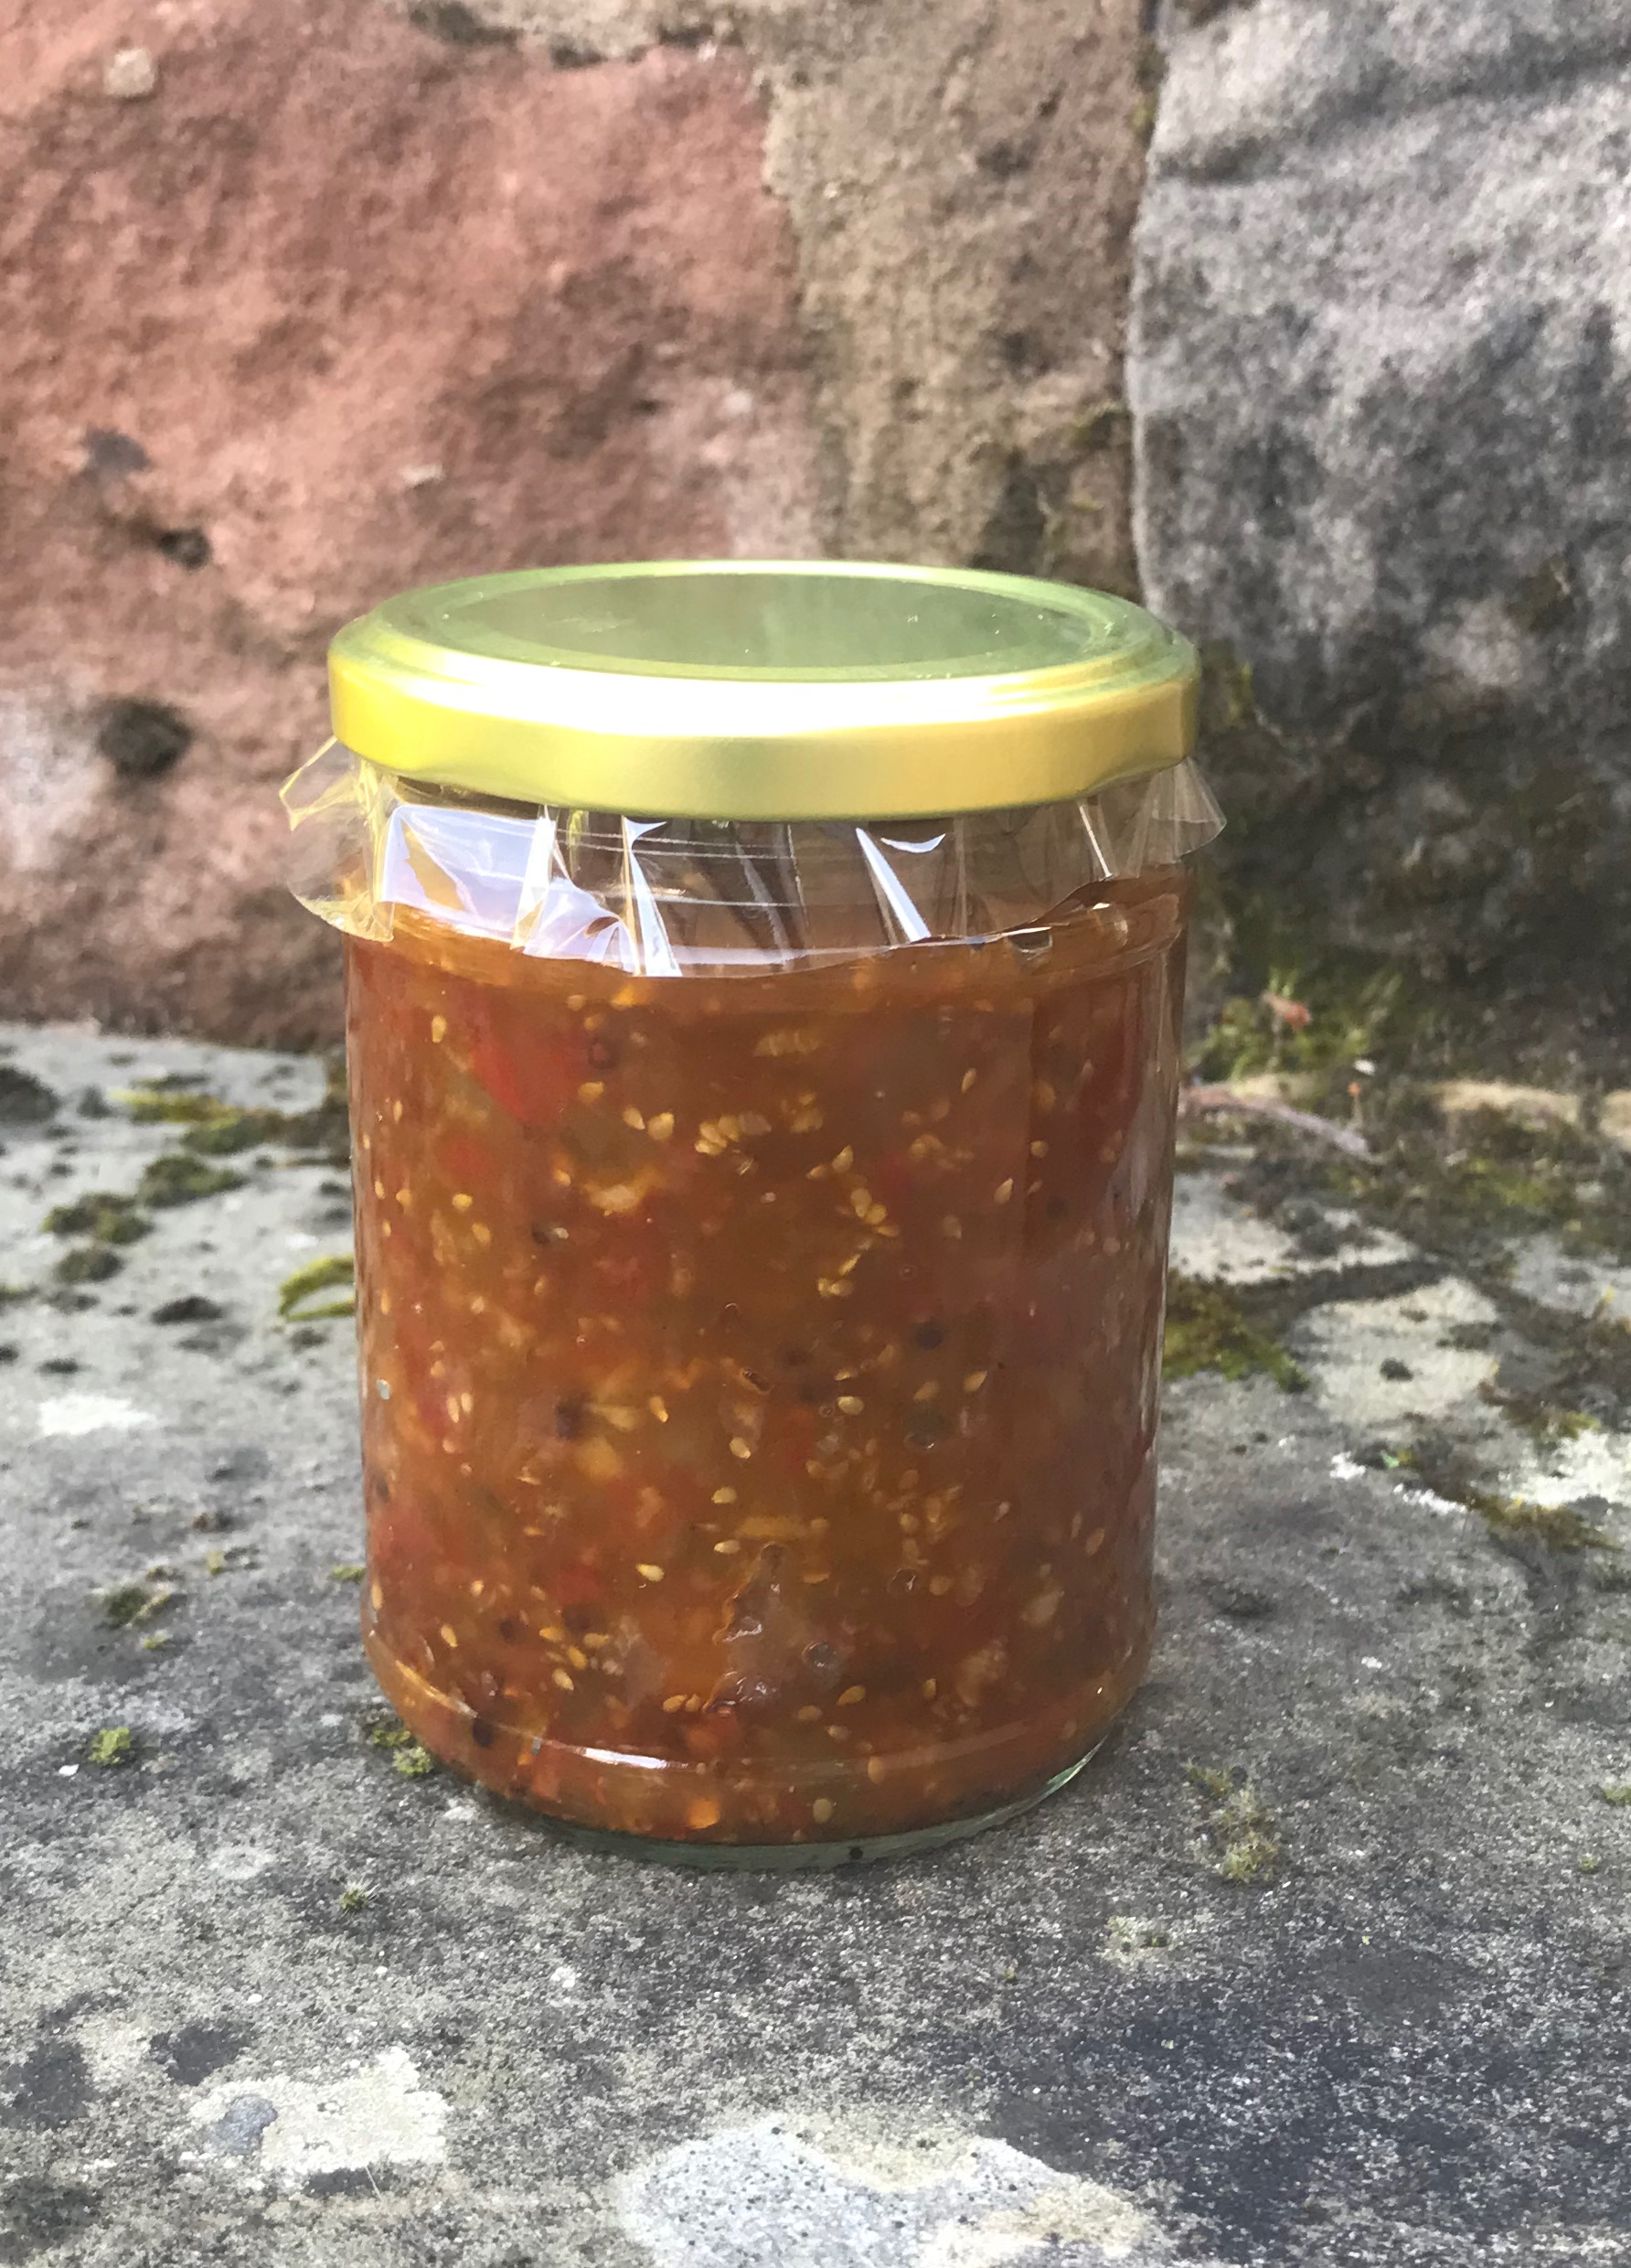
We cleared the tomatoes out of the greenhouse and they needed using up. I had a mixture of ripe and green tomatoes. This Chilli and Tomato Chutney makes perfect use of them.
I like to cook the onion in a little olive oil first to soften and sweeten it, but you can miss this step out if you prefer and just pop everything in a saucepan and simmer until thick.
Ingredients
I tbsp olive oil (optional, only needed if you want to sauté the onion first) 1 onion, chopped into small dice 4 garlic cloves half teaspoon of salt 4 chillis (deseeded) 5cm fresh ginger (root) 1 star anise 1tsp black mustard seeds 1 tsp coriander seeds 500g tomatoes (more or less, don’t worry if you have a few more or a few less than this) 250g sugar (you can use soft brown for a darker colour and stronger taste or granulated white) 150ml vinegar (you can use whichever variety you have in the cupboard, I used distilled white vinegar)
Method
If you would like to soften the onion, add the oil to a large pan over a medium heat and sauté the chopped onion until soft, translucent and beginning to colour.
Chop the garlic, chillis, ginger and tomatoes finely. I whizzed them in the food processor using the metal blade.
When the onion is ready add the star anise, coriander seeds and mustard seeds and fry for another minute then add the chopped garlic, ginger, chillis and tomatoes. Stir in the sugar and the vinegar and bring to a boil. As soon as it boils, lower the heat and simmer until it has reduced to a thick consistency which very little extra liquid. This took 40 minutes for me, it may take less or longer for you.
Sterilise some jars. This amount filled two jars for me. Once the chutney has thickened take it off the heat and leave it to cool for about twenty minutes before carefully spooning the mixture into clean jars and sealing.
The chutney is good to eat straightaway but the vinegariness will soften if it is allowed to sit for a week before eating.
We have a pear tree in our garden that has produced one or two fruits each year since we have lived here. The fruit are very small and I have always assumed that it is either a stunted tree or some equivalent of the crabapple. This year though, it is heavily loaded with small fruit.
It was this that drew my mum’s eye and led her to comment that she thought it was a Tettenhall Dick pear tree. I looked at her askance and then realised that she wasn’t joking.
My mum’s gran had this pear tree in her garden in Willenhall which is not that far from Tettenhall so it would make sense for her to have a Tettenhall Dick tree, but I have no idea how this variety of tree has ended up in our garden, but someone must have specifically chosen to plant it here. Great gran used to bottle them and they are reputed to be ideal for bottling and making Perry, so I guess it makes sense to have this in the garden rather than a pear tree that is hard and uneatable one minute and mush the next.
So, the Tettenhall Dick… from a quick google search I have found that it is quite a rare tree, named, after Tettenhall, an area in Wolverhampton and about twenty miles away from here. It was a tree that could be found all over the Black Country but many of the trees have long since been uprooted. You can read all about a chap trying to bring them back from the brink in this article. There are also lots of interesting stories connected to the pear in this blog post and comments by Brownhills Bob.
As my great gran used to bottle them I feel it is my duty to give it a go, in her honour, this year. I want my mum to try them and see if they remind her of the happy childhood she had with her gran.
Most of the pears aren’t ready yet, but some are already starting to fall, so I used the tried and tested technique of giving the pear a little wiggle and if it comes easily off the tree it is ready to be used for bottling. If it stays firm then leave it longer to ripen.
I used my trusted copy of The Sainsbury Book of Preserves & Pickles by Heather Lambert, first published in 1981, as my guide for bottling as it is something I have never ventured before. It has always seemed a bit complicated, but actually now that I have given it a go I think I will be doing it more often.
My sister gifted me a very large Kilner type jar last year so I have used this, but I would advise on using two smaller ones if you can. This one was too big to stand in the simmering oven of the Aga so had to be balanced precariously in a tin and on a pyrex dish so that the syrup wouldn’t leak whilst the seal was taking place. If I had a normal sized oven it probably wouldn’t be an issue. Using smaller jars if you have them will be a better option because fruit in an unopened smaller jar will last for longer than fruit in an opened large jar.
I was surprised at how little sugar you need to bottle pears. I am used to making jam or chutney where you need a fair amount of sugar to either preserve or counteract the vinegar. For this recipe I only needed 125g sugar to every 600ml of water.
Feel free to spice the pears however you like, I added cloves and allspice berries, but use whatever you like or have, suggestions include lemon peel, orange peel, cinnamon, star anise. Experiment to your heart’s content.
Ingredients: Pears – enough to fill the jar that you are using 125g sugar to every 600ml water Optional spices/flavourings
You will need a sterile kilner jar (or several depending on how many pears you have to bottle) or similar that has the rubber ring intact. Preheat the oven to 150C, 300F, Gas Mark 2.
Wash the pears and peel. If you are using large pears you can halve them and remove the core. I left mine whole. Place them in acidulated water whilst you prepare them all to stop them browning (acidulated water is water with a squeeze or lemon or teaspoon of vinegar added).
Half fill your jar with water and measure how much water that is. This will give you a guestimate of how much sugar syrup you will use once the pears are in the jar.
Now calculate how much sugar you will need using 125g for every 600ml of water and place the sugar and water in a pan and stir over a gentle heat until the sugar is fully dissolved. Stop stirring and bring the syrup to a gentle boil.
Fill the jar with pears, pressing them down if you can to make sure the jar is filled as much as it can be. Pour the boiling sugar syrup, slowly and carefully, to completely cover the fruit and fill the jar to the top. Give the jar a gentle bang on a surface covered with a cloth to remove any air bubbles.
Close the jars but don’t completely seal. Place in the oven for an hour. Remove from the oven and seal (using a cloth to protect your hands as it will be very hot). Leave undisturbed for 24 hours. Check fora good seal by loosening the clip and attempting to gently lift the lid. It should be firmly sealed. If the lid opens you can try to seal again by following the instructions above one more time or eat the fruit immediately.
The fruit will stay good in a sealed jar for 3 years.Once you have broken the seal eat within a few days and keep in the fridge.
If you too have Tettenhall Dicks loitering in your garden let me know.
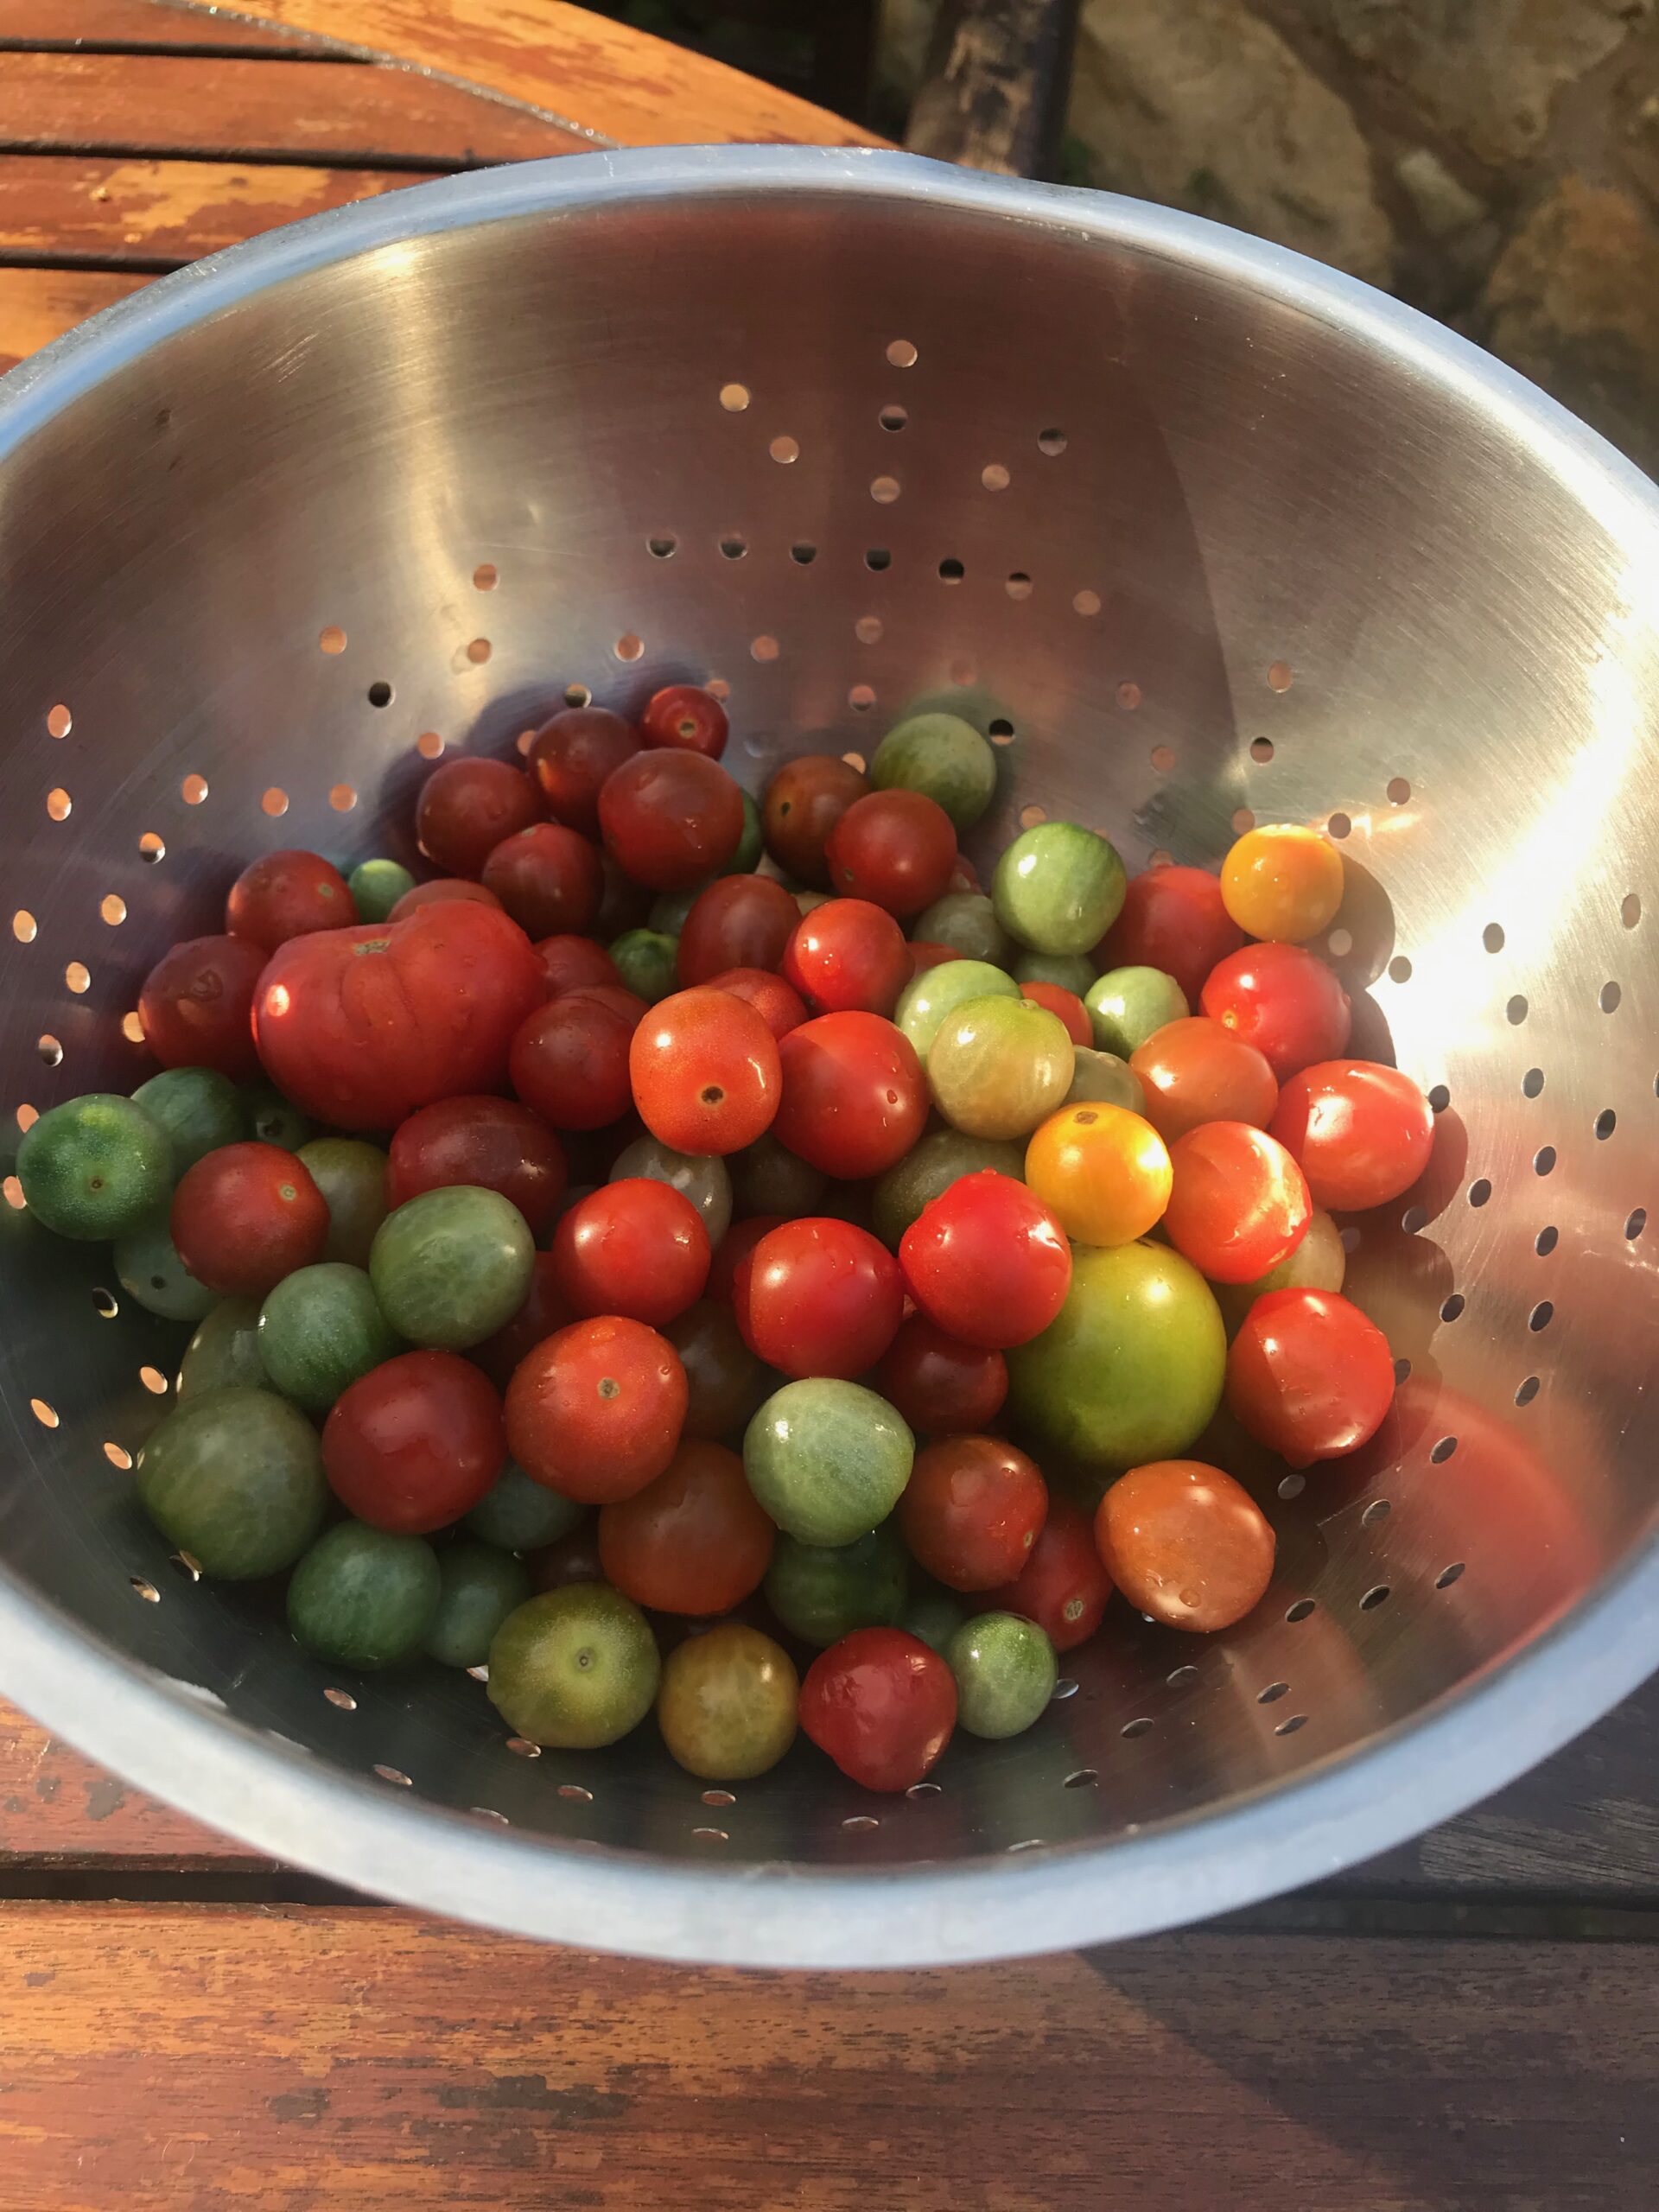
Our tomato harvest has been wonderful already this year and we have lots of green ones left on the vine with plenty of time left for them to turn. We really have had a wonderful summer in terms of sunshine and warmth (I am saying this from the comparative comfort of a 16°c day and we have recently had plenty of rain. I have spent an awful lot of my time the last couple of months complaining that I was too hot and wishing it would rain to quench the brown, solid lawns and fields. Hindsight is a wonderful thing). This summer’s weather has been perfect for tomatoes if not for everything else in the garden. We have collected a large mixing bowl full over the last few days alone. Half the bowlful are currently oven drying for use in future tomato breads.
I neglected to change the soil in the greenhouse this year, opting instead to just add plenty of our home-made compost. I know, it’s lazy, wrong and neglectful with the potential to spread disease. I promise to change the soil this year, honest. The bonus of this though was lots and lots of self-set tomatoes. I planted most of them up in small pots and popped them on the outside wall, not giving them a great deal of hope as we never have much luck with tomatoes grown outside here. They grew and demanded large pots. I obliged and, in my shoddy gardener’s way, even gave some of them a stake to grow up. They have forgiven me my shoddiness and grown beautifully producing a bounteous crop that have been ripening for the last month or so.
The rain that we have had over the last few days has caused some of the damsons to start falling from one of our trees. So, I went out today and picked a couple of branches worth before they were all on the ground.
It occurred to me that I could combine both bowlfuls in a ketchup.
2kg of tomatoes and damsons combined
200g onions, chopped up fairly small
2 cloves of garlic, peeled and bashed with the side of your knife
570g distilled white vinegar (It comes in bottles of 568 g, so that is what I used)
A muslin bag or clean tea towel containing the following spices and tied with kitchen string: (if you don’t have all of these in stock or don’t like the flavour of any of them, make up your own pickling bag according to what you like and have access to)
2 tsp black peppercorns
2 dried chillies, these are hot so add more if yours are mild
1 tsp mustard seeds
1 tsp coriander seeds
5 allspice berries
1 star anise
200g demerara sugar
25g sea salt
Method
Chop the larger tomatoes in half. Put the tomatoes, damsons, onions and garlic into a large preserving pan, add the vinegar and the spice bag and cook over a medium heat until everything has softened and the tomatoes and damsons have collapsed (about thirty minutes). Strain through a sieve into a large bowl, pushing the fruit through with a large metal spoon. Keep going until all you have left in the sieve is the damson stones, skin and bits of resistant onion. Clean the preserving pan and add the puree back in. Add the sugar and the salt and give it a good stir. Taste and see if it has enough flavour from the spices, if not put the spice bag in (it will taste overpoweringly vinegary, don’t worry that will mellow as it matures). Return to the heat and simmer gently, stirring until the sugar and salt dissolve fully. Continue to simmer for about an hour or so, stirring occasionally, until it has reduced to a sauce the consistency of ketchup. Pour into clean, sterilised bottles and seal and it will keep for about 6 months. If you place the unsealed bottles into a large pan and pour in water until about 2 inches from the top of the bottles and boil the water for 10 minutes, then remove the bottles and seal, the ketchup will keep indefinitely until opened. Leave to mature for one month before using so that the flavours can develop and the vinegar tang can mellow.
I am sure that I normally make my chutney earlier than this, but this autumn has been so unseasonably mild that my tomatoes have just continued to give. A week or so ago I knew that it was finally time to pick the last of the tomatoes.
The tomatoes have done well this year, we have had a good harvest. I couldn’t say the same for our sweetcorn or our cabbage or our borlotti beans. But every year is different and that is part of the joy of vegetable growing. These beauties were destined for chutney, along with a marrow and some bramleys.
I made a very similar chutney last year and was very pleased with the result. This year’s seems promising. Of course, it is too early to tell what its real flavour might be once it has sat in the cupboard for a month or two and matured. At the moment it has too much vinegary astringency to be sure. But underneath its immaturity I can sense its sweetness and the potential for a lovely chutney.
Chutney takes much longer to cook than you first imagine it might. Patience and a gentle simmer is needed and it is only ready when the vinegar has all but disappeared and in its place a thick sludge remains. It will take about three or four hours and your house will smell vinegary, spicy and fruity. I like it, the girls don’t. The Aga makes life easy because you just bring the pan to a simmer and then place it in the simmering oven for a few hours. A slow cooker might work, but I have never tried it so can’t say for sure.
The chutney nearly there and ready for potting
You can add whatever fruit and veg you have to this chutney as long as you remember that you need 1 part vinegar to three part fruit/veg. Then sugar in a similar amount, perhaps slightly less. You can use whichever spices are your favourite or you have in the cupboard, just make sure you tie them in a cloth that has been scalded in a pan of boiling water for a few minutes. That way you don’t experience an unpleasant bite into a whole spice when enjoying your chutney. I add walnuts to my chutney because I love the slight bite they retain, but feel free to not include them.
Here is what I have in mine this year.
1kg marrow
1.5kg tomatoes
400g bramley apple
350g onion
3 cloves garlic
150g sultanas
100g walnuts
15g salt
600ml vinegar (I used a mix of distilled and cider as that is what I had in the cupboard)
500g soft brown sugar
Spices to tie in a cloth bag:
1 chilli, left whole or cut in half depending how hot you want your chutney
1tsp mustard seed
4 cloves
5 cardamom seeds
1 tsp coriander seed
5 allspice berries
1 bayleaf
1 tsp cumin seed
1 tsp fresh ginger, sliced
Method
Chop all the fruit and vegetables to an even size. Slice the garlic. Place all of this in a large preserving pan. Add the sultanas and the walnuts. Tie the spices into a bag and place in the pan. Sprinkle the salt over. Add the sugar and pour the vinegar over everything. Place the pan on a medium heat and bring to a gentle simmer. Continue to simmer until the fruit and vegetables are tender and the vinegar has become a thick sauce.
Pour into warm sterilised jars. Seal and store for a few months before enjoying and bringing back memories of your summer.
Whilst I was picking my rosehips for the syrup I found a couple of heavily loaded sloe trees. I made my way back there a few days later and picked a kilo or two and popped them in the freezer. We are lucky enough to have a crabapple tree nearby too so I picked a couple of kilo of those too. The crabapples have sat in my kitchen looking at me accusingly for a couple of weeks, so yesterday I made myself get round to giving them a good swill and popped them in the preserving pan with some of the sloes. I cooked them slowly in just enough water to cover them until the apples were pulpy. I gave them a good mash and strained it overnight through a jelly bag. Today, I boiled them with sugar until the jelly wrinkled on a cold saucer. The finished jelly will be great with roast dinners and cold meats and stirred into gravies. I might even have it on toast like I do with my damson and rosehip jelly. This one though is a little sharper and has that sherbetty finish to it that you would expect from a jelly made with fruits that are sour before cooking.
The colours at the different stages are stunning. Starting with a rose pink and turning to a deep purple. It is worth making this jelly just for these colours.
The strained juice
The boiling stage
You can put in as many crabapples and sloes that you have, cover them with just enough water to almost cover and then strain the juice through a fine sieve of jelly bag. Measure out the juice and to every 600ml add 450g of granulated sugar. Here is what I did:
2kg crabapples
1kg sloes
water
1 kg granulated sugar
Method
Rinse the crabapples and the sloes well. Place in a large pan and cover with just enough water to almost cover. Cook over a gentle heat until the apples are pulpy. Mash with a potato masher and pour the purée into a jelly bag, a clean tea cloth (boil in a pan of water before use) or through a very fine sieve. Leave to strain overnight.
Measure the juice and for every 600ml add 450g of granulated sugar. I had 1,300 ml of juice so added 1 kg of sugar. Stir over a gentle heat until the sugar dissolves and then turn up the heat and boil the syrupy mixture until a teaspoonful of it wrinkles when placed onto a cold saucer and pushed with your finger. Remove any scum that rises to the surface. Pour the hot mixture into warm sterilised jars and seal.
Update to this post (Sept 2016): My experiment did not work! Leaving them whole, as I did, meant that they just sat at the bottom of the sugar. However, my friend made them at the same time and was much more diligent then I was and snipped off both ends of each hip. The sugar was then able to macerate the hip much more effectively. Hers did turn into a syrup. I will be trying to make it again this year with modifications to my method.
Original post: This is an experiment. I have made rosehip syrup before (although I failed to blog about it) by using the boiling method, similar to making a jelly. When I made the crabapple and rosehip jelly , Margaret wisely suggested that boiling rosehips probably defeats the object of the syrup. Rosehips are incredibly high in vitamin C and so a syrup can be very handy to have in the house during the winter months to stave off any nasty lurgies.
My wonderful friend A suggested this tactic for making the syrup. She had been to visit her Cornish uncle and he had bought out his rosehip syrup for her to try and had explained that he made it by layering the rosehips in sugar. We both wanted to give it a go.
It always makes me smile to think about my friendship with A. We have been friends since we were 17 and at college together. Back then our interests were mostly concerned with having fun and partying. Now when we get together, which is as often as we can manage, we mostly find ourselves strolling around the garden and discussing the finer points of growing vegetables and how best to cook them. How times have changed.
Anyway back to the rosehip syrup. This is not a recipe as such. You just pick as many rosehips as will fit into your jar. You give them a good wash and remove the old flower head. Dry the rosehips well. Now you pour a layer of sugar into the bottom of your jar, then a layer of rosehips, then sugar, then rosehips until the jar is full. Your rosehips should be entirely covered in sugar. As a guide I used about 400g rosehips and 450g of sugar to fill my kilner jar.
This is my jar after a week:
Rosehips and sugar Day 6
This is an experiment. I will report back in due course whether it has been successful. However, as you can see from the photo above it looks promising. I did not pierce the hips at all and the maceration has started. I am hopeful that we will have rosehip syrup for our porridge and to sweeten our mint tea in perhaps six weeks time. Watch this space.
UPDATE 13th October 2015
We are now about 16 days into the syrup making process. About 9 days in (a week ago) I noticed that as the sugar was liquefying the rosehips were becoming exposed at the top of the jar, so I added more sugar, enough to fill up the jar again. The photo below is one I took today. You can see that not all the sugar has liquified yet, but it is getting there. The rosehips are starting to wrinkle too. One of my students at the bread making class last week gave me a great tip – she keeps her damson gin in the car when it needs regular shaking. What a genius idea. This would work equally as well for your rosehip syrup. A plastic container might be more suited to that than a glass one though.
I intended to make rowan berry and crabapple jelly this year. The rowan berries have drooped heavily this year. In fact, on our usual walk I have noticed several new rowan trees. Obviously they aren’t actually new trees I just haven’t noticed them before. Which makes me think that this year the trees must be particularly heavy with berries as I am not usually one to miss a foraging opportunity. Anyway, off I marched with my carrier bags, one for the crabapples, one for rowan berries and one just in case. You never know what you might spot.
It wasn’t until I came to actually pick the rowan berries that I noticed quite how tall each of my newly spotted trees was. Why hadn’t I noticed before that I needed to be several feet higher to get the berries? I managed a handful from a sapling growing on the side of a brook. Time for a rethink. That was when the spare carrier bag came in handy for the rosehips.
I made rosehip syrup last year in an effort to ward off any chesty coughs. So this year, we will be having crabapple and rosehip jelly by the spoonful if the common cold dares to visit. The rosehip is high in vitamin C and during World War II people were paid by the pound for rosehips so that the syrup could be made and given to children.
The apples and rosehips are bubbling as I write this draft and the scent is mesmerisingly good. I am looking forward to this jelly accompanying our winter sunday roasts and perhaps added to some herb teas. I think a spoonful might be a good addition to a sage tea to sooth sore throats.
750g crab apples
300g rosehips
water to cover
sugar, 450g for every 600ml of juice
Method
Wash the crab apples well and cut out any bruises. Chop roughly.
Wash the rosehips and remove the old flower and check for any creatures that might be hiding there. Blitz them in a food processor or chop finely. Bearing in mind that they are famed by schoolchildren everywhere for their qualities as itching powder, so you might want to wear gloves when handling them.
Place the apples and rosehips in a large pan and just cover with water. Bring to a simmer and simmer away until the fruit is soft. Put the pulp into a jelly bag or a clean tea towel (I boil one in a pan two thirds filled with water for about ten minutes to make sure it is clean) and allow the fruit to strain over a large bowl. Don’t squeeze the bag or the jelly will be cloudy. A lot of recipes say that you need to leave it overnight, but the liquid in mine had drained through in a couple of hours, leaving a dry pulp behind.
Place a couple of saucers in the fridge for testing your jelly later. Measure your juice and pour into a large clean pan. Bring to boiling point. Add 450g sugar for every 600ml of juice and stir to dissolve. Boil rapidly once the sugar has dissolved and boil until setting point has been reached. You may have a scum come to the surface. Scoop this out. Setting point should take about ten minutes. But test for setting point after five minutes. To test for setting point take out one of the cold saucers and place a teaspoonful of the jelly onto it. Allow to cool and then push your finger through it. If it wrinkles then it is ready. Pour into hot sterile jars and seal.
I love the colour of this jelly, it’s much paler than the crabapple jelly I made two years ago. It has more of a rose blush about it. It’s well worth a try.
Cherry brandy has always been one of my favourite tipples. I remember it being in the drinks cabinet when I was young and enjoying the sweet smell of it in my mum’s glass. It’s probably very 1970’s to admit to such a thing.
I have made damson gin or vodka lots of times thanks to our tree but I didn’t think I would get the chance to make my own cherry brandy. But the delivery of a crate of cherries from our friend made it a very tempting possibility.
It’s very easy, but you do need a large jar with a well-fitting lid, so that you don’t have a disaster when it comes to the shaking of the jar bit.
One of my favourite uses of cherry brandy now is to add a good slug to our regular cup of hot chocolate in the evening. Now there’s a sign of our age and present mentality.
I used a litre of brandy because I had so many cherries to get through, but you can half the quantities for a 50cl bottle. I used light coloured cherries so if you use dark cherries the colour of the resulting brandy will be deeper.
1 kg cherries
1 litre brandy (I used the cheapest bottle on the shelf)
300g sugar
Method
Find a jar that has a tight-fitting lid that is large enough to take the cherries and the liquid.
Prick the cherries several times and place into the jar. If you prick them over the jar you capture most of the juice, although it is a very good idea to wear old clothes and an apron. My formerly white ceiling bears testament to how far cherry juice can travel. Add the sugar and the brandy. Fit the lid, I then sellotape it to make extra sure of a tight fit. Give the jar a good shake. Place the jar somewhere where you will see it daily to remind you to shake every day for the next week. After that shake once a week for the next two months, tasting it occasionally to see if it is cherry enough for you. Once it is, strain back into sterile bottles. You can now drink it or if you can bear it leave it for 12 months to mature. I plan to use the cherries in a chocolate dessert. It would be a shame to waste them.
The reason that this is a tale rather than a recipe is that I am not convinced that I have done this pickling of walnuts thing quite right and I don’t want you, my dear reader, making the same mistakes as I have. I have found too many conflicting recipes to make any sense of the procedure. So, please, feel free to read this and then promptly go off and do your own research and come to your own conclusions. I hope to try again next year and experience might go in my favour.
I have never pickled walnuts before, in fact I don’t think that I have ever eaten a pickled walnut. It has been on my list of things to do, though, for a long time. My generous friend, spoken of previously, has a lovely walnut tree. Walnuts wear the little green jackets that you can see in the photo above and the hard brown shell that we are all so familiar with forms underneath this jacket sometime between June and September, depending on the weather conditions and probably all sorts of other factors. A pickled walnut is the entire green seed pod and not just the nut inside. If you want to pickle your walnuts you need to get them off the tree before the hard shell starts to form. So, sometime towards the end of June or the middle of July.
Please be aware that the juices from a walnut will stain your hands decidedly yellow to dark brown depending on how much contact you have with it. Wear gloves whenever you handle them. I did and I still managed to have yellow hands when I finished pricking them.
The green pod has to be pricked with a fork or skewer several times and soaked in a salt brine for two weeks, changing the brine after the first week (or every three days, depending on whose advice you take). If your fork meets any resistance then discard this walnut as the shell has started to form and you were too late in your picking. It was at this brining stage that I came across my first problem – a mould developed on the top of the brine. This surprised me as I didn’t think that a salt brine would attract mould. Perhaps my house in midsummer, with the Aga still pumping out at full bore, is just too warm for pickling walnuts. I have, however, ignored the mould. The walnuts submerged in the brine seem to be unaffected by this top layer of mould so I have carried on with the pickling process. However, whilst I write this post I am considering that my salt brine was just two weak. Now that I have read Mrs Beeton’s wise words, (it didn’t occur to me to do so before brining) her salt brine at 500g salt to each litre of water is at least twice as much and sometimes four times more salt than others recommend.
The walnuts are still green, although a slightly darker green than before, when they come out of the brine. At this point you spread them on trays in a single layer and leave to go black. My walnuts went black very quickly, much quicker than I expected, in fact by the next morning. When they have turned black you pickle them. Now, my problem has been the conflicting and sometimes vague recipes that I have found online for this. One suggested that you use a sweet vinegar (malt vinegar, with the addition of brown sugar in a 2:1 ratio and spices such as cinnamon, cloves, star anise, peppercorns) bring it to a simmer and then the walnuts are added and allowed to simmer for 15 minutes. Another suggested that you just pour a spiced pickling vinegar over the walnuts in a jar and allow to marinate. Well, it seems to me that there is quite a difference there. Mrs Beeton, a woman of good sense, and surely someone that can be trusted in all things kitchen, advises that you boil the vinegar and pour it, still hot, over the walnuts in the jar, covering them completely.
I decided that as I like pickled damsons in a sweet vinegar so very much, that I would try the sweetened pickle vinegar, bringing 1 litre of malt vinegar, 500g of dark brown sugar, a piece of cinnamon, four cloves, a few peppercorns and a star anise to the boil. Add the 1 kg of brined and blackened walnuts and leave to cool for 10 minutes before placing into hot sterile jars. Covering completely with the vinegar.
There, you see, I have created a new method and probably more confusion. The walnuts are sitting in jars as I type. I will let you know how they taste in a month’s time (when they will be ready according to Mrs Beeton and not 5 days like some on the internet will tell you). Who knew that pickling walnuts would be such a minefield?
If you have pickled walnuts in the past and would like to pass on your wisdom, I would be forever grateful, that is unless you confuse me further.
Update October 2013 – Just to report we have tried the walnuts now and I can’t say I am impressed or unimpressed. They taste like something pickled but not particularly walnuty. Although we did try them with friends and one of them commented that she thought they were walnuty. Another friend suggested that they are good in a beef stew, so that’s what I shall be trying next for these little pickled things.
Whilst I was picking the mint for the Shropshire Mint Cakes I picked enough to make a jar of concentrated mint sauce to make sure that we have some for our roast lamb this winter. Mary Berry, the source of this recipe, (although I have also found it in one of my Shropshire recipe books), suggests that you make this concentrate in June just before the mint flowers. I never make it then, as winter seems so very far away and I always think about it but never get round to it. But actually the mint in my garden flowers in June and then rejuvenates itself and flowers again in September and this year is still growing new shoots even now.
This mint sauce is made with the tender and strongly scented new tips. I managed to pick 50g, which is a fair amount of mint in a bowl. But as you only need a teaspoon or so each time you make mint sauce, this will last me through the winter roasts until the new mint comes through next spring. If you have plenty then double up and make a jar for a friend. It will definitely be appreciated.
To use the concentrate in the winter. Take a heaped teaspoon of the concentrate and mix in a bowl with a slosh of vinegar and it’s ready to douse your lamb.
50g mint sprigs
100ml vinegar (Mary Berry suggests distilled vinegar but I use white wine vinegar)
75g granulated sugar
Method
Wash a jar and its lid well in soapy water, rinse in clean hot water and place in a low oven for 15 minutes to sterilise.
Place the vinegar and sugar in a pan and bring slowly to the boil (this will allow the sugar to dissolve before boiling point is reached). Now you can either chop the mint leaves using a knife and then add to the hot vinegar or you can put the leaves in a food processor and add half the vinegar and pulse until finely chopped, then add to the rest of the vinegar (be careful with the hot vinegar). Pour into the warm sterile jar and seal immediately.
This website uses cookies to improve your experience. You can opt-out if you wish.AcceptRejectSettings
Privacy & Cookies Policy
Privacy Overview
This website uses cookies to improve your experience while you navigate through the website. Out of these, the cookies that are categorized as necessary are stored on your browser as they are essential for the working of basic functionalities of the website. We also use third-party cookies that help us analyze and understand how you use this website. These cookies will be stored in your browser only with your consent. You also have the option to opt-out of these cookies. But opting out of some of these cookies may affect your browsing experience.
Necessary cookies are absolutely essential for the website to function properly. This category only includes cookies that ensures basic functionalities and security features of the website. These cookies do not store any personal information.
Functional cookies help to perform certain functionalities like sharing the content of the website on social media platforms, collect feedbacks, and other third-party features.
Performance cookies are used to understand and analyze the key performance indexes of the website which helps in delivering a better user experience for the visitors.
Analytical cookies are used to understand how visitors interact with the website. These cookies help provide information on metrics the number of visitors, bounce rate, traffic source, etc.
Cookie
Duration
Description
_ga
2 years
The _ga cookie, installed by Google Analytics, calculates visitor, session and campaign data and also keeps track of site usage for the site's analytics report. The cookie stores information anonymously and assigns a randomly generated number to recognize unique visitors.
_gat_gtag_UA_11789200_1
1 minute
Set by Google to distinguish users.
_gid
1 day
Installed by Google Analytics, _gid cookie stores information on how visitors use a website, while also creating an analytics report of the website's performance. Some of the data that are collected include the number of visitors, their source, and the pages they visit anonymously.
CONSENT
2 years
YouTube sets this cookie via embedded youtube-videos and registers anonymous statistical data.
Advertisement cookies are used to provide visitors with relevant ads and marketing campaigns. These cookies track visitors across websites and collect information to provide customized ads.
Cookie
Duration
Description
VISITOR_INFO1_LIVE
5 months 27 days
A cookie set by YouTube to measure bandwidth that determines whether the user gets the new or old player interface.
YSC
session
YSC cookie is set by Youtube and is used to track the views of embedded videos on Youtube pages.